添加登录验证码
登录验证码也是项目中一个常见的需求,但是 Spring Security 对此并未提供自动化配置方案,需要开发者自行定义。一般来说,有两种实现登录验证码的思路:
-
自定义过滤器。
-
自定义认证逻辑。
通过自定义过滤器来实现登录验证码,这种方案我们会在本书后面的过滤器章节中介绍,这里先来看如何通过自定义认证逻辑实现添加登录验证码功能。
生成验证码,可以自定义一个生成工具类,也可以使用一些现成的开源库来实现。这里采用开源库 kaptcha,首先引入 kaptcha 依赖,代码如下:
<dependency>
    <groupId>com.github.penggle</groupId>
    <artifactId>kaptcha</artifactId>
    <version>2.3.2</version>
</dependency>
然后对 kaptcha 进行配置:
@Configuration
public class KaptchaConfig {
    @Bean
    Producer kaptcha() {
        Properties properties = new Properties();
        properties.setProperty("kaptcha.image.width", "150");
        properties.setProperty("kaptcha.image.height", "50");
        properties.setProperty("kaptcha.textproducer.char.string", "0123456789");
        properties.setProperty("kaptcha.textproducer.char.length", "4");
        Config config = new Config(properties);
        DefaultKaptcha defaultKaptcha = new DefaultKaptcha();
        defaultKaptcha.setConfig(config);
        return defaultKaptcha;
    }
}
配置一个 Producer 实例,主要配置一下生成的图片验证码的宽度、长度、生成字符、验证码的长度等信息。配置完成后,我们就可以在 Controller 中定义一个验证码接口了:
@Autowired
Producer producer;

@GetMapping("/vc.jpg")
public void getVerifyCode(HttpServletResponse resp, HttpSession session)
        throws IOException {
    resp.setContentType("image/jpeg");
    String text = producer.createText();
    session.setAttribute("kaptcha", text);
    BufferedImage image = producer.createImage(text);
    try (ServletOutputStream out = resp.getOutputStream()) {
        ImageIO.write(image, "jpg", out);
    }
}
在这个验证码接口中,我们主要做了两件事:
-
生成验证码文本,并将文本存入 HttpSession 中。
-
根据验证码文本生成验证码图片,并通过 IO 流写出到前端。
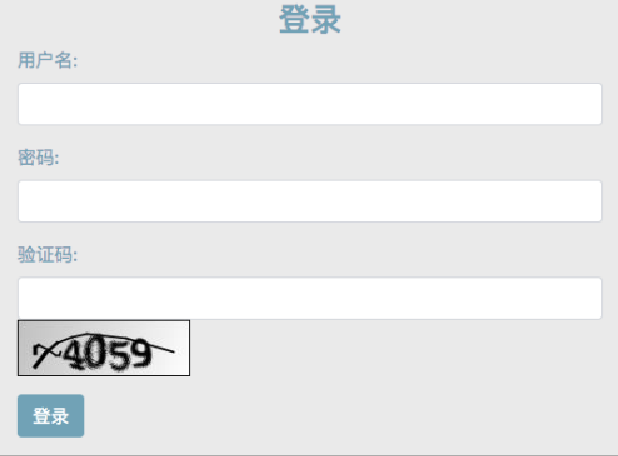
接下来修改登录表单,加入验证码,代码如下:
<form id="login-form" class="form" action="/doLogin" method="post">
    <h3 class="text-center text-info">登录</h3>
    <div th:text="${SPRING_SECURITY_LAST_EXCEPTION}"></div>
    <div class="form-group">
        <label for="username" class="text-info">用户名:</label><br>
        <input type="text" name="uname" id="username" class="form-control">
    </div>
    <div class="form-group">
        <label for="password" class="text-info">密码:</label><br>
        <input type="text" name="passwd" id="password" class="form-control">
    </div>
    <div class="form-group">
        <label for="kaptcha" class="text-info">验证码:</label><br>
        <input type="text" name="kaptcha" id="kaptcha" class="form-control">
        <img src="/vc.jpg" alt="">
    </div>
    <div class="form-group">
        <input type="submit" name="submit" class="btn btn-info btn-md"
               value="登录">
    </div>
</form>
在登录表单中增加一个验证码输入框,验证码的图片地址就是我们在 Controller 中定义的验证码接口地址。
接下来就是验证码的校验了。经过前面的介绍,读者已经了解到,身份认证实际上就是在 AuthenticationProvider#authenticate 方法中完成的。所以,验证码的校验,我们可以在该方法执行之前进行,需要配置如下类:
public class KaptchaAuthenticationProvider extends DaoAuthenticationProvider {
    @Override
    public Authentication authenticate(Authentication authentication)
            throws AuthenticationException {
        HttpServletRequest req = ((ServletRequestAttributes) RequestContextHolder
                .getRequestAttributes()).getRequest();
        String kaptcha = req.getParameter("kaptcha");
        String sessionKaptcha =
                (String) req.getSession().getAttribute("kaptcha");
        if (kaptcha != null && sessionKaptcha != null
                && kaptcha.equalsIgnoreCase(sessionKaptcha)) {
            return super.authenticate(authentication);
        }
        throw new AuthenticationServiceException("验证码输入错误");
    }
}
这里重写 authenticate 方法,在 authenticate 方法中,从 RequestContextHolder 中获取当前请求,进而获取到验证码参数和存储在 HttpSession 中的验证码文本进行比较,比较通过则继续执行父类的 authenticate 方法,比较不通过,就抛出异常。
|
有的读者可能会想到通过重写 DaoAuthenticationProvider 类的 additionalAuthenticationChecks 方法来完成验证码的校验,这个从技术上来说是没有问题的,但是这会让验证码失去存在的意义,因为当 additionalAuthenticationChecks 方法被调用时,数据库查询已经做了,仅仅剩下密码没有校验,此时,通过验证码来拦截恶意登录的功能就已经失效了。 |
最后,在 SecurityConfig 中配置 AuthenticationManager,代码如下:
@Configuration
public class SecurityConfig extends WebSecurityConfigurerAdapter {
    @Bean
    UserDetailsService us1() {
        return new InMemoryUserDetailsManager(User.builder()
                .username("javaboy").password("{noop}123").roles("admin").build());
    }

    @Bean
    AuthenticationProvider kaptchaAuthenticationProvider() {
        KaptchaAuthenticationProvider provider =
                new KaptchaAuthenticationProvider();
        provider.setUserDetailsService(us1());
        return provider;
    }

    @Override
    @Bean
    public AuthenticationManager authenticationManagerBean() throws Exception {
        ProviderManager manager =
                new ProviderManager(kaptchaAuthenticationProvider());
        return manager;
    }

    @Override
    protected void configure(HttpSecurity http) throws Exception {
        http.authorizeRequests()
                .antMatchers("/vc.jpg").permitAll()
                .anyRequest().authenticated()
        //省略
    }
}
这里配置分三步:首先配置 UserDetailsService 提供数据源;然后提供 一个 AuthenticationProvider 实例并配置 UserDetailsService;最后重写 authenticationManagerBean 方法,提供一个自己的 ProviderManager 并使用自定义的 AuthenticationProvider 实例。
另外需要注意,在 configure(HttpSecurity) 方法中给验证码接口配置放行,permitAll 表示这个接口不需要登录就可以访问。
配置完成后,启动项目,浏览器中输入任意地址都会跳转到登录页面,如图 3-5 所示。
此时,输入用户名、密码以及验证码就可以成功登录。如果验证码输入错误,则登录页面会自动展示错误信息。