基于 Jira 票证创建 Behat 功能
在上一章中,我们学习了如何创建一个简单的 Behat 功能。在本节中,我们将创建一个新的 Behat 功能,该功能将代表我们在 第 2 章 "了解和组织项目的业务需求 " 中创建的 TOYC-2 Jira ticket。这将有助于推动集成测试和单元测试的开发,从而帮助我们构建实际的解决方案代码。让我们开始具体步骤。
创建一个 Behat 功能文件,将其命名为 inventory_clerk_registration.feature,并保存为以下功能内容:
Feature: Inventory Clerk Registration
    In order to access the inventory system
    As an Inventory Clerk
    I need to be able to create a clerk account

    Scenario: Access Registration Page
        Given I am in the home "/" path
        When I click the "Register" link
        Then I should be redirected to the registration page

    Scenario: Register
        Given I am in the register "/register" path
        When I fill in Email "Email" with "clerk_email@phptdd.bdd"
        And I fill in Password "Password" with "password"
        And I check the "AgreeTerms" checkbox
        And I click on the "Register" button
        Then I should be able to register a new account
如果您通读了我们刚刚创建的 Behat 功能,就会对我们要实现的目标一目了然。这些步骤就是现实生活中用户注册我们系统的步骤。此时,我们还不会构建解决方案代码,而是先创建 Behat 注册测试代码。
创建 Behat 注册功能
由于本章使用的是基本代码,因此我们必须确保安装了所有库才能运行 Behat。
我们需要再次安装 Composer 软件包才能使用 Behat。运行以下命令重新安装所需的库:
/var/www/html/behat# composer install然后,这将拉取并安装我们在上一章中使用的所有库。安装完成后,让我们看看是否可以为我们的登录功能生成 Behat PHP 类:
-
使用以下内容更新
behay.yml文件:codebase/behat/behat.ymldefault: suites: default: contexts: - FeatureContext - HomeContext - InventoryClerkRegistrationContext -
更新
behat.yml文件后,现在让我们尝试运行此命令来生成 PHP 上下文类:/var/www/html/behat# ./vendor/bin/behat --init运行命令后,我们应该能够在
codebase/behat/features/bootstrap/InventoryClerkRegistrationContext.php中生成一个新的 PHP 类。 -
现在,让我们尝试在
InventoryClerkRegistrationContext.php类中基于inventory_clerk_registration.feature文件自动生成 PHP 方法。运行以下命令:
/var/www/html/behat# ./vendor/bin/behat features/inventory_clerk_registration.feature --append-snippets运行命令后,您应该看到以下结果:
 Figure 1. Figure 7.6 – Autogenerating context methods
运行上述命令后,如果打开
codebase/behat/features/bootstrap/InventoryClerkRegistrationContext.php类,您应该能够看到新添加的方法。现在,如果我们运行 Behat,我们可能会得到失败的结果。 -
运行以下命令:
/var/www/html/behat# ./vendor/bin/behat您应该看到以下结果:
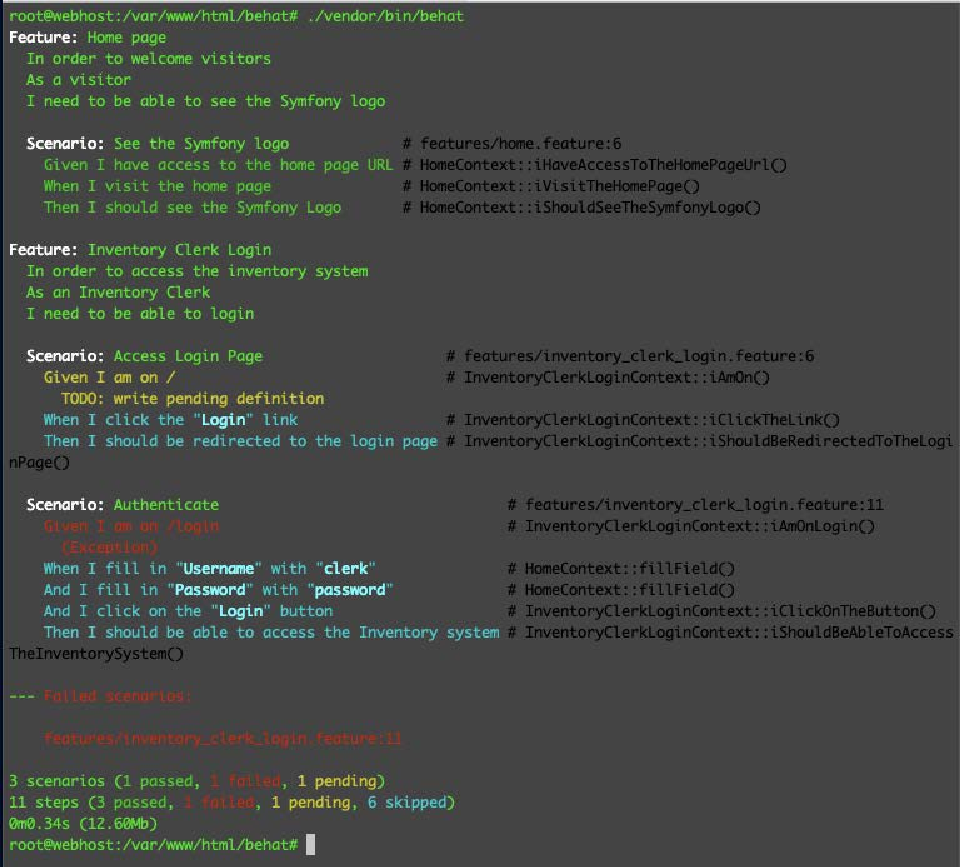
 Figure 2. Figure 7.7 – Behat failures
你会注意到,我们的主页功能失败了,跳过了待定测试,在这个阶段,我们甚至无法访问主页。这是因为我们还必须为 Symfony 应用程序安装缺失的库。就像我们为 Behat 所做的那样,让我们为 Symfony 应用程序安装缺少的 Composer 软件包。
-
运行以下命令:
/var/www/html/symfony# composer install -
安装缺少的 Symfony 包后,让我们修改
InventoryClerkRegistrationContext.php类,以便在iAmOn方法上引发异常:codebase/behat/features/bootstrap/InventoryClerkRegistrationContext.php/** * @Given I am on \/ */ public function iAmOn() { throw new \Exception(); }现在,让我们再次尝试运行 Behat,看看是否至少可以通过主页功能测试。
-
通过运行以下命令再次运行 Behat:
/var/www/html/behat# vendor/bin/behat
我们现在应该能够通过 主页 功能测试,但仍然无法通过库存员功能测试:
由于我们已经安装了缺少的 Symfony 软件包,主页测试现在已经通过。但是,由于我们还没有构建任何解决方案代码来通过登录测试,因此该测试将继续失败。
按照 "红-绿-重构" 模式,现在我们有了一个失败的测试,这是 "红" 阶段,我们现在可以继续编写通过失败测试所需的解决方案代码,这是 "绿" 阶段。