缓存
虽然前面讲了 Redis 的操作,但真实的项目中不会这样直接操作。实际的应用场景更多的是缓存数据,使得系统的性能更加高效。
缓存的使用
现在 Spring Boot 版本已经更新到 2.×,本书使用的版本也是 2.×,在缓存管理器上和以前的 1.× 版本有些不同。我们按照这里的程序使用缓存。
首先,看一下程序结构,如图8.11所示。
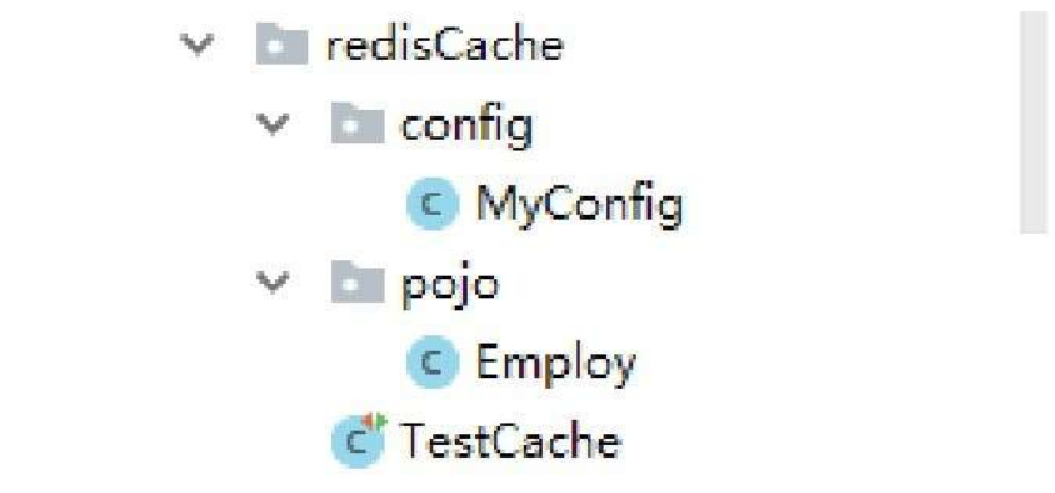
在这里,我们使用实体类进行保存。这里的实体类是 Employ,里面有 id、name。程序不再展示,在前面的实例中讲过,只是一个简单的 Bean。
然后,我们需要写自己的 CacheManager。和以前有些区别,原来的构造器方法被取消,需要使用新的方式来产生自己的 RedisCacheManager。先说第一种方式,使用静态方法 create,代码如下所示。
@Bean
public CacheManager cacheManager(RedisConnectionFactory factory) {
   RedisCacheManager cacheManager = RedisCacheManager.create(factory);
   return cacheManager;
}
这种方式的特点是,只能使用 Spring 提供的默认配置,不能修改一些配置项。因此,还有第二种方式,即使用 RedisCacheConfiguration 进行构造,设置默认的超时时间,缓存的命名空间。对于第二种方式,代码如下所示。
package com.springBoot.redisCache.config;
@Configuration
@EnableCaching
public class MyConfig extends CachingConfigurerSupport{
//key生成策略
   @Bean
   public KeyGenerator keyGenerator() {
      return new KeyGenerator() {
          @Override
          public Object generate(Object target, Method method, Object... params) {
             StringBuilder sb = new StringBuilder();
             sb.append(target.getClass().getName());
             sb.append(method.getName());
             for (Object obj : params) {
                 sb.append(obj.toString());
             }
             return sb.toString();
          }
      };
   }
   //factory
   @Bean
   JedisConnectionFactory connectionFactory() {
      return new JedisConnectionFactory();
   }
   //生成模板
   @Bean("redisTemplate")
   public RedisTemplate<String, String>redisTemplate(RedisConnectionFactory factory) {
      StringRedisTemplate template = new StringRedisTemplate(factory);
      Jackson2JsonRedisSerializer jackson2JsonRedisSerializer = new Jac kson2JsonRedisSerializer(Object.class);
      ObjectMapper om = new ObjectMapper();
      om.setVisibility(PropertyAccessor.ALL, JsonAutoDetect. Visibility.ANY);
      om.enableDefaultTyping(ObjectMapper.DefaultTyping.NON_FINAL);
      jackson2JsonRedisSerializer.setObjectMapper(om);
      template.setValueSerializer(jackson2JsonRedisSerializer);
      template.afterPropertiesSet();
      return template;
   }
   //缓存管理器
   @SuppressWarnings("rawtypes")
   @Bean
   public CacheManager cacheManager(RedisConnectionFactory factory) {
      RedisCacheConfiguration redisCacheConfiguration =RedisCacheConfiguration.defaultCacheConfig();redisCacheConfiguration=redisCacheConfiguration.entryTtl(Duration. ofMinutes(1))// 设置缓存有效期1s
          .disableCachingNullValues();
   return RedisCacheManager
          .builder(RedisCacheWriter.nonLockingRedisCacheWriter(factory))
          .cacheDefaults(redisCacheConfiguration).build();
   }
}
对这段代码的知识点说明一下:首先需要继承 CachingConfigurerSupport 类,这个类给我们提供自定义缓存的相关配置。从下面的源码,可以看到里面的方法都没经过逻辑处理。
package org.springframework.cache.annotation;
public class CachingConfigurerSupport implements CachingConfigurer {
   public CachingConfigurerSupport() {
   }
   @Nullable
   public CacheManager cacheManager() {
      return null;
   }
   @Nullable
   public CacheResolver cacheResolver() {
      return null;
   }
   @Nullable
   public KeyGenerator keyGenerator() {
      return null;
   }
   @Nullable
   public CacheErrorHandler errorHandler() {
      return null;
   }
}
在这个类中,有两个方法需要注意,一个方法是 errorHandler,用于自定义处理 Redis 的异常;另一个方法是 keyGenerator,用来自定义 key 生成策略。回到正题,在配置文件中,我们继承类,然后重写了 key 的生成策略。这里的生成策略比较合理,规则为类名+方法名+参数。
在 RedisTemplate 方法中,产生一个模板使用的序列化器是 Jackson2JsonRedisSerializer,这个使用方式在前面讲解过,这里不再详细说明。
最后一个方法是 CacheManager,通过第二种方式来产生缓存管理器。首先,生成默认配置,可以通过 config 对象对自定义缓存进行配置。在 config 中,设置缓存的默认时间,代码中使用的时间以秒为单位。其中,disableCachingNullValues 是不缓存空值。
现在,我们测试一下数据是否可以缓存,代码如下所示。
package com.springBoot.redisCache;
@RunWith(SpringJUnit4ClassRunner.class)
@SpringBootTest(classes = Application.class)
public class TestCache {
   @Autowired
   private StringRedisTemplate stringRedisTemplate;
   @Autowired
   private RedisTemplate redisTemplate;
   @Test
   public void testObj() throws Exception {
      Employ employ=new Employ("uu","uuName");
      ValueOperations<String, Employ>operations=redisTemplate.opsForValue();
      operations.set("no", employ,50, TimeUnit.SECONDS);
      Thread.sleep(1000);
      boolean exists=redisTemplate.hasKey("no");
      if(exists){
          System.out.println("exists is true");
      }else{
          System.out.println("exists is false");
      }
   }
}
这里代码的思路是,先把数据缓存到 Redis,但有时间限制,若在一定的时间内还没失效,我们就可以去 Redis 中获取。
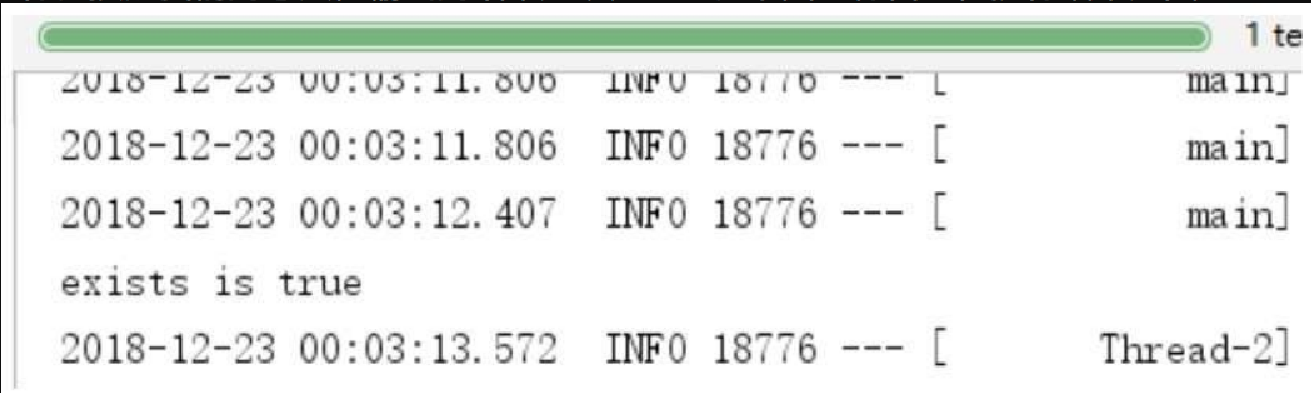
测试一:存放的时间定为 50s。存放之后,有 1s 的睡眠时间,然后代码继续往下运行。按照我们的想法,输出的结果应该是 true。下面运行代码,执行结果如图8.12所示。
测试二:让时间过去 50s,修改测试类程序,看 Redis 中是否还能有对应的 key。修改的测试代码如下所示。
@Test
public void testObj() throws Exception {
boolean exists=redisTemplate.hasKey("no");
if(exists){
System.out.println("exists is true");
}else{
System.out.println("exists is false");
}
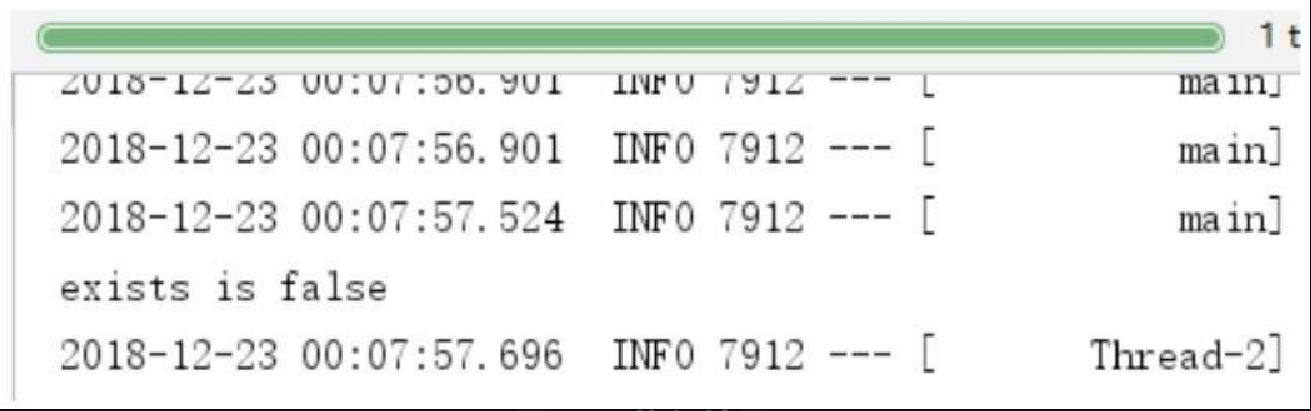
}运行代码,观察结果。按照我们的想法,在 50s 之后,缓存失效,不会获得对应的 key,则应该输出 false。执行结果如图8.13所示。
缓存的注解
在程序中,作者还是比较喜欢上面使用缓存管理器的方式,不过使用注解的方式声明缓存器也需要讲解。
缓存中常用的几个注解
@EnableCaching:在 Spring 中,在类上加上这个注解,将会创建一个切面,并触发 Spring 缓存的切点。根据注解的不同以及缓存的状态值,切面会将数据添加到缓存中,从缓存中获取数据,以及从缓存中移除数据。因此,这个注解的意思是切面在对缓存操作时会调用此缓存器的方法。
@Cacheable:先从缓存中的 key 进行查询,如果查询到数据,则返回,不执行该方法;如果没有数据,则执行该方法,并返回数据,最后将数据保存到缓存。
@CachePut:将方法的返回值放到缓存中,方法始终会执行,且在方法调用前不会检查缓存。
@CacheEvict:通过定义的键删除缓存。
@CacheConfig:统一配置本类的缓存注解的属性。
主要参数
这里说的是注解 @Cacheable、@CachePut、@CacheEvict 的主要参数。
Value:缓存的名称。在配置的时候,必须指定一个,或者多个,多个的时候是一个数组,例如:@Cacheable value={"cache1","cache2"}。
Key:缓存的键key。在配置时可以使用 Spring 支持的 spel 表达式写,也可以缺省按照方法的所有参数进行组合,例如:@Cacheable(value="cache1",key="#p0")。
Condition:缓存的条件,使用 SpEL 表达式写,返回布尔值,只有 true 的时候才会进行缓存操作或者删除缓存操作,例如:@Cacheable(value="cache1",condition="id==1")。
Unless:当 true 时,则不会缓存。
SpEL表达式
考虑到在程序中直接使用 SpEL 时,我们看程序有些麻烦,且理解 SpEL 需要单独查资料。因此,下面对 SpEL 表达式稍微做一些说明,方便后续的学习,如表8.1所示。
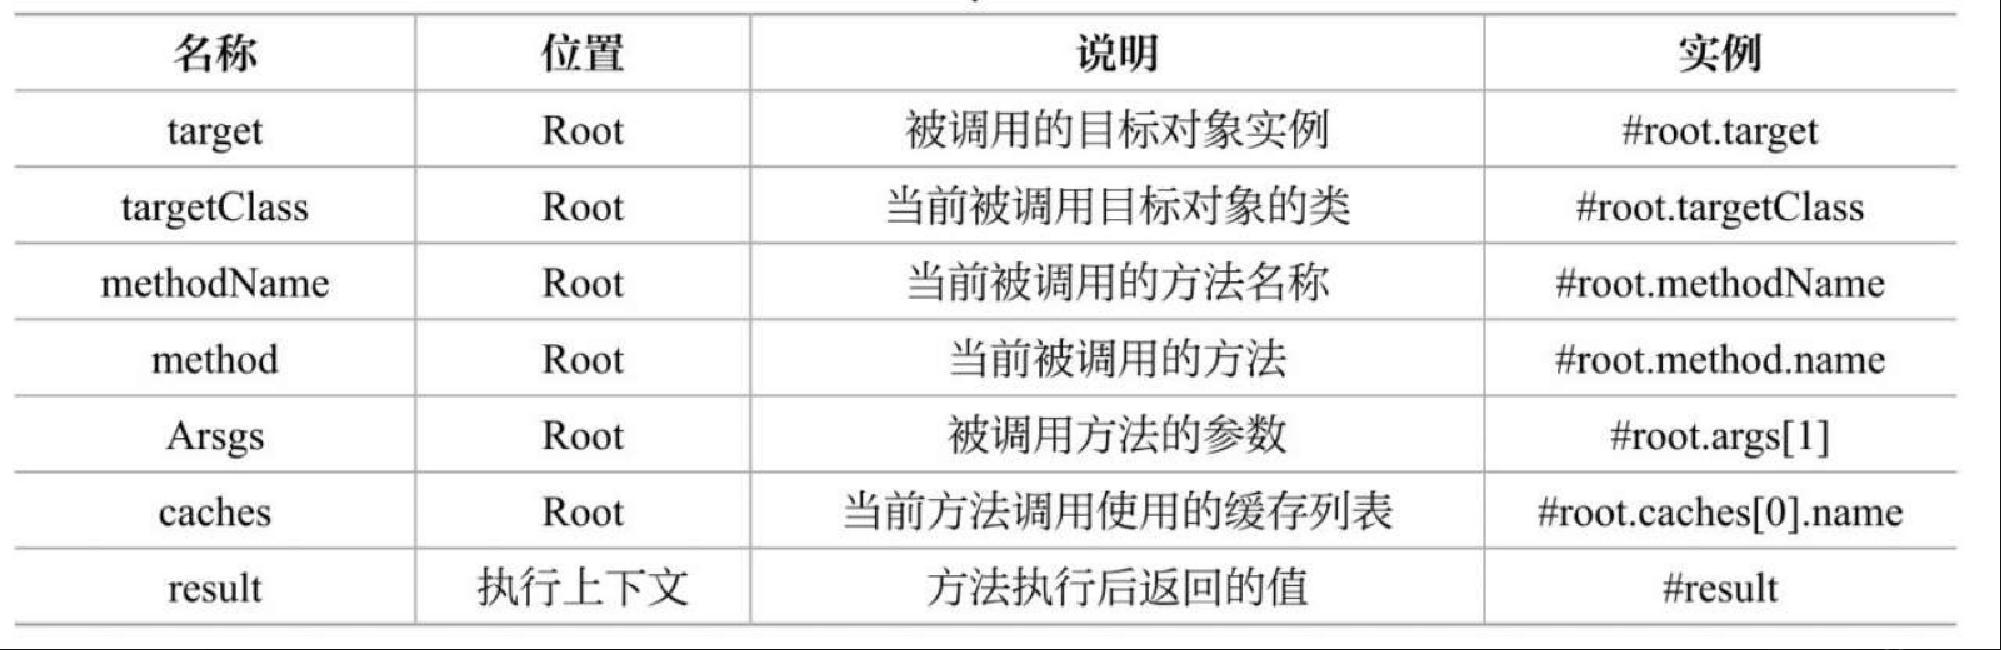
在上文的表中,除了最后一个,在实例中都使用 #root,如果使用 Root 对象的属性作为 key,Spring 默认使用 Root 对象,就可以不再写 #root。例如,@Cacheable(value="cache1",key="method")。
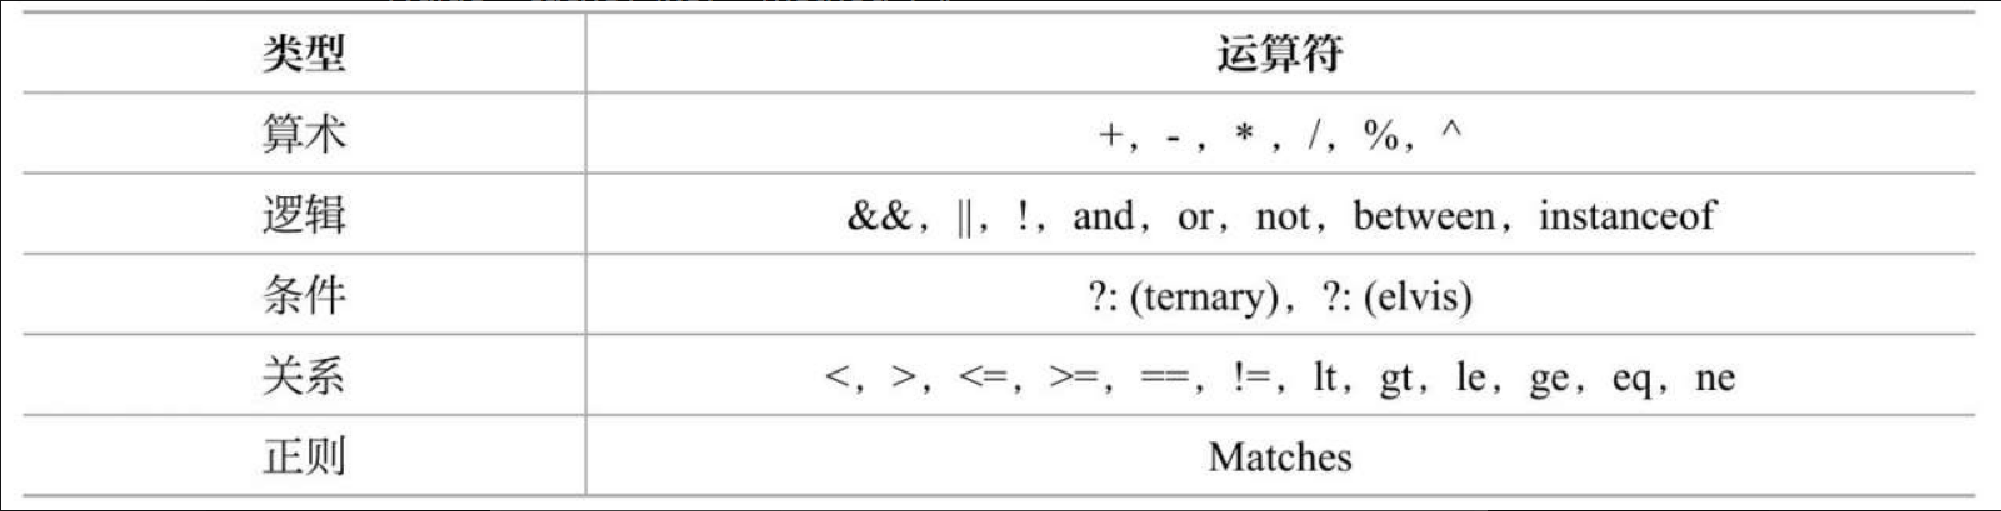
在 SpEL 中,还存在运算符,这里也介绍一下,如表8.2所示。
最后,还有一个知识点需要介绍。在使用方法参数的时候,可以使用 “#参数名”,也可以使用 “#p参数index”,这种写法还是比较常见的。
实例
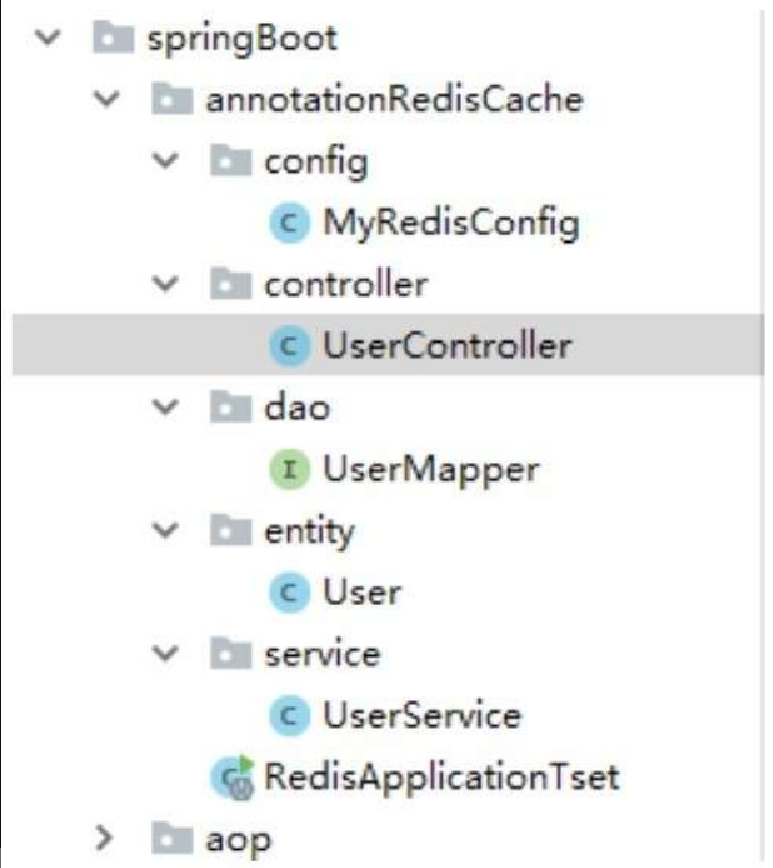
关于缓存的注解知识点介绍结束了,那么在程序中我们如何使用呢?这里讲解一个新的案例:新建一个 annotationRedisCache 包。仍然先看程序结构,方便重现程序,如图8.14所示。
首先,我们使用对象 user 进行演示,所以新建表,以 MySQL 为例,代码如下所示。
CREATE TABLE 'user' (
'id' int(16) NOT NULL,
'name' varchar(255) DEFAULT NULL,
'age' varchar(255) DEFAULT NULL,
PRIMARY KEY ('id')
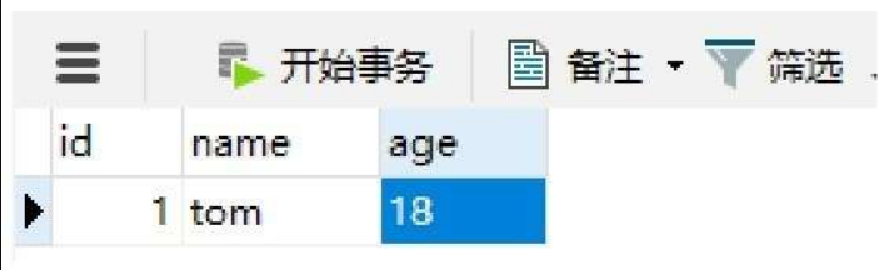
) ENGINE=InnoDB DEFAULT CHARSET=utf8;为了方便程序运行之后验证正确性,先在表中插入一条数据,插入的数据如图8.15所示。
然后,新建一个 User 类,主要有 id、name、age 字段,同时都是 String 类型,代码如下所示。
package com.springBoot.annotationRedisCache.entity;
public class User implements Serializable{
   private static final long serialVersionUID = 366444554774130L;
   private String id;
   private String name;
   private String age;
}
在上面的代码中需要注意的是需要实现 Serializable,因为在 Redis 中,我们需要完成序列化。然后,我们需要开启缓存,这个时候就使用 @EnableCaching 注解,代码如下所示。
package com.springBoot.annotationRedisCache;
@SpringBootApplication
@EnableCaching
public class RedisApplicationTset {
   public static void main(String[] args) {
      SpringApplication.run(RedisApplicationTset.class, args);
   }
}
上面开启缓存的注解放在启动类上了,这个注解放在配置文件上也是一样的效果。然后,我们开始写 dao,进行 “增删改查” 操作,操作 user 表,代码如下所示。
package com.springBoot.annotationRedisCache.dao;
@Mapper
@CacheConfig(cacheNames = "user")
public interface UserMapper {
   //根据id查询user
   @Select("select * from user where id =#{id}")
   @Cacheable(key ="#p0")
   User findUserById(@Param("id") String id);
   //插入数据
   @Insert("insert into user(id,name,age) values(#{id},#{name},#{age})")
   int addUser(@Param("id")String id,@Param("name")String name,@Param("age")String age);
   //根据id更新user
   @CachePut(key = "#p0")
   @Update("update user set name=#{name} where id=#{id}")
   void updateUserById(@Param("id")String id,@Param("name")String name);
   //如果指定为true,则方法调用后将立即清空所有缓存
   @CacheEvict(key ="#p0",allEntries=true)
   @Delete("delete from user where id=#{id}")
   void deleteUserById(@Param("id")String id);
}
在上面的程序中,我们直接使用注解 @Mapper,这个标识是 MyBatis 体系中的,因为使用 MyBatis 进行操作,所以这里可以这么使用。其实在这里,可以使用另一个注解 @Repository,这个注解是 Spring 中用来表示 Dao 层的注解。
在上面的代码中,我们使用注解 @CacheConfig、@CachePut、@Cacheable、@CacheEvict。先说 @CacheConfig,这个注解的作用在上文的知识点讲解中说过,即统一配置本类的缓存属性,现在结合实例再具体介绍。
在程序中,我们在多个地方使用缓存,这时就可以使用当前注解统一设定 value 的值,也就是说在具体的方法上可以省略写 value 的属性,如果在方法上的注解中写 value,则使用方法上的 value。这个注解的好处是统一配置,更加方便。
只要使用 cacheNames 属性就可以统一设定 value 的值。当前注解还有其他的属性,代码如下所示。
public @interface CacheConfig {
   String[] cacheNames() default {};
   String keyGenerator() default "";
   String cacheManager() default "";
   String cacheResolver() default "";
}
keyGenerator:key 的生成器;cacheManager:指定缓存管理器;cacheResolver:指定获取解析器。在上面的代码中,使用 value 的值为 user。
再说 @Cacheable 注解,使用这个注解之后,会先查询缓存中是否存在缓存,如果有则使用缓存数据,没有则执行方法,并把结果缓存下来。
在缓存中,我们需要写 value,具体制定缓存的命名空间,因为在 @CacheConfig 注解中统一制定了 value 的值,在这里就沿用 user 值,所以这个缓存的命名空间也是 user。对于key的指定,这里使用 “#p参数index” 的方式。当前的注解还有其他的属性,这里做一些介绍,代码如下所示。
public @interface Cacheable {
   @AliasFor("cacheNames")
   String[] value() default {};
   @AliasFor("value")
   String[] cacheNames() default {};
   String key() default "";
   String keyGenerator() default "";
   String cacheResolver() default "";
   String condition() default "";
   String unless() default "";
   boolean sync() default false;
}
cacheNames 与 value 相同;keyGenerator:key 生成器,与上面的 key 属性两者选一;cacheResolver 指定获取解析器;conditon:条件符合则进行缓存;unless:缓存符合则不进行缓存;sync:是否采用异步模式缓存。
再说 @CachePut,这个注解针对方法,根据方法的请求参数对结果进行缓存,使用这个注解后,每次都会运行方法,适合的场景正是更新这种操作。
在 key 与 value 的属性上有一点要注意,注解上的 key 与 value 要和即将更新的缓存相同。我们来看这个注解的其他属性,代码如下所示。
public @interface CachePut {
   @AliasFor("cacheNames")
   String[] value() default {};
   @AliasFor("value")
   String[] cacheNames() default {};
   String key() default "";
   String keyGenerator() default "";
   String cacheManager() default "";
   String cacheResolver() default "";
   String condition() default "";
   String unless() default "";
}
上面是 CachePut 的源码,其中,每个属性都在前面讲过,这里就不再重复说明。
最后,在上文的代码中,我们还使用了 @CacheEvict 注解。这个注解根据条件对缓存进行清空,注解在方法上。
在程序中,使用了 allEntries 属性,表示是否清空缓存内容,如果是 true 则调用方法之后,清空缓存,默认是 false。这个注解的其他属性,代码如下所示。
public @interface CacheEvict {
   @AliasFor("cacheNames")
   String[] value() default {};
   @AliasFor("value")
   String[] cacheNames() default {};
   String key() default "";
   String keyGenerator() default "";
   String cacheManager() default "";
   String cacheResolver() default "";
   String condition() default "";
   boolean allEntries() default false;
   boolean beforeInvocation() default false;
}
在上面的属性中,有一个 beforeInvocation 属性,这个属性是指是否在方法执行之前清空缓存,默认是 false;如果是 true,则在方法执行前清空缓存。在 false 情况下,如果方法在执行后抛出异常,缓存不会被清空。
然后,我们开始写 service,这种写法显得正规一些,代码如下所示。
package com.springBoot.annotationRedisCache.service;
@Service
public class UserService {
   @Autowired
   private UserMapper userMapper;
   public User findUserById(String id){
      return userMapper.findUserById(id);
   }
   public int addUser(String id,String name,String age){
      return userMapper.addUser(id,name,age);
   }
   public void updateUserById(String id,String name){
      userMapper.updateUserById(id,name);
   }
   public void deleteUserById(String id){
      userMapper.deleteUserById(id);
   }
}
然后,接着写控制层,代码如下所示。
package com.springBoot.annotationRedisCache.controller;
@RestController
public class UserController {
@Autowired
private UserService userService;
@RequestMapping("/findUserById")
public User findUserById(@RequestParam("id") String id){
return userService.findUserById(id);
}
@RequestMapping("/adduser")
public int addUser(@RequestParam("id")String id,@RequestParam("name")String name, @RequestParam("age")String age){
return userService.addUser(id,name, age);
}
@RequestMapping("/updateUserById")
public String updateUserById(@RequestParam("id") String id,@RequestParam("name") String name){
try {
userService.updateUserById(id, name);
} catch (Exception ex) {
return "error";
}
return "success";
}
@RequestMapping("/deleteUserById")
public String deleteUserById(@RequestParam("id") String id){
try {
userService.deleteUserById(id);
} catch (Exception ex) {
return "error";
}
return "success";
}
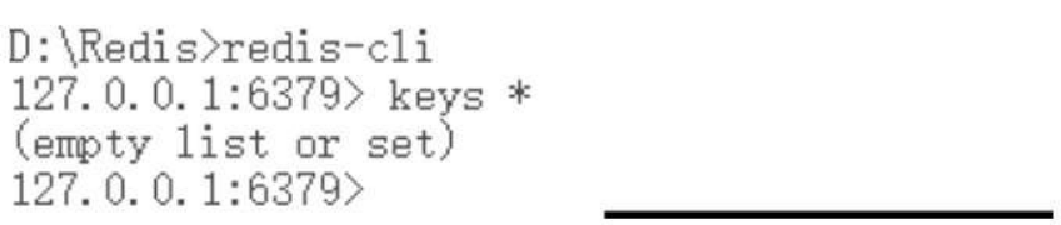
}代码都写好了,现在我们进行测试。启动测试类。在测试前,我们进入 Redis,根据图8.16,可以发现在 Redis 中没有缓存数据。
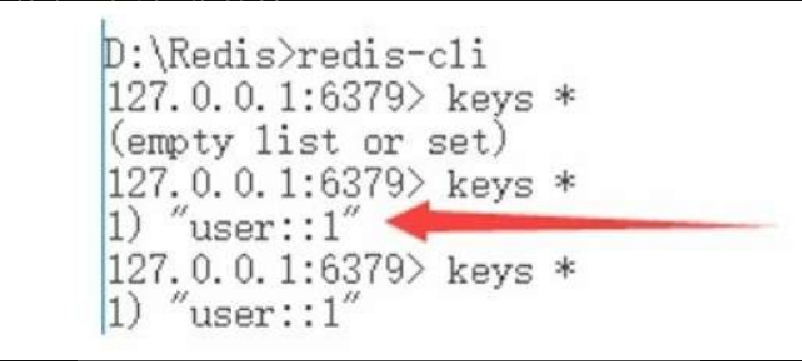
输入链接 http://localhost:8082/findUserById?id=1 后,再进入 Redis,看数据是否被缓存。从图8.17中可以发现在查询之后,执行了缓存操作。
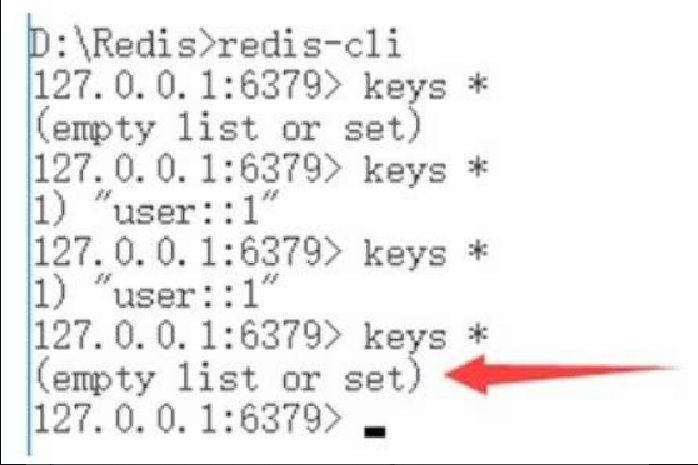
最后,我们执行删除缓存操作,输入链接 http://localhost:8082/deleteUserById?id=1 ,图8.18是执行删除操作的结果。