Zuul路由
按照老思路,我们先通过快速实例,感性认识 Zuul 网关的使用。然后深入理解 Zuul 的核心知识点,即路由与过滤。在本章节中,主要介绍 Zuul 的基本路由功能是如何使用的,以及如何自定义路由,最后,讲解 Cookie 的头信息控制的实例。
基本的网关功能
首先,搭建项目,了解 Zuul 具备的基本的网关功能。
新建网关项目
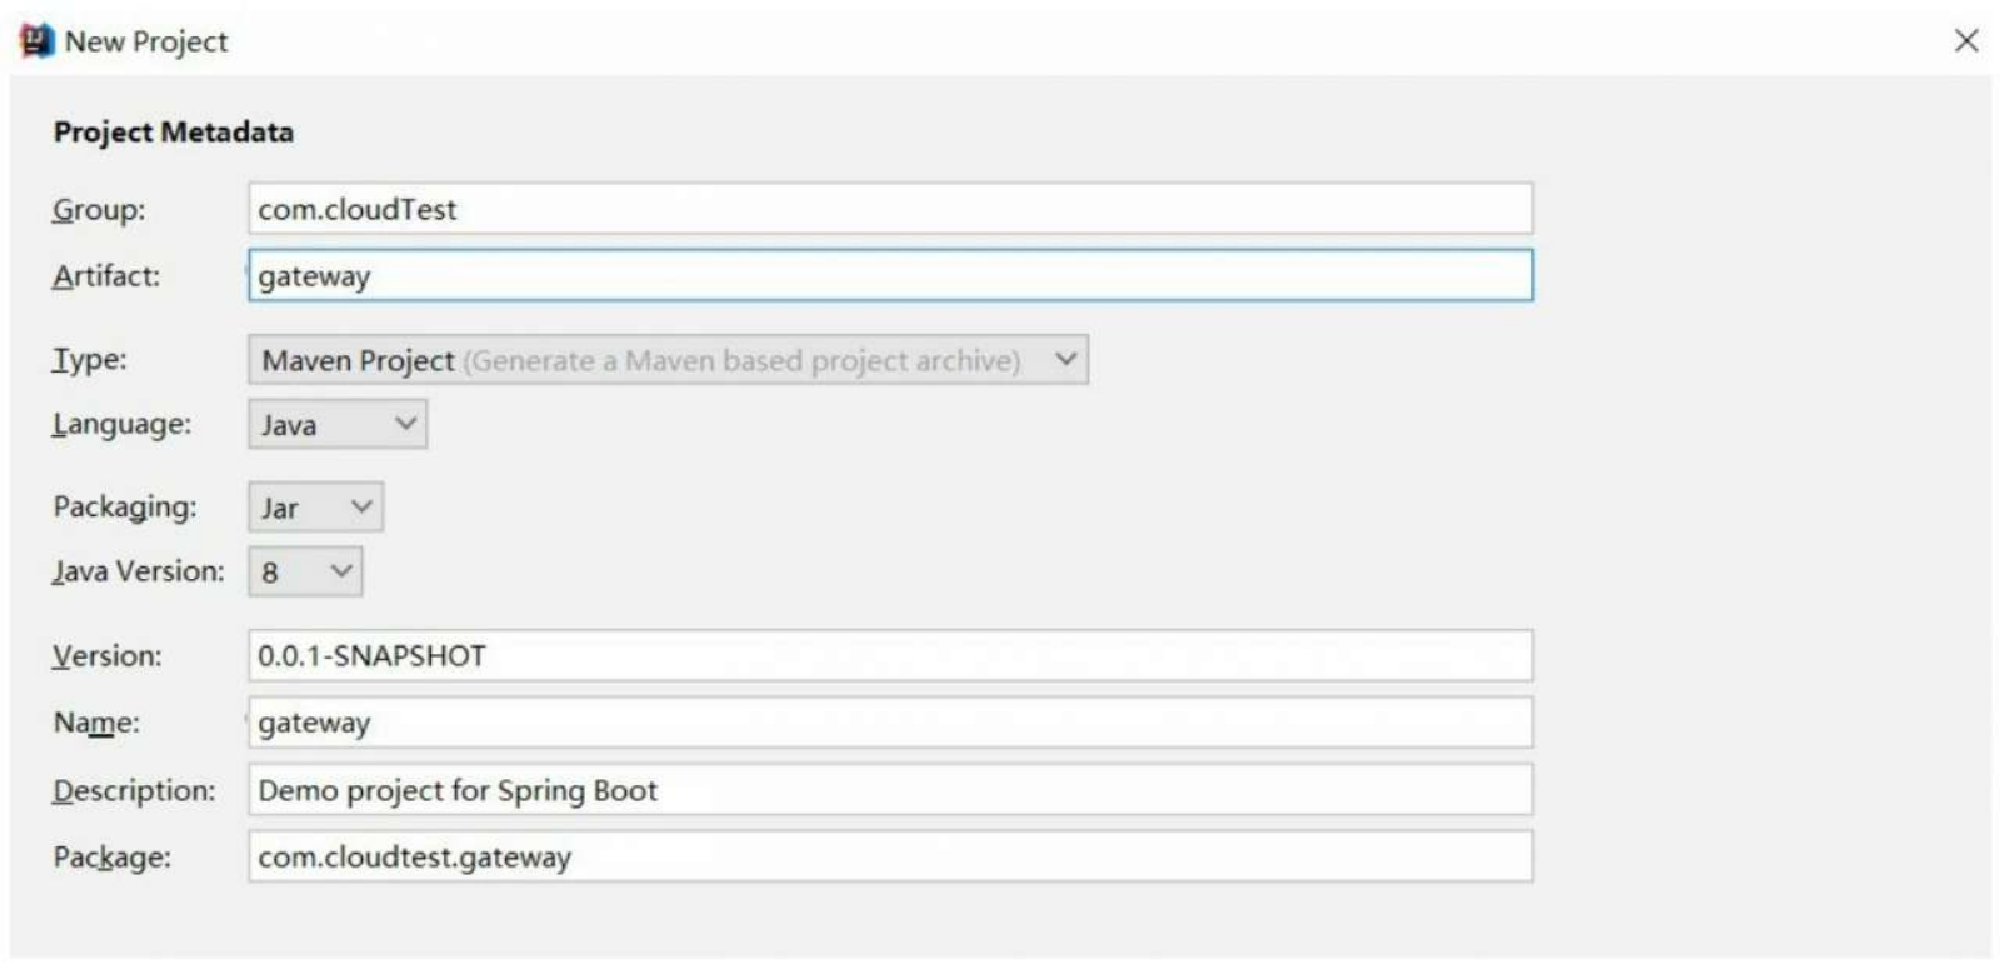
我们需要新建一个 Zuul 项目——gateway,如图15.1所示。
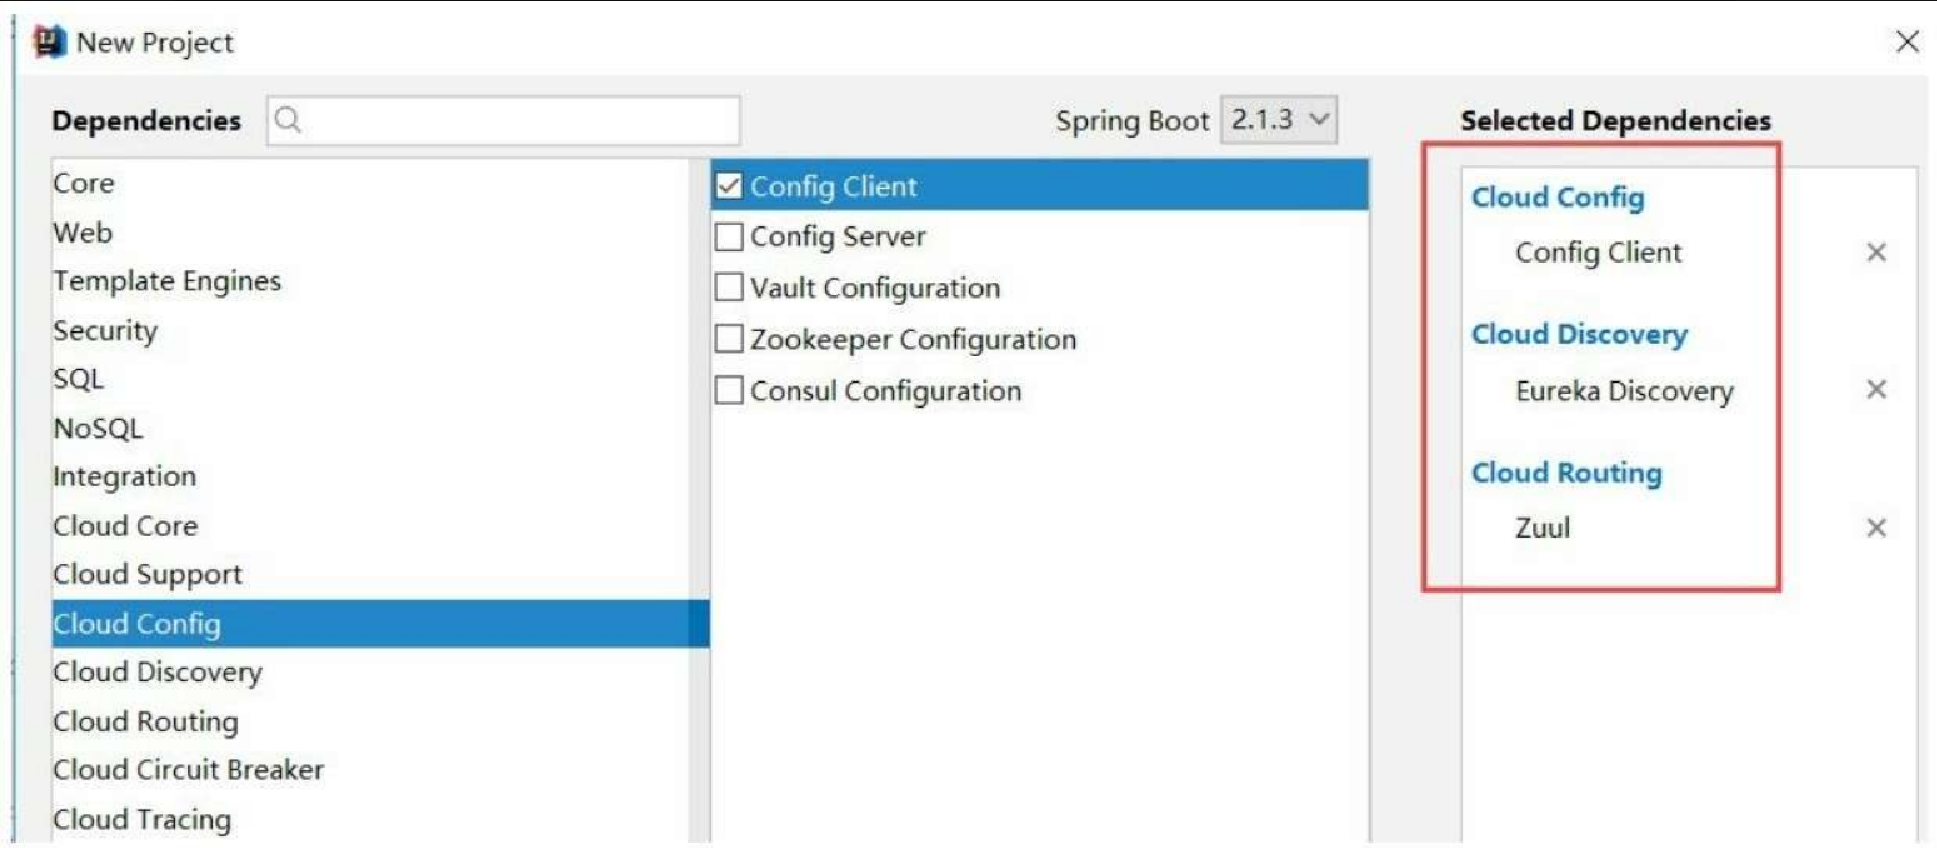
然后,选择组件,添加需要的依赖,如图15.2所示。
这时,进入生成的 pom 文件,可以看到下面的依赖,代码如下。
<dependencies>
   <dependency>
      <groupId>org.springframework.cloud</groupId>
   <artifactId>spring-cloud-starter-config</artifactId>
  </dependency>
  <dependency>
   <groupId>org.springframework.cloud</groupId>
   <artifactId>spring-cloud-starter-netflix-eureka-client</artifactId>
  </dependency>
  <dependency>
   <groupId>org.springframework.cloud</groupId>
   <artifactId>spring-cloud-starter-netflix-zuul</artifactId>
  </dependency>
  <dependency>
   <groupId>org.springframework.boot</groupId>
   <artifactId>spring-boot-starter-test</artifactId>
   <scope>test</scope>
  </dependency>
</dependencies>
在上面的程序中,因为需要使用 Zuul 组件,所以引入 Zuul 的依赖。至于 Eureka,因为需要进行路由智能,让 Zuul 与 Eureka 进行组合,所以也需要引入依赖。然后,修改配置文件 application.properties,代码如下所示。
server.port=8066
spring.application.name=gateWay
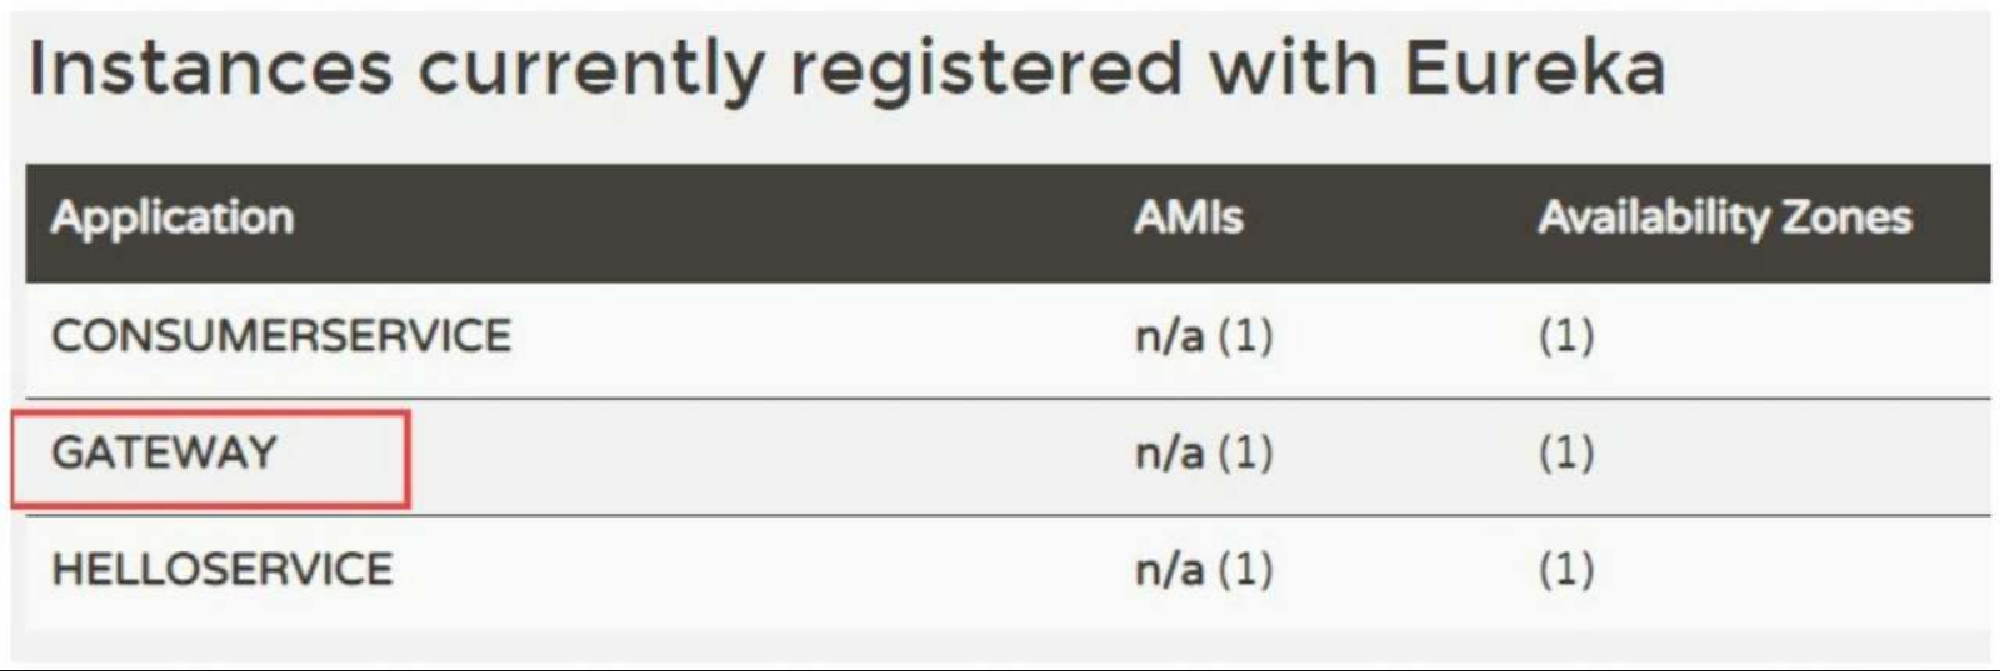
eureka.client.service-url.defaultZone=http://localhost:8764/eureka/然后,启动项目,我们在 Eureka 服务注册中心中发现,服务已经被注册,如图15.3所示。
面向服务路由方式
在上面的项目中,还需要在启动主类上添加注解 @EnableZuulProxy,用于开启 Zuul 的网关服务功能,代码如下所示。
package com.cloudtest.gateway;
@SpringBootApplication
//启动网关功能的注解
@EnableZuulProxy
public class GatewayApplication {
   public static void main(String[] args) {
      SpringApplication.run(GatewayApplication.class, args);
   }
}
重新启动项目。此时,我们就可以实现基本的路由功能。下面,我们开始进行验证 Zuul 如何做到路由转发。首先,在图15.3中发现服务注册中心有 CONSUMERSERVICE 应用服务,在这个应用中,有 Restful 服务接口 “/consumer”,直接使用这个接口进行测试,这段代码在前面章节介绍过,代码如下所示。
package com.cloudtest.eurekaconsumer.controller;
@RestController
@DefaultProperties(defaultFallback = "defaultFallback")
public class ConsumerController {
   @Autowired
   RestTemplate restTemplate;
   @Autowired
   LoadBalancerClient loadBalancerClient;
   @HystrixCommand(commandProperties = {
          //设置熔断
          @HystrixProperty(name="circuitBreaker.enabled",value = "true"),
@HystrixProperty(name="circuitBreaker.requestVolumeThreshold",value = "10"),
@HystrixProperty(name="circuitBreaker.sleepWindowInMilliseconds", value = "10000"s),
@HystrixProperty(name="circuitBreaker.errorThresholdPercentage", value = "10"),
   })
   @GetMapping("/consumer")
   public String consumer(@RequestParam("number") Integer number){
      //如果是偶数,则进行
      if (number%2==0){
           return "success";
      }
           return restTemplate.getForEntity("http://HELLOSERVICE/hello",String.class).getBody();
   }
   public String defaultFallback(){
      return "defaultFallback,请稍后再试!";
   }
}
然后,直接对 “/consumer” 进行访问,观察返回效果。访问链接 http://localhost:8070/consumer?number=2 ,执行结果如图15.4所示。

然后,使用路由地址访问链接 http://localhost:8066/consumerservice/consumer?number=2 ,执行结果如图15.5所示。

现在,对上文的测试链接做一个解释。8066 是 gateway 项目对外访问的端口,说明我们对服务的访问进入接口是从网关项目进入的;consumerservice 是 consumerservice 的服务 ID,这个 ID 注册在服务注册中心;consumer 则是上文的服务。说到这里可以知道,通过网关项目,能路由到需要访问的服务。
自定义路由
在一些场景下,Zuul 自带的基本内置规则不能满足需求,需要考虑自定义路由。Zuul 对于自定义路由也是支持的。
自定义路由
在上面的路由规则中,需要添加应用服务名称才能访问服务,那么如何使用自己定义的名称,Zuul 是否可以支持呢?修改配置文件即可,修改代码如下所示。
zuul.routes.aaa.path=/myconsumerService/**
zuul.routes.aaa.serviceId=consumerService
对于这里的写法,上面的 “aaa”,表示可以随意写。在上文的配置文件中,我们要访问 consumerService 中的服务,就不需要再写 consumerService,写自己定义的 myconsumerServcie 即可。访问链接 http://localhost:8066/myconsumerService/consumer?number=2 ,执行结果如图15.6所示。

Cookie头信息控制
在默认的情况下,Zuul 的路由,将会过滤 HTTP 头中的一些敏感信息,防止传递到下游的外部服务器。
但是,有时候使用 Spring Security 等安全框架构建应用时,由于 Cookie 无法传递,Web 应用将会无法实现登录,因此我们需要解决这个问题。首先,默认敏感信息通过 sensitiveHeaders 参数来控制。
private Set<String> sensitiveHeaders = new LinkedHashSet(
   Arrays.asList("Cookie", "Set-Cookie", "Authorization"));
在这里说明,Cookie、Set-Cookie、Authorization 是敏感信息。
验证Cookie是否可以传递
修改服务 “/consumer”,主要是修改函数,添加 HttpServletRequest,方便断点获取 Cookie 信息。部分代码如下所示。
@GetMapping("/consumer")
public String consumer(@RequestParam("number") Integer number, HttpServletRequest request){
……
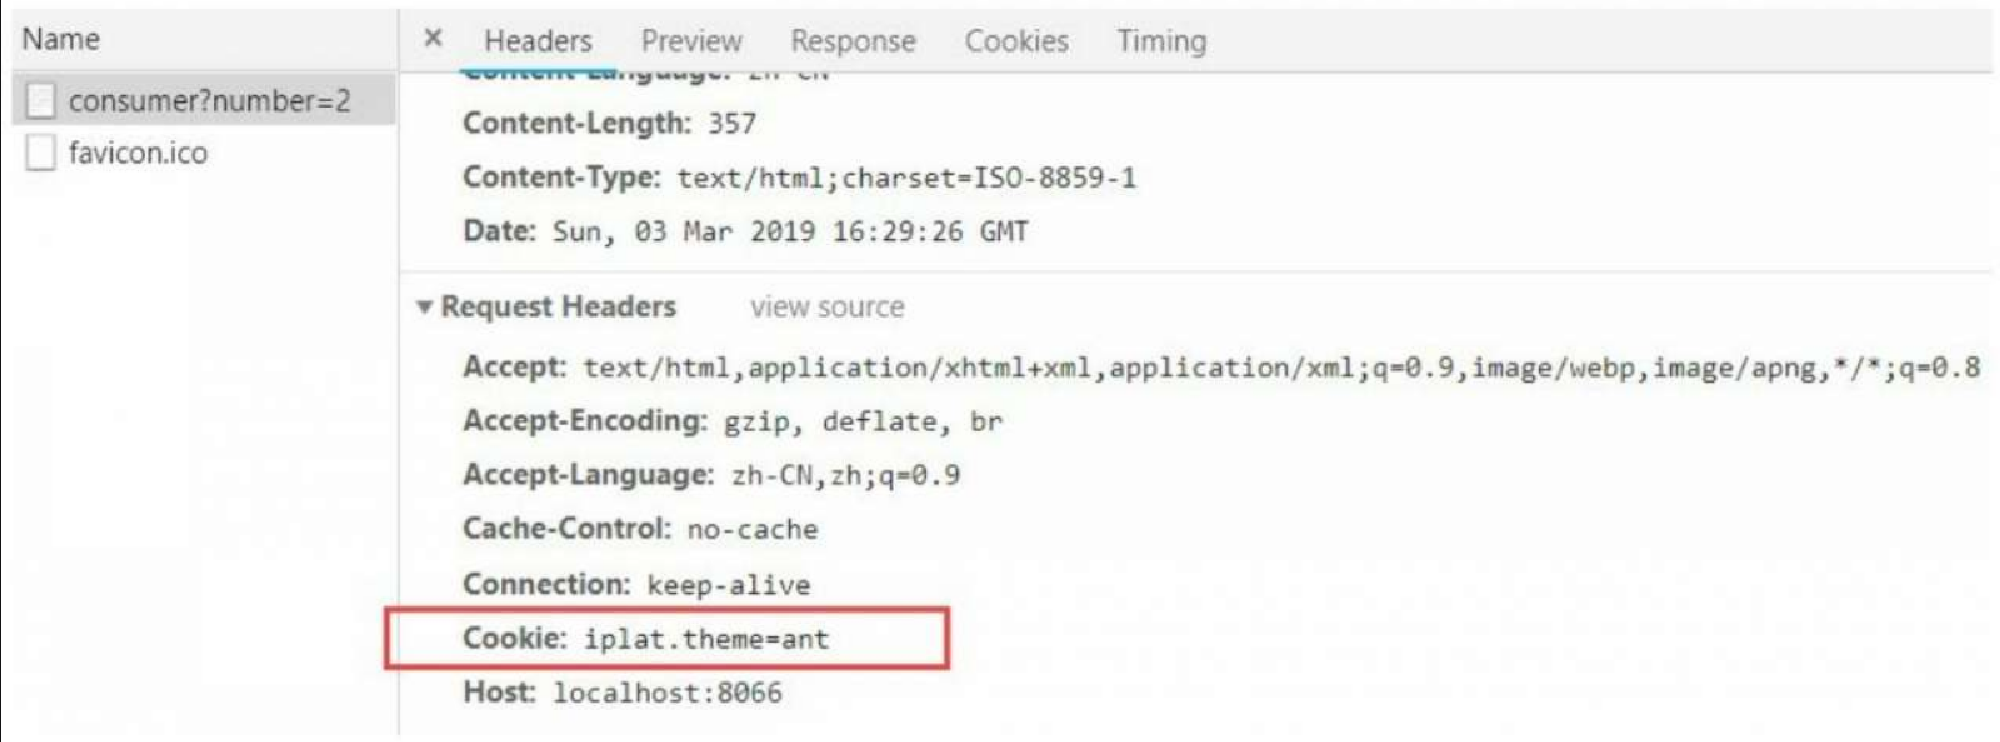
}先访问链接 http://localhost:8066/myconsumerService/consumer?number=2 ,观察 Cookie 信息,如图15.7所示。
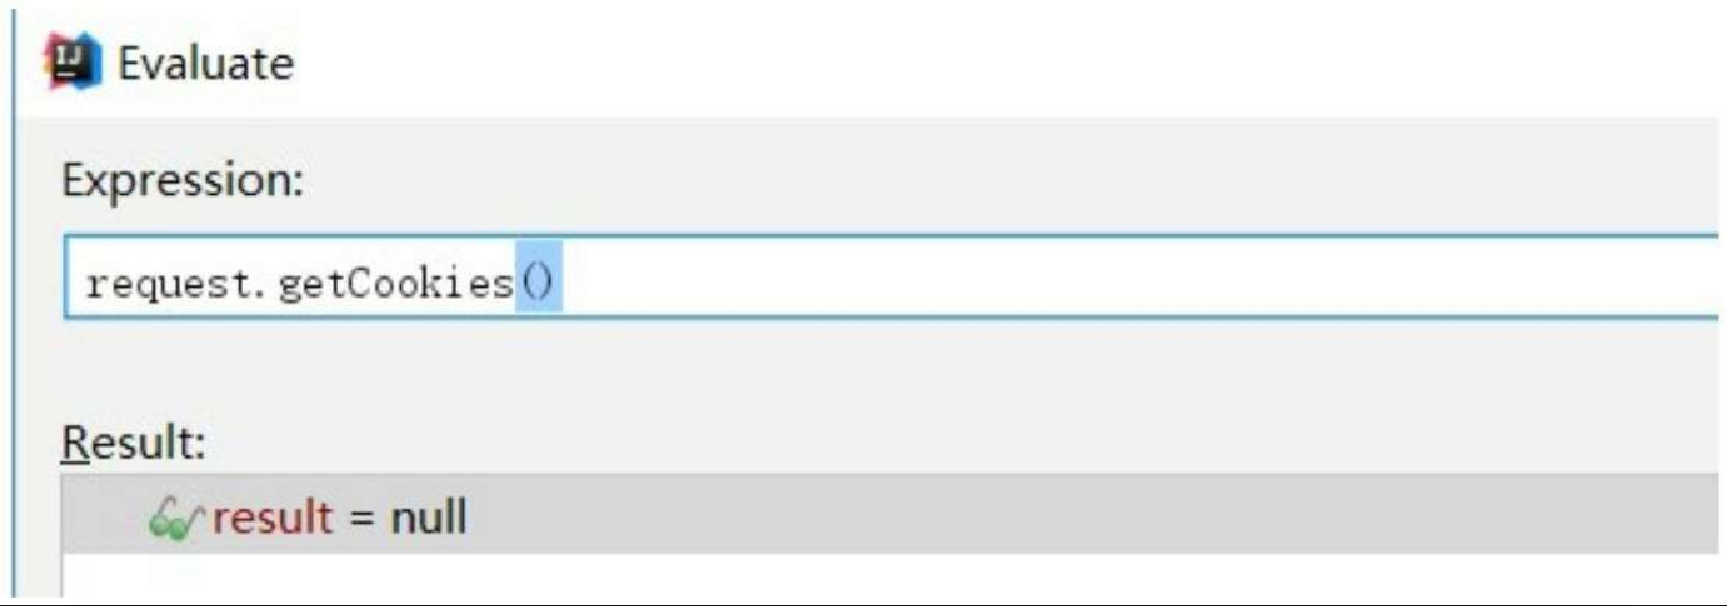
然后,在后台的服务 “/consumer” 上断点调试,查看 Cookie 信息,Cookie 获取结果如图15.8所示。
处理方式
我们有两种处理方式,可以使得 Cookie 信息继续传递。第一种,修改配置文件,通过配置全局参数为空来覆盖默认值,代码如下所示。
zuul.routes.aaa.path=/myconsumerService/**
zuul.routes.aaa.serviceId=consumerService
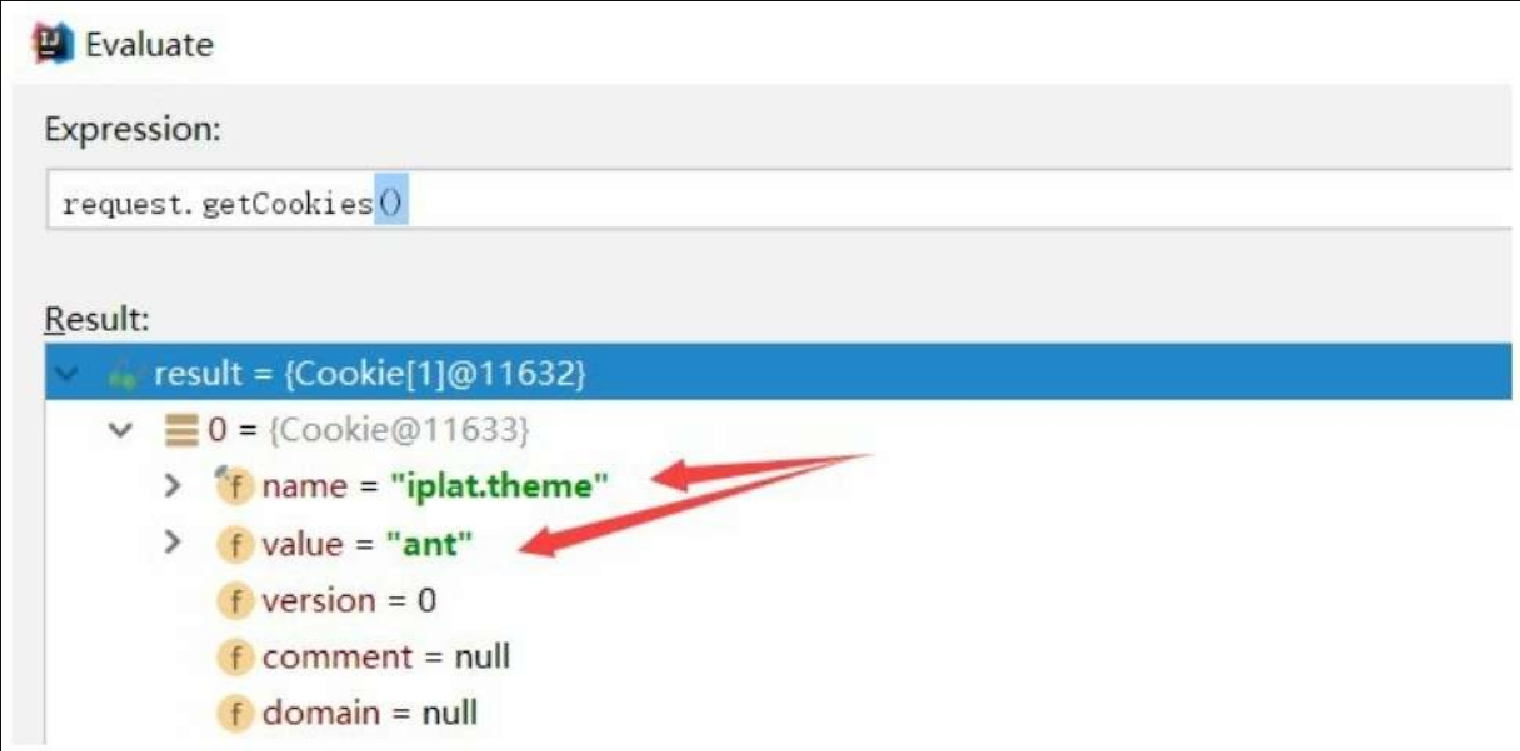
zuul.routes.aaa.sensitive-headers=然后,重新调试,如图15.9所示。
第二种,通过上面的方式可以看到,我们实现了 Cookie 信息的传递,但是也存在了新的问题,破坏了默认方式的用意。因为我们让 Cookie 信息传递了,然后让其他的敏感信息也被暴露出来。
此时对指定路由开启自定义敏感头 Zuul.routers.<router>.customSensitiveHeaders=true 即可解决。