自定义用户认证流程
本小节介绍用户自定义认证流程,主要包括自定义登录页面,优化自定义登录页面,以及登录成功或者登录失败之后的处理。在项目中,开发人员一般都会有自己的处理方式,可结合部分内容使得更符合自己的项目场景。
自定义登录页面
在 Security 中,默认的登录页面是固定的,但在实际开发中,多半是不符合的,因此需要使用自己的登录页面,在 Security 中支持自定义登录页面。原本的登录页面的源码如下所示。
public class UsernamePasswordAuthenticationFilter extends AbstractAuthenticationProcessingFilter {
   private boolean postOnly = true;
   public UsernamePasswordAuthenticationFilter() {
      super(new AntPathRequestMatcher("/login", "POST"));
   }
}
在上文的代码中,可以看到过滤器上的登录只能是 POST 的 login。自定义登录页面,首先设置配置文件,代码如下所示。
package com.cao.security.browser;
/**
  * 覆盖掉security原有的配置
  * @author dell
  *
  */
@Configuration
public class BrowserSecurityConfig extends WebSecurityConfigurerAdapter{
   @Override
   protected void configure(HttpSecurity http) throws Exception {
      //表单登录的一个安全认证环境
      http.formLogin()
          .loginPage("/index.html")
          .loginProcessingUrl("/authentication/form")
            // http.httpBasic()
          .and()
          .authorizeRequests() //请求授权
          .antMatchers("/index.html").permitAll() //这个URL不需要认证
          .anyRequest() //任何请求
          .authenticated() //都需要认证
          .and()
          .csrf().disable(); //去掉csrf的防护
   }

   @Bean
   public PasswordEncoder passwordEncoder() {
      return new BCryptPasswordEncoder();
   }
}
在上面代码中,定义了登录的页面是 index.html,登录的方法是 authentication/form。这里需要注意的是,index 也是需要通过过滤器链的,但在实际中这个请求不存在用户名与密码,不需要进行校验。所以在请求的校验时,有 index 就不需要进行校验。然后,写一个登录的页面的程序,代码如下所示。
<!DOCTYPE html>
<html>
<head>
<meta charset="UTF-8">
<title>登录</title>
</head>
<body>
<h2>标准登录页面</h2>
<h3>表单登录</h3>
<form action="/authentication/form" method="post">
<table>
<tr>
<td>用户名</td>
<td><input type="text" name="username"></td>
</tr>
<tr>
<td>密码</td>
<td><input type="password" name="password"></td>
</tr>
<tr>
<td colspan="2"><button type="submit">登录</button></td>
</tr>
</table>
</form>
</body>
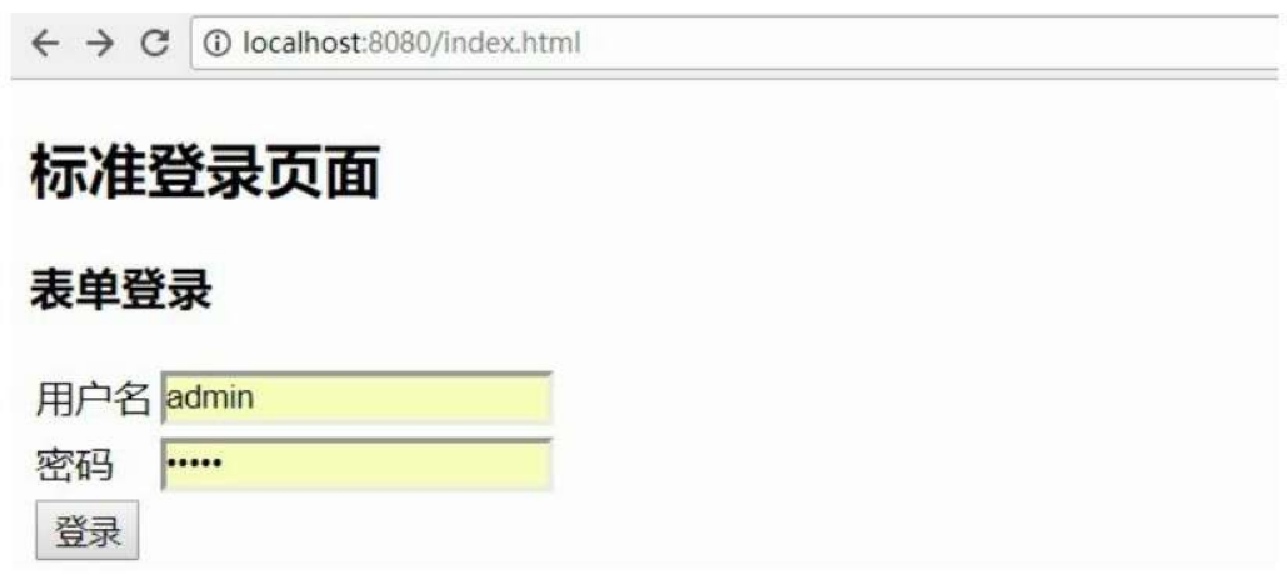
</html>在上面的代码中,只写用户名与密码,用于演示校验。这里需要注意的是,登录的方法需要和配置文件中的程序保持一致。运行程序,然后访问链接,就可以进行登录认证,登录页面如图9.8所示。
优化自定义登录页面
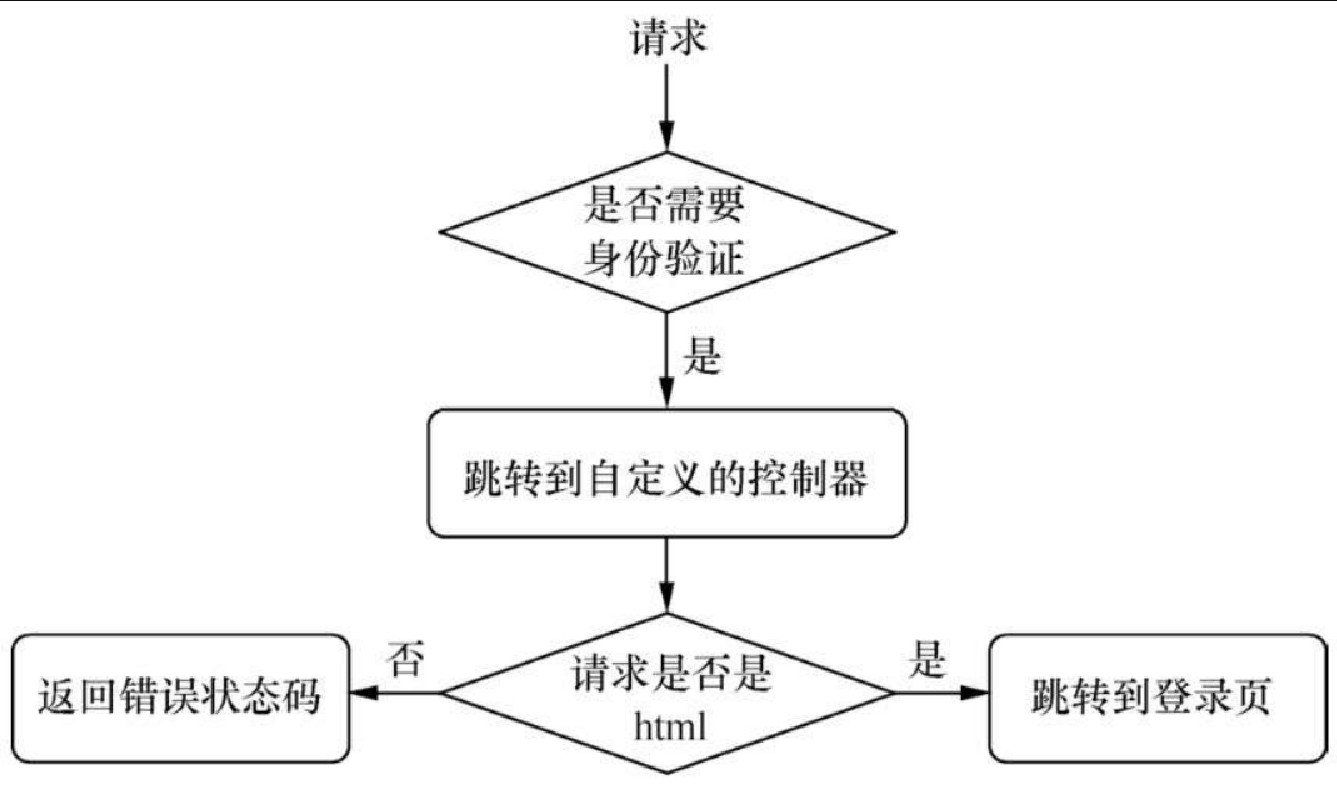
通过设置配置文件,我们已经实现自定义登录页面,但是这只是初步的实现,我们还需要对其进行优化。在上文的实现中,采取的是页面直接跳转的方式,而现在我们需要通过控制器进行统一管理,所以,就需要按照这个思路进行优化。在优化之前,先看看优化的思路图,如图9.9所示。
首先,修改配置文件,代码如下所示。
package com.cao.security.browser;
/**
  * 覆盖security原有的配置
  * @author dell
  *
  */
@Configuration
public class BrowserSecurityConfig extends WebSecurityConfigurerAdapter{
   @Autowired
   private SecurityProperties securityProperties;
   @Override
   protected void configure(HttpSecurity http) throws Exception {
      //表单登录的一个安全认证环境
      http.formLogin()
          .loginPage("/authentication/require")
          .loginProcessingUrl("/authentication/form")
      http.httpBasic()
          .and()
          .authorizeRequests() //请求授权
          .antMatchers("/authentication/require", securityProperties.getBrowser().getLoginPage()).permitAll() //这个URL不需要认证,包含自定义的登录页
          .anyRequest() //任何请求
          .authenticated() //都需要认证
          .and()
          .csrf().disable(); //去掉csrf的防护
   }
   @Bean
   public PasswordEncoder passwordEncoder() {
      return new BCryptPasswordEncoder();
   }
}
在上面的配置文件代码中,可以发现没有 index.html 的相关内容,只有 authentication/require 的请求。
在上面的代码中,有 securityProperties 的这一段代码定义的 URL 不需要经过统一认证。对于这里的处理,我们还是通过抽象一些方法来实现,图9.10是抽象的一个框架。
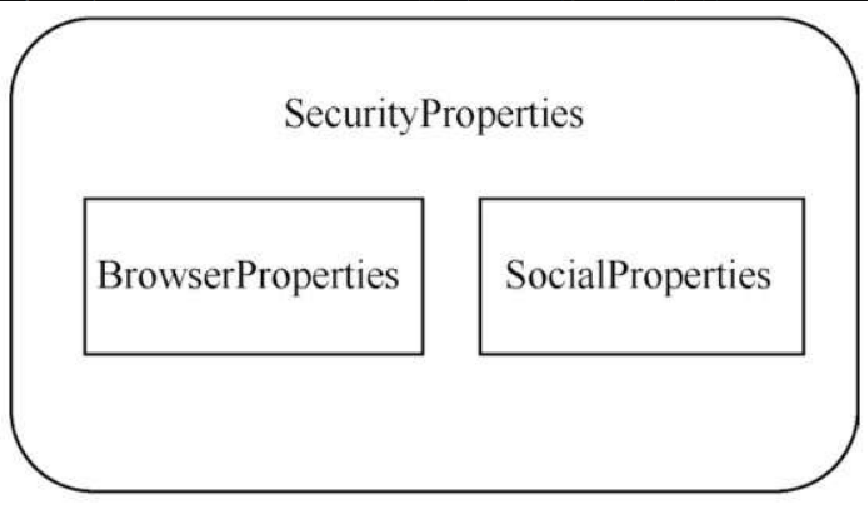
在9.10图中,最外层是 SecurityProperties,然后里面的对象分别是浏览器端与移动端的对象,分别用于做配置项。对于 SecurityProperties,代码如下所示。
package com.cao.security.core.properties;
@ConfigurationProperties(prefix="jun.security")
public class SecurityProperties {
   private BrowserProperties browser=new BrowserProperties();
   public BrowserProperties getBrowser() {
      return browser;
   }
   public void setBrowser(BrowserProperties browser) {
      this.browser = browser;
   }
}
在上面的程序中,我们先写一个 BrowserProperties 对象。这里会读取 jun.security 开头的配置项,同时会把配置项的第三个字段读取到同 Browser 相同的类中,所以后续还要写 Browser 的类。
现在开始写 BrowserProperties 对象,这里要读取的是配置项的第四个字段。loginPage 里有一个默认值,如果用户没有指定,就使用初始化的值,代码如下所示。
package com.cao.security.core.properties;
public class BrowserProperties {
   private String loginPage="/index.html";
   public String getLoginPage() {
      return loginPage;
   }
   public void setLoginPage(String loginPage) {
      this.loginPage = loginPage;
   }
}
然后,为了让配置项可以生效,还需要写一个配置类,代码如下所示。
package com.cao.security.core.properties;
@Configuration
//让SecurityProperties读取器生效
@EnableConfigurationProperties(SecurityProperties.class)
public class SecurityCoreConfig {
}
现在,需要控制类处理请求,请求的代码如下所示。
package com.cao.security.browser;
@RestController
public class BrowserSecurityController {
   private Logger logger=LoggerFactory.getLogger(getClass());
   //拿到引发身份跳转的请求
   //因为在跳转之前,security会将请求缓存到session中
   private RequestCache requestCache=new HttpSessionRequestCache();
   //跳转
   private RedirectStrategy redirectStrategy=new DefaultRedirectStrategy();
   //方便读取自定义登录页的配置项
   @Autowired
   private SecurityProperties securityProperties;
   /**
   * 当需要身份认证的时候,跳转到这里
   * @param request
   * @param response
   * @return
   * @throws Exception
   */
   @RequestMapping("/authentication/require")
   @ResponseStatus(code=HttpStatus.UNAUTHORIZED)
   public SimpleResponse requiredAuthentication(HttpServletRequest request,HttpServletResponse response) throws Exception {
      SavedRequest saveRequest=requestCache.getRequest(request, response);
      if(saveRequest!=null) {
          String target=saveRequest.getRedirectUrl();
          logger.info("引发跳转的请求:"+target);
          if(StringUtils.endsWithIgnoreCase(target, ".html")) {
             //跳转到一个自定义的登录页
             redirectStrategy.sendRedirect(request, response, securityProperties.getBrowser().getLoginPage());
          }
      }
      return new SimpleResponse("访问的服务需要身份认证,请引导到登录页");
   }
}
在控制类中,在返回状态码的时候,需要使用一个对象,这个对象是 SimpleResonse,这个类的代码如下所示。
package com.cao.security.browser.support;
public class SimpleResponse {
   public SimpleResponse(Object content) {
      this.content=content;
   }
   private Object content;
ect getContent() {
      return content;
   }
   public void setContent(Object content) {
      this.content = content;
   }
}
配置项如下所示。
#JDBC
spring.datasource.driver-class-name = com.mysql.jdbc.Driver
spring.datasource.url=jdbc:mysql://127.0.0.1:3308/test?useUnicode=yes&characterEncoding=UTF-8&useSSL=false
spring.datasource.username = root
spring.datasource.password = 123456
##session store type
spring.session.store-type=none
#security login
#security.basic.enabled = false
jun.security.browser.loginPage=/newIndex.html
最后看效果。测试一:先访问 Demo 登录页,结果如图9.11所示。
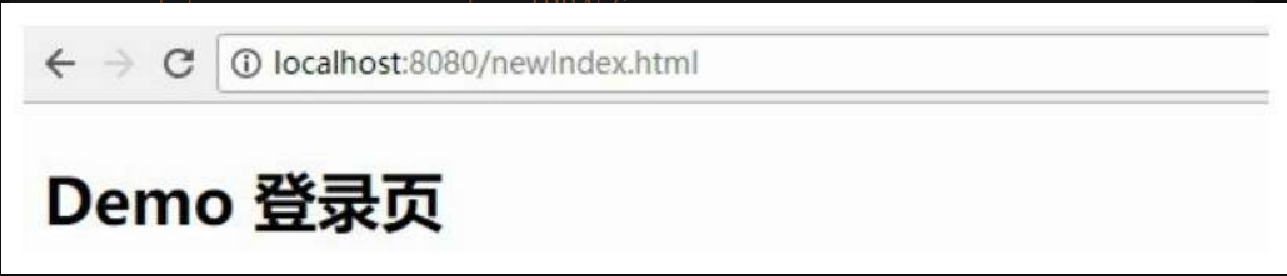
测试二:访问服务,结果如图9.12所示。

登录成功之后的处理
在登录成功之后,可以做一些处理,比如,进行自定义处理,具体的做法主要的思路有两部分,一是在配置文件中指定要处理的类,二是逻辑处理这个具体的类。因此,我们主要展示这两个部分的代码。配置类,指定登录之后的处理类,代码如下所示。
package com.cao.security.browser;
/**
  * @Description 覆盖security原有的配置
*/
@Configuration
public class BrowserSecurityConfig extends WebSecurityConfigurerAdapter{
   //获取自定义的登录页面
   @Autowired
   private SecurityProperties securityProperties;
   //使用自己的登录成功后的处理类
   @Autowired
   private AuthenticationSuccessHandler browserAuthenticationSuccessHandler;
   @Override
   protected void configure(HttpSecurity http) throws Exception {
      //表单登录的一个安全认证环境
      http.formLogin()
          .loginPage("/authentication/require")
          .loginProcessingUrl("/authentication/form")
          .successHandler(browserAuthenticationSuccessHandler)
            // http.httpBasic()
          .and()
          .authorizeRequests() //请求授权
          .antMatchers("/authentication/require", securityProperties.getBrowser().getLoginPage()).permitAll() //这个url不需要认证,包含自定义的登录页
          .anyRequest() //任何请求
          .authenticated() //都需要认证
          .and()
          .csrf().disable(); //去掉csrf的防护
   }
   @Bean
   public PasswordEncoder passwordEncoder() {
      return new BCryptPasswordEncoder();
   }
}
在上面的代码中,我们使用 successHandler 来指定登录成功之后的处理类,在这里指定一个 browserAuthenticationSuccessHandler 类进行处理。下面是登录成功之后的处理逻辑代码如下所示。
package com.cao.security.browser.authentication;
@Component(value="browserAuthenticationSucceswsHandler")
public class BrowserAuthenticationSuccessHandler implements AuthenticationSuccessHandler {
   private Logger logger=LoggerFactory.getLogger(getClass());
   @Autowired
   private ObjectMapper objectMapper;
   /**
   * @Description 登录成功会被调用
   */
   @Override
   public void onAuthenticationSuccess(HttpServletRequest request, HttpServletResponse response,
      Authentication authentication) throws IOException, ServletException {
      //Authentication 封装了认证信息
      logger.info("登录成功");
      response.setContentType("application/json;charset=UTF-8");
      //将authentication转为json字符串response.getWriter().write(objectMapper.writeValueAsString(authenticat ion));
   }
}
在上面的代码中,需要让类实现 AuthenticationSuccessHandler,然后在方法中重写 onAuthenticationSuccess,具体的逻辑处理放在这个方法中。
登录失败之后的处理
对比登录成功之后的处理,登录失败之后同样可以进行一些处理,分两个部分。一个部分是配置项,另一个部分是配置文件具体指定的失败处理类。配置文件指定的失败处理类,代码如下所示。
package com.cao.security.browser;
@Configuration
public class BrowserSecurityConfig extends WebSecurityConfigurerAdapter{
   //获取自定义的登录页面
   @Autowired
   private SecurityProperties securityProperties;
   //使用自己的登录成功后的处理类
   @Autowired
   private AuthenticationSuccessHandler browserAuthenticationSuccessHandler;
   //使用自己的登录失败后的处理类
   @Autowired
   private BrowserAuthenticationFailHandler browserAuthenticationFailHandler;
   @Override
   protected void configure(HttpSecurity http) throws Exception {
      //表单登录的一个安全认证环境
      http.formLogin()
          .loginPage("/authentication/require")
          .loginProcessingUrl("/authentication/form")
          .successHandler(browserAuthenticationSuccessHandler)
          .failureHandler(browserAuthenticationFailHandler)
            // http.httpBasic()
          .and()
          .authorizeRequests() //请求授权
          .antMatchers("/authentication/require", securityProperties.getBrowser().getLoginPage()).permitAll()
           //这个url不需要认证,包含自定义的登录页
          .anyRequest() //任何请求
          .authenticated() //都需要认证
          .and()
          .csrf().disable(); //去掉csrf的防护
   }
   @Bean
   public PasswordEncoder passwordEncoder() {
      return new BCryptPasswordEncoder();
   }
}
在上面的程序中,使用 failureHandler 指定登录失败的处理类,这段代码直接写在登录成功代码的后面即可。然后,看看登录失败的处理代码,如下所示。
package com.cao.security.browser.authentication;
@Component(value="browserAuthenticationFailHandler")
public class BrowserAuthenticationFailHandler implements AuthenticationFailureHandler {
   private Logger logger=LoggerFactory.getLogger(getClass());
   @Autowired
   private ObjectMapper objectMapper;
   @Override
   public void onAuthenticationFailure(HttpServletRequest request, HttpServletResponse response,
           AuthenticationException exception) throws IOException, ServletException {
      //这里不会有Authentication
      logger.info("登录失败");response.setStatus(HttpStatus.INTERNAL_SERVER_ERROR.value());
      response.setContentType("application/json;charset=UTF-8");
        response.getWriter().write(objectMapper.writeValueAsString(exception));
   }
}
在上面的代码中,需要让类实现 AuthenticationFailureHandler,然后在方法中重写 onAuthenticationFailure 方法,具体的逻辑处理放在这个方法中。