槽、命名槽和作用域槽
另一种在 Vue.js 中实现可重用性的组件组合模式是插槽(slots)。
槽(Slots)是组件的一部分,其中模板/渲染被委托回组件的使用者。
在这里,props 可以被认为是从父级传递到子级的数据,以便所属子级运行某些逻辑或渲染它。
插槽可以被认为是从父级传递到子级以供所属子级渲染的模板或标记。
传递要在子组件中渲染的标签
最简单的槽类型是默认子槽(child slot)。
我们可以定义一个带有槽的 Box 组件,如下所示。请注意,这个 Box 组件的作用非常小:
<template>
    <div>
        <slot />
    </div>
</template>
以下标记适用于父组件 (src/App.vue):
<template>
    <div>
        <Box>
            <h3>This whole h3 is rendered in the slot</h3>
        </Box>
    </div>
</template>

<script>
import Box from './components/Box.vue'

export default {
    components: {
        Box
    }
}
</script>
前面的代码在浏览器中将如下所示:
This whole h3 is rendered in the slotVue 单文件组件中模板(template)部分的作用域是使用父组件的作用域进行编译的。
考虑以下示例:
<template>
    <div>
        <Box>
            <h3>This whole h3 is rendered in the slot with parent count {{ count }}</h3>
        </Box>
        <button @click="count++">Increment</button>
    </div>
</template>

<script>
import Box from './components/Box.vue'

export default {
    components: {
        Box
    },
    data() {
        return { count: 0 }
    }
}
</script>
前面的代码将根据父组件中的值渲染 count。它无法访问 Box 实例 data 或 props,并将生成以下输出:

增加计数确实会更新模板,正如我们所期望的,如果模板中的变量绑定到父级上的数据。 这将生成以下输出:

槽是一种将子组件的一部分渲染委托给父组件的方法。对实例属性、数据或方法的任何引用都将使用父组件实例。这种类型的槽无法访问子组件的属性、props 或数据。
在下一节中,我们将了解如何使用命名槽来渲染多个部分。
使用命名槽来委托多个部分的渲染
当子组件需要能够将多个部分的模板委托给父组件时,可以使用命名槽。
例如,Article 组件可能会将 header 和 excerpt 的渲染委托给其父组件。
在本例中,Article.vue 文件中的内容如下所示。命名槽是具有表示槽名称的名称属性的槽条目:
<template>
    <article>
        <div>Title: <slot name="title" /></div>
        <div>Excerpt: <slot name="excerpt" /></div>
    </article>
</template>
通过这样做,您可以在另一个组件中使用该组件。
为了传递槽的内容,我们使用 v-slot:name 指令(其中 name 应替换为槽的名称)。
例如,对于名为 title 的槽,我们将使用 v-slot:title,而对于 excerpt 槽,我们将使用 v-slot:excerpt:
<template>
    <div>
    <Article>
        <template v-slot:title>
            <h3>My Article Title</h3>
        </template>
        <template v-slot:excerpt>
            <p>First paragraph of content</p>
            <p>Second paragraph of content</p>
        </template>
    </Article>
    </div>
</template>

<script>
import Article from './components/Article.vue'

export default {
    components: {
        Article
    }
}
</script>
当在浏览器中看到前面的应用程序时,它将如下所示:

正如您所看到的,指定的插槽确实呈现了预期的内容。
v-slot:slot-name 的简写语法是 #slot-name。我们可以重构使用 Article 的模板,如下所示:
<template>
<div>
<Article>
<template #title>
<h3>My Article Title</h3>
</template>
<template #excerpt>
<p>First paragraph of content</p>
<p>Second paragraph of content</p>
</template>
</Article>
</div>
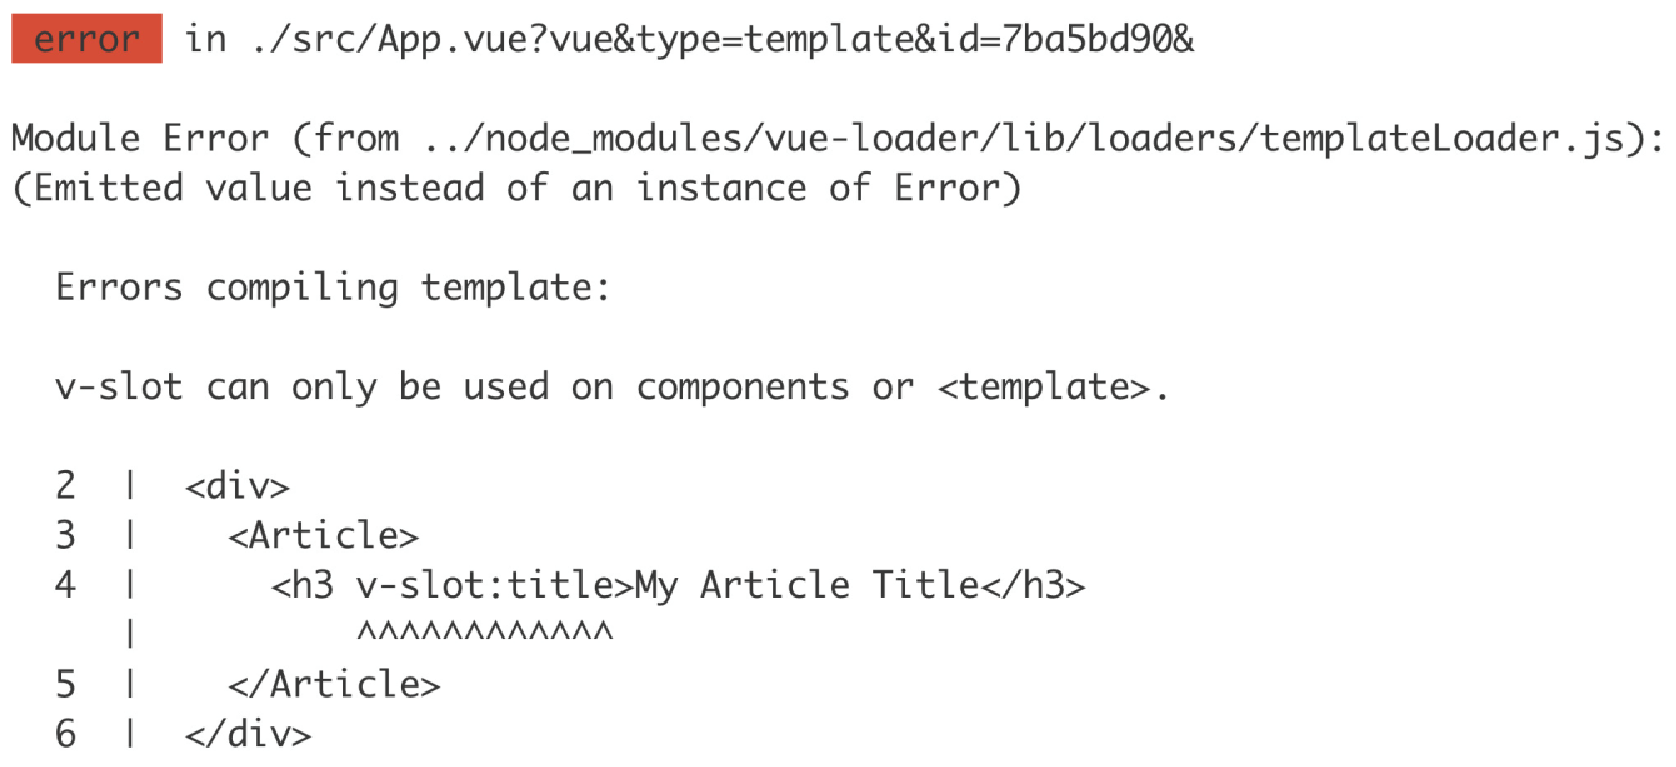
</template>v-slot 不能与原生元素一起使用。它只能使用模板(template)和组件。例如,以下 <template> 部分尝试在 h3 元素上设置 v-slot:
<template>
    <div>
        <Article>
            <h3 v-slot:title>My Article Title</h3>
        </Article>
    </div>
</template>
该模板将失败,并出现编译错误 v-slot can only be use on Components or <template>,如下图所示:
Vue.js 的早期版本允许使用替代语法来表示命名槽内容(这在 Vue 2.6.0+ 中已弃用)。使用 slot="slot-name" 代替 v-slot:slotname 指令样式。 原生元素以及模板和组件上允许使用 slot 语法。
|
适用于默认插槽的所有内容也适用于命名插槽。事实上,默认槽是一个名为 default 的命名槽。这意味着命名槽也可以访问父实例,但不能访问子实例。 |
默认插槽只是一个名为 default 的插槽,并且受到 Vue.js 的特殊处理,因为它默认在没有名称的插槽中使用。
默认插槽隐式推断如下:
<template>
    <MyComponent>
        <template>Default template</template>
    </MyComponent>
</template>
默认槽可以用简写槽符号来表示。
<template>
    <MyComponent>
        <template #default>Default template</template>
    </MyComponent>
</template>

# 默认插槽可以用长手写插槽符号表示
<template>
    <MyComponent>
        <template v-slot:default>Default template</template>
    </MyComponent>
</template>
我们现在已经了解了命名槽如何允许组件将某些部分的模板委托给使用者,以及这些命名槽如何拥有默认模板来满足命名槽可选的情况。
在下一节中,我们将学习如何使用作用域(scoped)槽来封装 prop 传递逻辑。
使用作用域(scoped)槽来包装 Prop 传递逻辑
到目前为止,我们探索的槽类型只能访问声明它们的组件实例。
有时,让父组件决定渲染,同时让子组件以某种方式转换数据是很有用的。这就是作用域插槽的用途。(子组件可以传回数据给父组件中的槽中)
作用域槽从子组件的槽开始,其中槽元素通过使用 v-bind 或简写 : 绑定了一些属性。
在这种情况下,item 绑定到 el。 el 是已传递给此 PagulatedList 组件的 items 属性中的元素:
<template>
    <ul>
        <li
            v-for="el in currentWindow"
            :key="el.id"
        >
            <slot :item="el" />
        </li>
    </ul>
</template>

<script>
export default {
    props: ['items', 'limit', 'offset'],
    computed: {
        currentWindow() {
            return this.items.slice(this.offset, this.limit)
        }
    }
}
</script>
在消费者端(父组件),我们可以将槽模板视为使用包含绑定到子组件中槽的所有数据的对象来调用。因此,这些槽被称为作用域;它们通过子组件定义的作用域对象传递。
在这种情况下,我们可以如下使用 PaginatedList:
<template>
    <div>
        <PaginatedList :items="snacks">
            <template #default="{ item }">
                {{ item.content }}
            </template>
        </PaginatedList>
    </div>
</template>
#default="{ item }" 是默认作用域插槽的简写符号,允许我们将插槽的作用域解构为 item。
插槽模板定义的长手写版本如下:
<template v-slot="slotProps">
    {{ slotProps.item.content }}
</template>
然后使用 item 来渲染 {{ item.content }}。脚本(script)部分(包含要渲染的 snacks)如下:
<script>
import PaginatedList from './components/PaginatedList.vue'

export default {
    components: {
        PaginatedList
    },
    data() {
        return {
            snacks: [
                {
                    id: 'ready-salted',
                    content: 'Ready Salted'
                },
                {
                    id: 'cheese-onion',
                    content: 'Cheese & Onion'
                },
                {
                    id: 'salt-vinegar',
                    content: 'Salt & Vinegar'
                },
            ]
        }
    }
}
</script>
我们在浏览器中得到以下输出:

至此,我们了解了作用域插槽如何为组件提供更大的灵活性,以将模板逻辑委托给使用者。
|
作用域插槽还具有已弃用的(从 Vue.js 2.6.0+ 开始)插槽作用域语法。已弃用的 v-slot:name="slotProps" 等效项将是 slot="name" slot-scope="slotProps"。 有关更多信息,请参阅 Vue.js 文档: https://vuejs.org/v2/guide/components-slots.html#Scoped-Slots-with-the-slot-scope-Attribute 。 |
现在,让我们学习如何借助这些命名插槽来实现 card 组件。
练习 4.04:使用命名槽实现 Card 组件
在本练习中,我们将使用命名槽实现一个卡组件。该卡片将包含标题、图像和描述部分。我们将使用槽来允许父组件定义标题(title)、图像(image)和描述(description)。
要访问本练习的代码文件,请参阅 https://packt.live/2UhLxlK 。
请按照以下步骤完成本练习:
-
我们将首先创建一个新的 src/components/Card.vue 组件,该组件具有支持三个槽的模板 - 标题(title)、图像(image)和描述(description):
<template> <div> <slot name="image" /> <slot name="title" /> <slot name="description" /> </div> </template> -
然后,我们将 Card.vue 组件导入到新 src/App.vue 文件的脚本部分:
<script> import Card from './components/Card.vue' export default { components: { Card } } </script> -
我们现在可以在模板(template)中使用 Card:
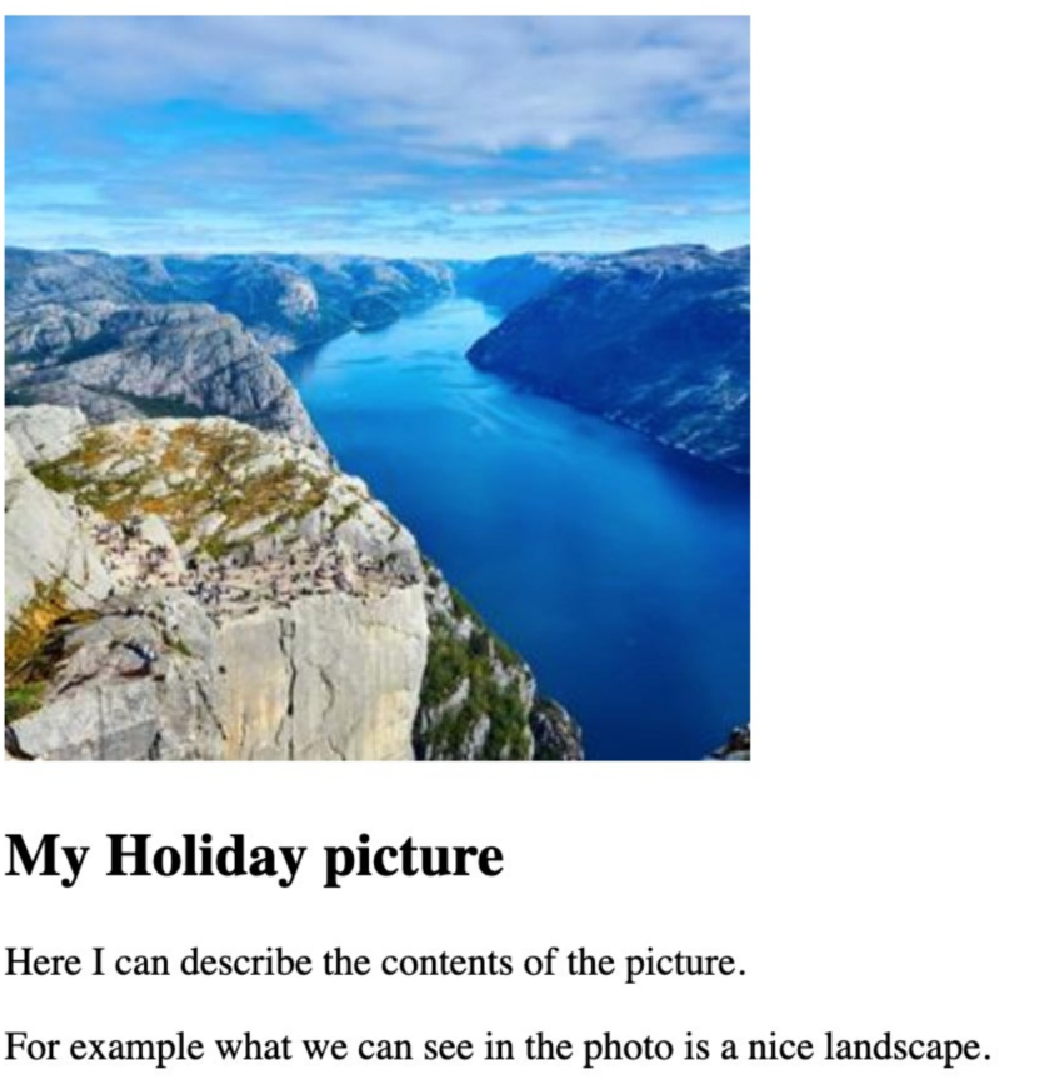
<template>
    <div id="app">
        <Card>
            <template #image>
                <img src="https://picsum.photos/id/1015/300" />
            </template>
            <template #title>
                <h2>My Holiday picture</h2>
            </template>
            <template #description>
                <p>Here I can describe the contents of the picture.</p>
                <p>For example what we can see in the photo is a nice landscape.</p>
            </template>
        </Card>
    </div>
</template>
现在,我们可以使用 npm run serve 启动 vue-cli dev 服务器并查看 Card 组件的运行情况。输出如下:
至此,我们了解了不同类型的插槽如何帮助创建更通用的组件。插槽允许子组件将自身某些部分的渲染推迟到其父组件(使用者)。
要重用单个模板中的功能,我们可以使用过滤器。我们将在下一节中学习如何使用它们。