为 Vue.js 应用程序配置 Cypress
Cypress 是 JavaScript E2E 测试框架。它旨在解决使用 JavaScript 编写 E2E 测试的特殊需求。这与 WebDriverIO ( https://webdriver.io/ )、Selenium Webdriver ( https://www.selenium.dev/ )、Puppeteer ( https://developers.google.com/web/tools/puppeteer/ ) 和 Playwright ( https://github.com/microsoft/playwright ) 等常用于编写 E2E 测试的成熟浏览器自动化解决方案形成了鲜明对比。
与其它解决方案相比,Cypress 的最大不同在于它只专注于编写 E2E 测试(而非通用浏览器自动化)。测试只能使用 JavaScript 编写(Selenium 支持其它语言),而且直到最近,它还只支持 Chrome 浏览器(根据 https://www.cypress.io/blog/2020/02/06/introducing-firefox-and-edgesupport-in-cypress-4-0/ ,Cypress 4.0 现已支持 Firefox 和 Microsoft Edge)。
Cypress 具有图形用户界面(GUI),可在本地运行和调试测试,并内置了断言(assertion)和存根/模拟(stubbing/mocking)库。
要将 Cypress 添加到使用 Vue CLI 的项目中,我们可以使用 e2e-cypress 插件 ( https://cli.vuejs.org/core-plugins/e2e-cypress.html ),其安装说明指导我们在命令行运行以下命令。作为添加插件的一部分,Cypress 及其支持包将被下载并解压,因此可能需要一段时间才能完成:
vue add @vue/e2e-cypress该插件添加了一个 test:e2e 脚本,我们可以使用以下命令运行该脚本。该命令需要一段时间才能启动,因为它需要运行应用程序的生产版本,然后启动 Cypress 应用程序:
npm run test:e2e最终,我们将看到 Cypress GUI,如下所示:

该插件为我们创建了一个默认的 test.js 文件。默认内容如下。测试转到应用程序根目录 (/) 并检查页面上的 h1 是否包含 Welcome to Your Vue.js App:
// https://docs.cypress.io/api/introduction/api.html
describe('My First Test', () => {
    it('Visits the app root url', () => {
        cy.visit('/')
        cy.contains('h1', 'Welcome to Your Vue.js App')
    })
})
这适用于空的 Vue CLI 项目。
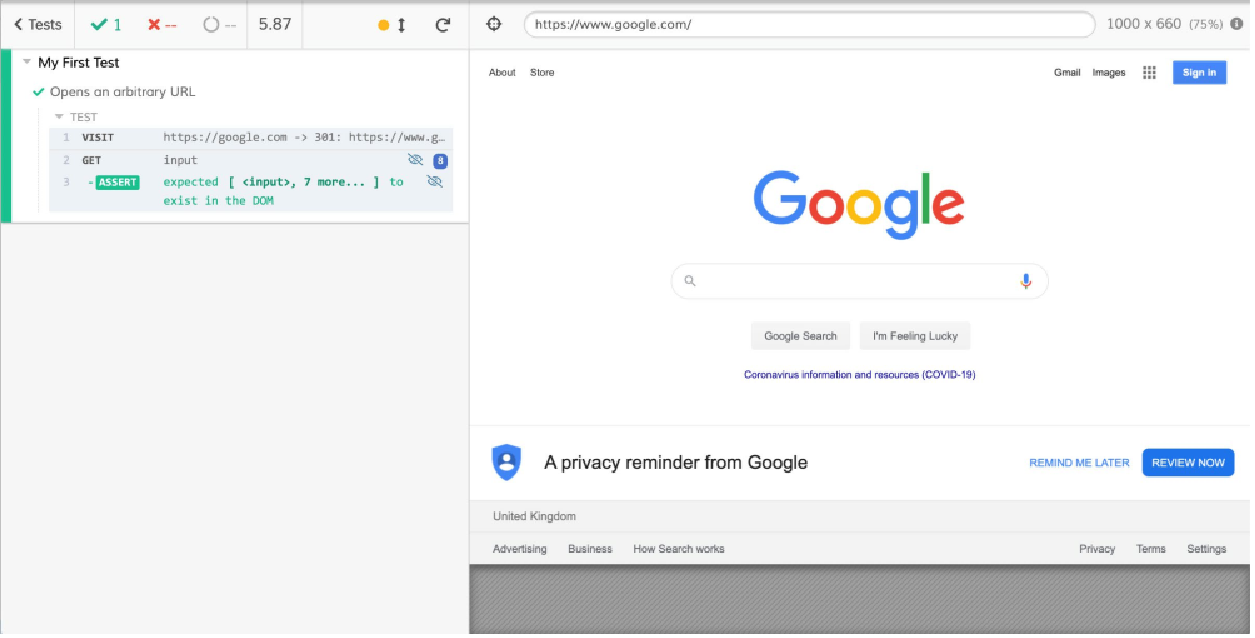
我们可以尝试使用 cy.visit(url) 访问 google.com,并首先使用 cy.get('input') 选择页面上的输入元素,然后使用 .should('exist') 断言:
describe('My First Test', () => {
    it('Opens an arbitrary URL', () => {
        cy.visit('https://google.com')
        cy.get('input').should('exist')
    })
})
我们可以通过单击 Cypress UI 中的 test.js 来运行测试(当 npm run test:e2e 正在运行时),如下所示:

当 Cypress 运行测试时,会打开一个浏览器窗口来运行它们:
我们现在已经了解了如何安装和使用 Cypress 来访问网页。
在下一节中,我们将了解如何使用 Cypress 与 UI 交互并检查 UI。
使用 Cypress 与 Vue.js UI 交互并检查
为了对 Commentator Pro 应用程序进行端到端测试,我们应该首先添加一些要测试的内容。在本例中,我们将有一个带有应用程序名称的标题 (h2)。 在 App.vue 文件中,我们将有以下代码:
<template>
<div id="app" class="p-10">
<div class="flex flex-col">
<h2
class="uppercase leading-loose pb-4 flex justify-center
m-auto md:w-1/3 text-xl mb-8 font-bold text-gray-800
border-b"
>
Commentator Pro
</h2>
</div>
</div>
</template>
<script>
export default {}
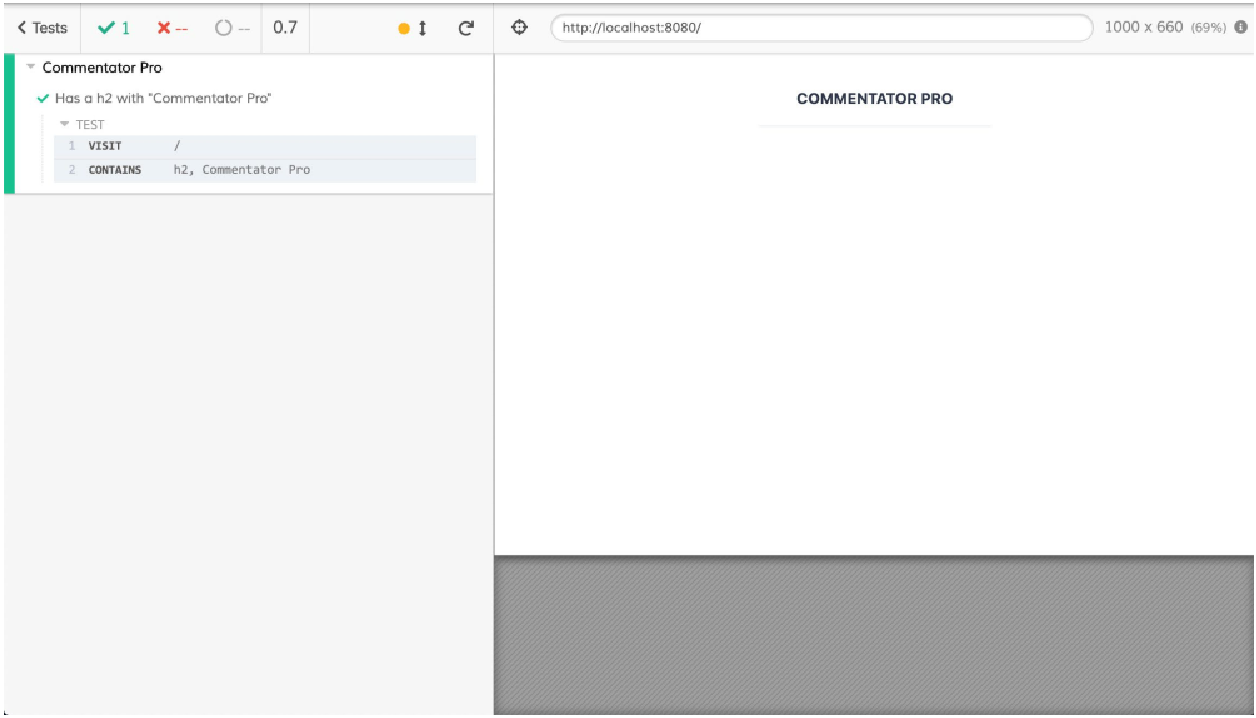
</script>为了使用 Cypress 进行测试,我们可以使用以下代码更改 tests/e2e/specs/test.js 文件。我们将使用 cy.visit('/') 转到正在运行的应用程序,然后使用 cy.contains('h2', 'Commentator Pro') 检查页面上的 h2 是否包含 Commentator Pro。cy.contains 函数已重载,可与一个参数(要匹配的文本)或两个参数(容器的选择器和要匹配的文本)一起使用:
describe('Commentator Pro', () => {
    it('Has a h2 with "Commentator Pro"', () => {
        cy.visit('/')
        cy.contains('h2', 'Commentator Pro')
    })
})
然后我们可以使用 Cypress UI 运行 test.js,如以下屏幕截图所示:
现在我们已经了解了如何访问页面并对其内容进行断言,接下来我们将了解如何使用 Cypress 自动测试 Vue.js 应用程序中的新功能。
练习13.01:添加“新评论”按钮和相应的E2E测试
为了使 Commentator Pro 应用程序有用,我们应该有一个 “添加新评论” 按钮以允许用户添加评论。
我们将添加一个带有文本 “添加新评论” 的蓝色巨型按钮,并使用 Cypress 编写相应的 E2E 测试。
要访问本练习的代码文件,请参阅 https://packt.live/36PefjJ 。
为此,请执行以下步骤:
-
要在应用程序中添加按钮,我们将在
src/App.vue中添加一个带有一些TailwindCSS类的按钮元素:<template> <div id="app" class="p-10"> <div class="flex flex-col"> <!-- rest of template --> <button class="flex mx-auto bg-blue-500 hover:bg-blue-700 text-white font-bold py-2 px-4 rounded"> Add a New Comment </button> </div> </div> </template>输出应显示如下:
 Figure 5. Figure 13.6: Commentator Pro application with the "Add a New Comment" button
 -
接下来,我们将在
tests/e2e/specs/add-new-comment.js中创建一个新的E2E测试。我们将把套件名称和测试描述设置为 "添加新评论",主页上应分别有一个带有正确文本的按钮:describe('Adding a New Comment', () => { it('the homepage should have a button with the right text', () => { // test will go here }) }) -
为了测试主页,我们必须使用
cy.visit('/')导航到它:describe('Adding a New Comment', () => { it('the homepage should have a button with the right text', () => { cy.visit('/') }) }) -
最后,我们可以编写断言,表明页面上有一个包含文本 “添加新评论” 的按钮实例:
describe('Adding a New Comment', () => { it('the homepage should have a button with the right text', () => { cy.visit('/') cy.contains('button', 'Add a New Comment') }) }) -
我们可以使用 Cypress UI 运行此测试(使用
npm run test:e2e运行它):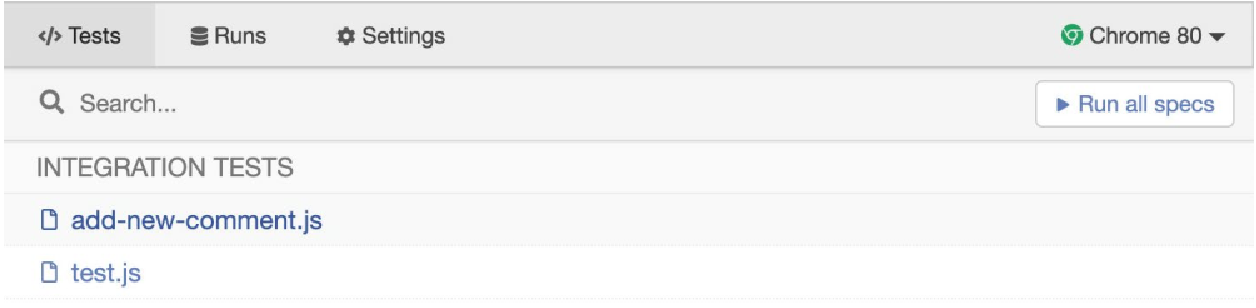 Figure 6. Figure 13.7: The "add-new-comment.js" test displaying in the Cypress UI
 -
当我们运行测试时,我们将在 Chrome 中得到以下输出。测试通过,因为主页上有一个带有相关文本的按钮:

我们现在已经了解了如何访问页面并对其内容进行断言。
在下一节中,我们将了解如何使用 Cypress 来测试交互行为。Cypress 具有自动选择器重试功能,这使其非常适合测试高度交互的 Vue.js 应用程序。我们将了解如何使用 Cypress 与 UI 交互并断言交互的效果。
使用 Cypress 触发并等待 UI 更新
到目前为止,我们编写的测试非常简单,仅检查应用程序在浏览器中加载时是否崩溃。
E2E 测试的优势之一是以高保真度测试 UI 在用户与其交互时是否按预期运行。 在本节中,我们将使用 Cypress 的选择(.get() 函数)、事件触发(.click() 函数)和断言(.should() 函数)功能来测试 Vue.js 应用程序。 Cypress 对 DOM 选择的自动重试将允许我们在没有明确的等待/超时条件的情况下编写 E2E 测试。等待和超时是其它 E2E 测试系统的主要内容,并且往往是测试中不稳定的根源。
首先,我们将向 Commentator Pro 应用程序添加评论编辑器。通过单击 “添加新评论” 按钮可以切换显示编辑器(一个简单的文本区域)。
为了继续编写测试而不需要争论复杂而脆弱的选择器,我们将开始添加 data-test-id 属性;首先,我们可以在 App.vue 文件中的 “添加新评论” 按钮中添加一个:
<template>
    <div id="app" class="p-10">
        <div class="flex flex-col">
            <!-- rest of template -->
            <button
            class="flex mx-auto bg-blue-500 hover:bg-blue-700
            text-white font-bold py-2 px-4 rounded"
            data-test-id="new-comment-button"
            >
            Add a New Comment
            </button>
            <!-- rest of template -->
        </div>
    </div>
</template>
接下来,我们将向 App 组件上的 Vue.js data() 方法添加 showEditor 属性。我们将在编辑器的 v-if 中使用此表达式。我们还可以设置新评论按钮来切换此实例属性:
<template>
    <div id="app" class="p-10">
        <div class="flex flex-col">
            <!-- rest of template -->
            <button
            @click="showEditor = !showEditor"
            class="flex mx-auto bg-blue-500 hover:bg-blue-700
            text-white font-bold py-2 px-4 rounded"
            data-test-id="new-comment-button"
            >
                Add a New Comment
            </button>
            <!-- rest of template -->
        </div>
    </div>
</template>

<script>
export default {
    data() {
        return {
            showEditor: false
        }
    }
}
</script>
我们可以使用由 showEditor 切换的 new-comment-editor data-test-id 添加编辑器:
<template>
    <div id="app" class="p-10">
        <div class="flex flex-col">
            <!-- rest of template -->
            <div v-if="showEditor">
                <textarea
                data-test-id="new-comment-editor"
                class="flex mx-auto my-6 shadow appearance-none
                border rounded py-2 px-3 text-gray-700 leading-tight
                focus:outline-none focus:shadow-outline"
                >
                </textarea>
            </div>
        </div>
    </div>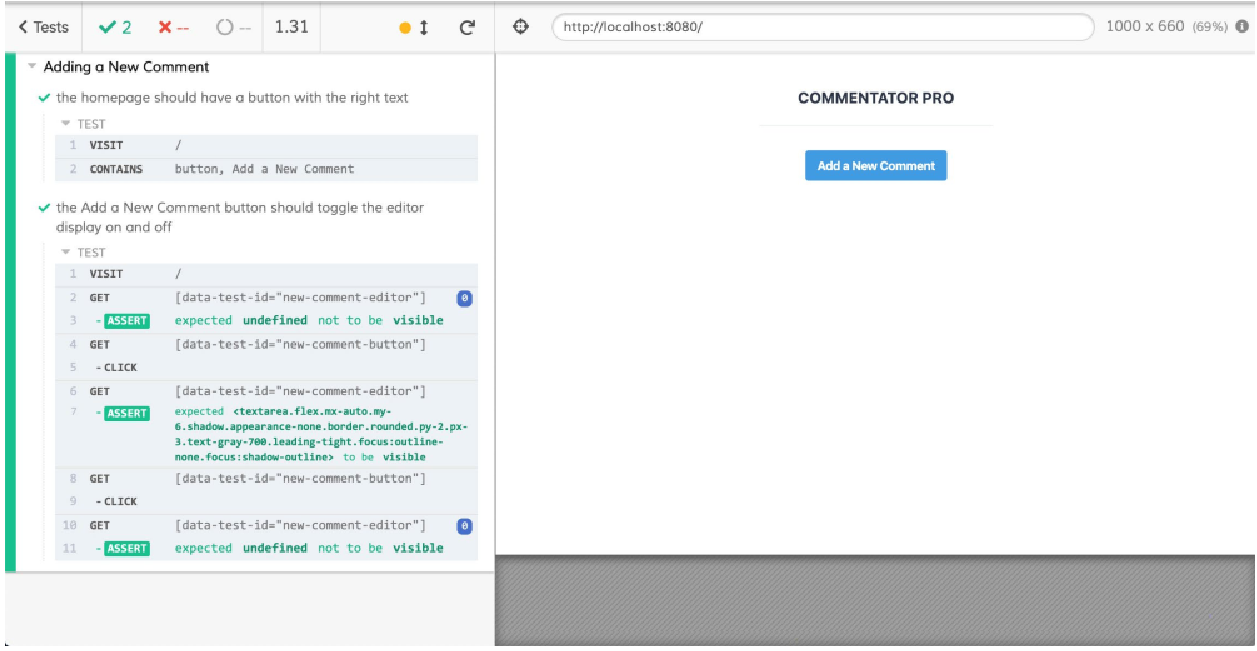
</template>为了测试切换,我们可以添加一个测试来打开该应用程序并检查评论编辑器是否最初显示,以及检查它是否显示取决于新评论按钮(new-comment-button)上触发的点击次数 :
describe('Adding a New Comment', () => {
    // other tests
    it('the Add a New Comment button should toggle the editor display on and off', () => {
        cy.visit('/')
        cy.get('[data-test-id="new-comment-editor"]').should('not.be.visible')
        cy.get('[data-test-id="new-comment-button"]').click()
        cy.get('[data-test-id="new-comment-editor"]').should('be.visible')
        cy.get('[data-test-id="new-comment-button"]').click()
        cy.get('[data-test-id="new-comment-editor"]').should('not.be.visible')
    })
})
前面的代码将生成以下结果:
我们现在已经了解了如何编写对 DOM 元素进行选择和断言的 Cypress 测试。
|
作为惯例, |
练习 13.02:添加新的评论编辑器输入和提交功能
为了能够将新的评论文本发送到 API,我们需要将文本存储在 Vue.js 状态中。添加评论的另一个先决条件是有一个虚拟的 “提交” 按钮。
要访问本练习的代码文件,请参阅 https://packt.live/2HaWanh 。
要添加这些功能及其相应的测试,请执行以下步骤:
-
为了将
textarea(编辑器)内容存储在内存中,我们将使用v-model。我们将创建一个新的数据(状态)变量newComment,它被初始化为""。现在,v-model将双向绑定textarea内容和newComment:<template> <div id="app" class="p-10"> <!-- rest of template --> <textarea data-test-id="new-comment-editor" class="flex mx-auto my-6 shadow appearance-none border rounded py-2 px-3 text-gray-700 leading-tight focus:outline-none focus:shadow-outline" v-model="newComment" > </textarea> <!-- rest of template --> </div> </template> <script> export default { data() { return { // other data properties newComment: '' } } } </script> -
我们将在编辑器内添加一个
submit按钮,该按钮仅在编辑器打开时显示。我们还确保包含data-test-id="new-comment-submit"属性,以便稍后能够通过Cypress选择它:<template> <div id="app" class="p-10"> <!-- rest of template --> <div v-if="showEditor"> <!-- rest of template --> <button data-test-id="new-comment-submit" class="flex mx-auto bg-blue-500 hover:bg-blue-700 text-white font-bold py-2 px-4 rounded" > Submit </button> <!-- rest of template --> </div> <!-- rest of template --> </div> </template> -
现在是时候添加一个
E2E测试来测试当我们在其中输入文本时new-comment-editor是否按预期工作。为了实现这一点,我们需要加载应用程序并单击新评论按钮以便显示编辑器。然后我们可以选择new-comment-editor(通过data-test-id)并使用 Cypress.type函数添加一些文本。我们可以链接.should('have.value', 'Just said…')来验证我们与textarea的交互是否成功:describe('Adding a New Comment', () => { // other tests it('the new comment editor should support text input', () => { cy.visit('/') // Get the editor to show cy.get('[data-test-id="new-comment-button"]').click() cy.get('[data-test-id="new-comment-editor"]').should('be.visible') cy.get('[data-test-id="new-comment-editor"]') .type('Just saying...') .should('have.value', 'Just saying...') }) })当使用 Cypress UI 运行时,此添加
add-new-comment测试套件应产生以下结果: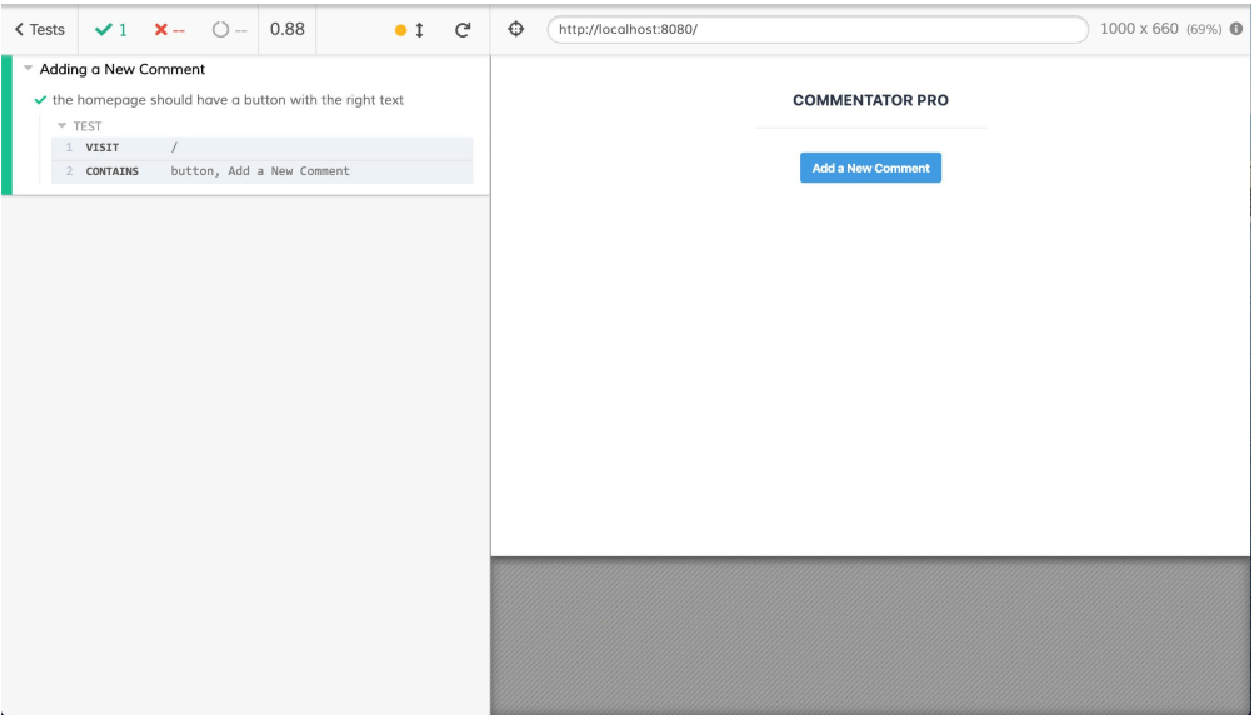 Figure 9. Figure 13.10: Cypress running "add-new-comment" tests, including the new editor text input test
 -
最后,我们可以添加一个
E2E测试来检查提交按钮默认情况下不会出现,但当我们单击新评论按钮时会出现。我们还可以检查new-comment-submit按钮的文本内容:describe('Adding a New Comment', () => { // other tests it('the new comment editor should have a submit button', () => { cy.visit('/') cy.get('[data-test-id="new-comment-submit"]').should('not.be.visible') // Get the editor to show cy.get('[data-test-id="new-comment-button"]').click() cy.get('[data-test-id="new-comment-submit"]').should('be.visible') cy.contains('[data-test-id="new-comment-submit"]', 'Submit') }) })当通过 Cypress UI 运行此测试时,我们看到以下结果:
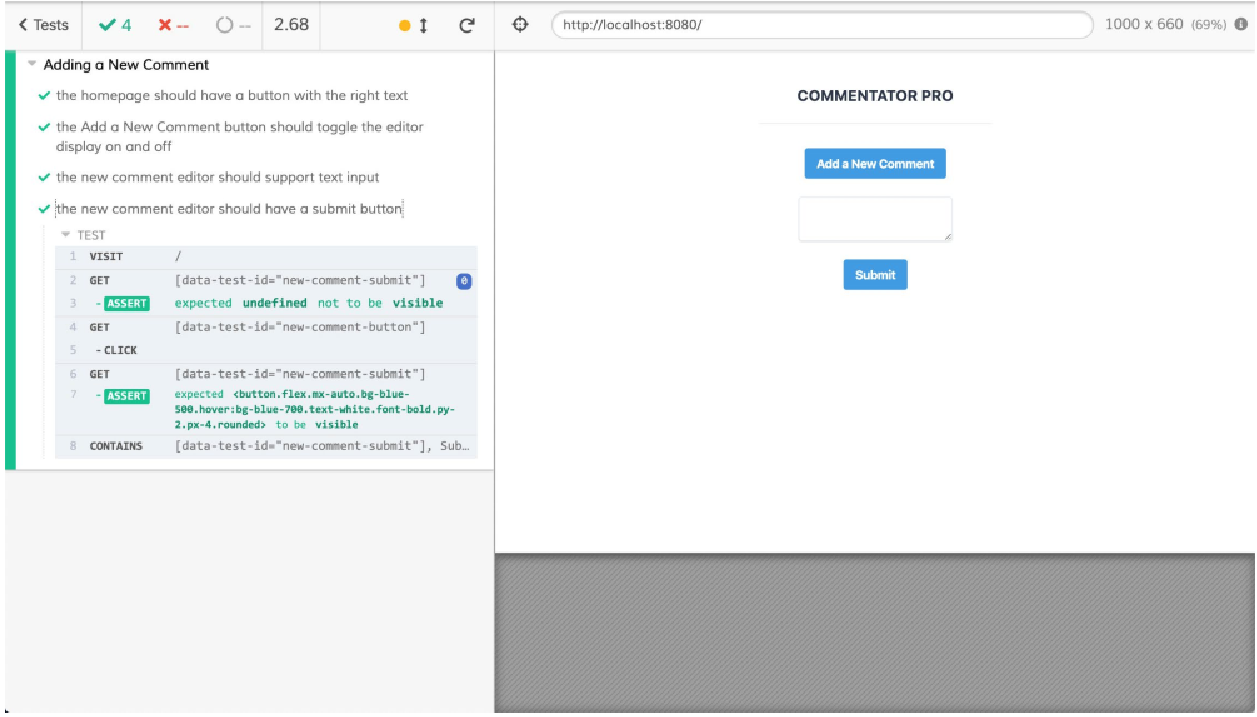 Figure 10. Figure 13.11: Cypress running "add-new-comment" tests, including the new submit button test
 -
我们可以添加的另一项功能是禁用提交按钮,直到文本编辑器中出现文本。为此,我们可以将
:disabled绑定到新评论提交按钮上的!newComment。我们将使用降低的不透明度使按钮看起来被禁用。顺便说一句,我们在newComment和textarea之间添加双向绑定的一个重要原因是启用如下所示的 UI 验证:<template> <!-- rest of template --> <button data-test-id="new-comment-submit" class="flex mx-auto bg-blue-500 hover:bg-blue-700 text-white font-bold py-2 px-4 rounded" :disabled="!newComment" :class="{ 'opacity-50 cursor-not-allowed' : !newComment }" > Submit </button> <!-- rest of template --> </template> -
相关测试将使用 Cypress 的
should('be.disabled')和should('not.be.disabled')断言来查看当文本编辑器内容为空时new-comment-submit按钮是否被禁用:
describe('Adding a New Comment', () => {
// other tests
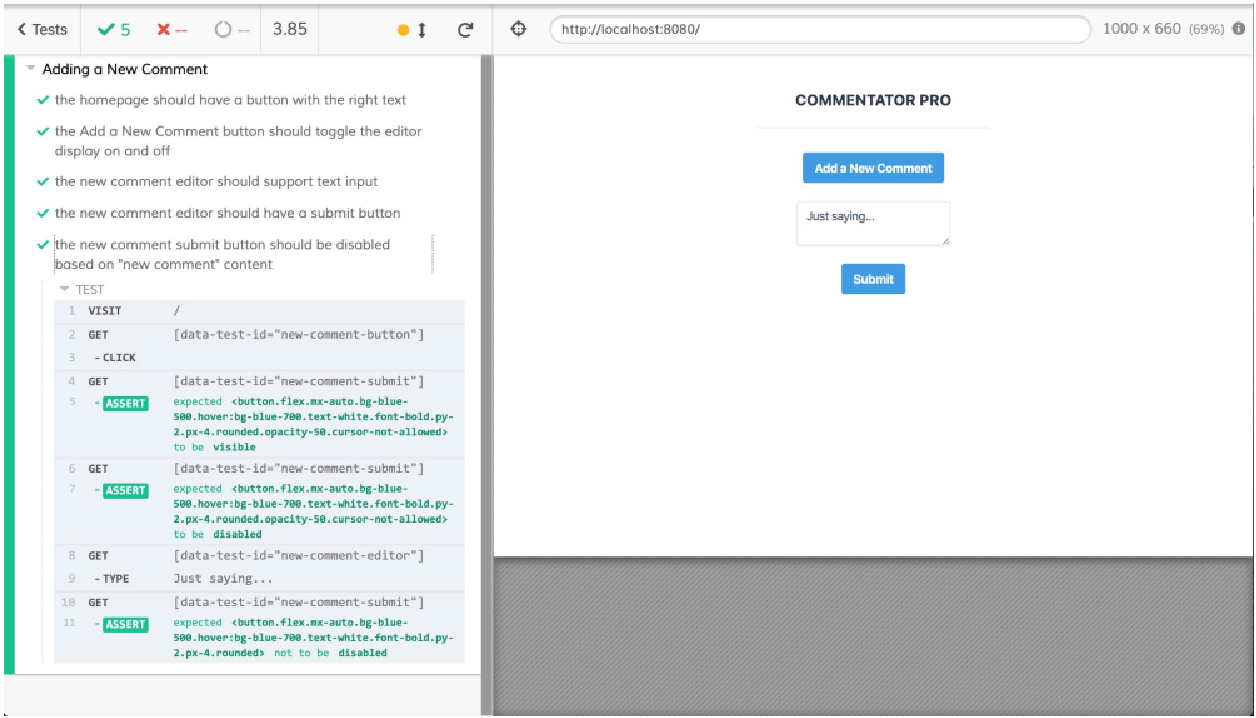
it('the new comment submit button should be disabled based on "new comment" content', () => {
cy.visit('/')
// Get the editor to show
cy.get('[data-test-id="new-comment-button"]').click()
cy.get('[data-test-id="new-comment-submit"]').should('be.visible')
cy.get('[data-test-id="new-comment-submit"]').should('be.disabled')
cy.get('[data-test-id="new-comment-editor"]').type('Just saying...')
cy.get('[data-test-id="new-comment-submit"]').should('not.be.disabled')
})
})当通过 Cypress UI 和 Chrome 自动化运行时,会产生以下输出:
现在我们已经了解了如何使用 Cypress 来选择、点击和输入文本。我们还看到了检查元素可见性、文本内容、输入值和禁用状态的方法。
熟悉其它自动化框架的人一定会注意到,在 Cypress 测试中,没有明确的等待或重试。这是因为 Cypress 会自动等待和重试断言和选择。我们编写的大多数测试并没有以主要方式展示这一点,但在下一个练习中,我们将把异步性引入其中。
练习 13.03:向新评论编辑器添加提交状态
为了展示 Cypress 令人印象深刻的自动重试/等待功能,我们将考虑为新评论编辑器添加和测试 submitting 状态。
实际上,我们将对提交按钮的点击做出反应,并显示一个旋转器 2.5 秒,以模拟对后端 API 的相当慢的 HTTP 请求。这个示例展示了 Cypress 自动等待和重试选择的能力。 此功能减少了任意等待的需要以及与之相关的不稳定。
要访问本练习的代码文件,请参阅 https://packt.live/2UzsYJU :
-
为了显示微调器(spinner),我们将
tailwindcss-spinner包添加到项目中:npm install --save-dev tailwindcss-spinner # or yarn add -D tailwindcss-spinner -
我们需要在 Tailwind 配置文件 (
tailwind.js) 中对其进行配置。需要使用require('tailwindcss-spinner')导入,作为插件添加,并且需要在主题中设置相关变量。我们的微调器颜色为灰色(gray),使用大小为4的 Tailwind 间距,边框宽度为2px,持续时间为500ms:module.exports = { theme: { extend: {}, spinner: (theme) => ({ default: { color: theme('colors.gray.400'), size: theme('spacing.4'), border: theme('borderWidth.2'), speed: theme('transitionDuration.500'), }, }), }, variants: { spinner: ['responsive'], }, plugins: [require('tailwindcss-spinner')()], } -
接下来,我们需要在
data()中向 Vue.js 应用程序添加isSubmitting状态,这将允许我们切换提交按钮的状态。我们将其初始化为false,因为在用户单击提交按钮之前我们不会提交任何内容:<script> export default { data() { return { // other properties isSubmitting: false } } } </script> -
接下来,我们将为提交按钮添加一个单击处理程序(作为
methods.submitNewComment)。它将使用setTimeout模拟2.5秒的加载时间:<script> export default { // other component properties methods: { submitNewComment() { this.isSubmitting = true setTimeout(() => { this.isSubmitting = false }, 2500) } } } </script> -
现在我们已经有了一个假的提交处理程序,我们应该将其绑定到新评论提交(
new-comment-submit)按钮上的单击事件:<template> <div id="app" class="p-10"> <div class="flex flex-col"> <!-- rest of template --> <div v-if="showEditor"> <!-- rest of editor --> <button data-test-id="new-comment-submit" class="flex mx-auto bg-blue-500 hover:bg-blue-700 textwhite font-bold py-2 px-4 rounded" :disabled="!newComment" :class="{ 'opacity-50 cursor-not-allowed' : !newComment}" @click="submitNewComment()" > Submit </button> </div> </div> </div> </template> -
现在是我们需要对提交按钮做出反应的部分。当
isSubmitting为true时,我们将显示微调器。为此,我们只需设置当isSubmitting为true时添加的微调器(spinner)类。 除此之外,我们将设置按钮在isSubmitting为true时禁用:<template> <div id="app" class="p-10"> <div class="flex flex-col"> <!-- rest of template --> <div v-if="showEditor"> <!-- rest of editor --> <button data-test-id="new-comment-submit" class="flex mx-auto bg-blue-500 hover:bg-blue-700 text-white font-bold py-2 px-4 rounded" :disabled="!newComment || isSubmitting" :class="{ 'opacity-50 cursor-not-allowed' : !newComment, spinner: isSubmitting}" @click="submitNewComment()" > Submit </button> </div> </div> </div> </template> -
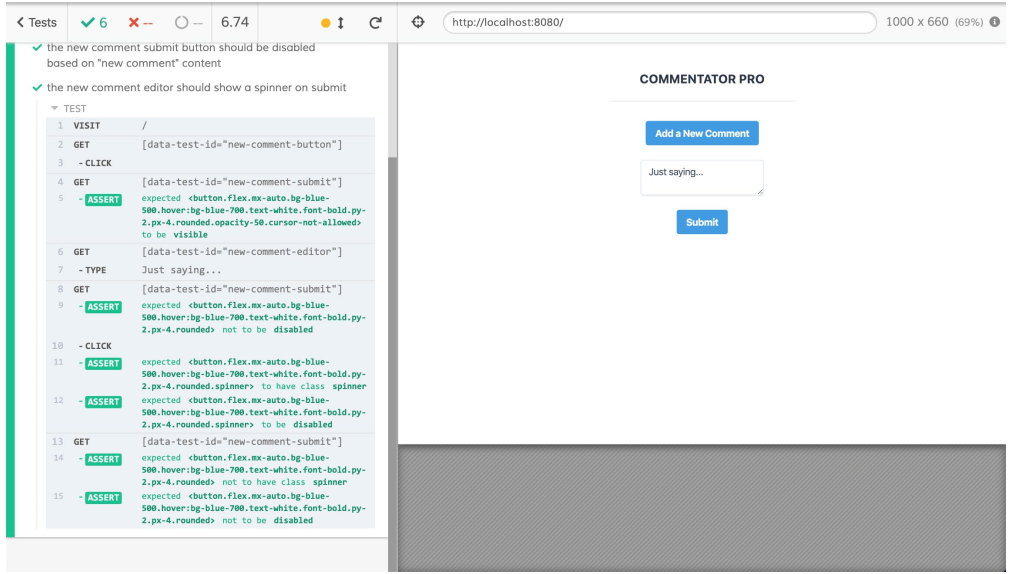
最后,我们可以添加一个测试来检查单击提交按钮时是否出现加载微调器。首先,我们需要设置文本编辑器,以便在单击 “添加新评论” 按钮并为评论设置文本值时,显示并启用文本编辑器。接下来,我们可以单击已启用的
new-comment-submit按钮并检查它是否已禁用并具有微调器(spinner)类(使用should()函数)。之后,我们应该编写另一个断言,该按钮不再被禁用并且不显示微调器:
it('the new comment editor should show a spinner on submit',
() => {
    cy.visit('/')
    // Get the editor to show
    cy.get('[data-test-id="new-comment-button"]').click()
    cy.get('[data-test-id="new-comment-submit"]').should('be.visible')
    cy.get('[data-test-id="new-comment-editor"]').type('Just saying...')
    cy.get('[data-test-id="new-comment-submit"]')
    .should('not.be.disabled')
    .click()
    .should('have.class', 'spinner')
    .should('be.disabled')
    // eventually, the spinner should stop showing
    cy.get('[data-test-id="new-comment-submit"]')
    .should('not.have.class', 'spinner')
    .should('not.be.disabled')
})
尽管旋转器显示了 2.5 秒,但由于赛普拉斯的自动重试/等待功能,该测试仍然通过:
现在,我们已经了解了 Cypress 如何通过在断言或选择失败的情况下自动等待/重试,使我们能够无缝地解决应用程序中的异步问题。
拦截 HTTP 请求
如前文所述,Cypress 被设计为 JavaScript E2E 测试解决方案。这意味着它具有断言、自动等待/重试、运行应用程序的合理默认值和广泛的模拟功能等内置功能。
HTTP 请求可能很慢,往往会给测试带来不稳定的行为。所谓不稳定是指间歇性的假阴性,即不是由应用程序问题而是由连接问题(例如,运行测试的服务器和后端主机之间的连接问题)引起的失败。
我们还将测试后端系统的实施。在使用持续集成(CI)时,这意味着必须在需要运行 E2E 测试的 CI 管道步骤中运行后端系统。
通常,当拦截后端请求并发送模拟响应时,我们也说 HTTP 请求被存根化(stubbed),以避免测试剥落(指与应用程序更改无关的间歇性故障)。
由于请求并没有完全通过堆栈(包括后端 API),因此从技术上讲,这已经不再是系统的完整 E2E 测试了。不过,我们可以将其视为前端应用程序的 E2E 测试,因为整个应用程序是由单独的练习组成的,并不针对特定的实现。
为了在 Cypress 中模拟请求,我们需要使用 cy.server() 和 cy.route()。Cypress 文档还告诉我们,为了使用 HTTP 拦截功能,我们目前需要一个使用 XMLHttpRequest(而非 fetch API)的客户端。
|
支持 HTTP 级别拦截的工作正在进行中(这意味着最终将支持 |
我们将使用 unfetch 库,它在 XMLHttpRequest 之上实现 fetch 接口。我们可以使用以下命令安装它:
npm install --save-dev unfetch
# or
yarn add -D unfetch
然后我们可以将其导入到 src/App.vue 中,如下所示。
<script>
import fetch from 'unfetch'
// rest of component
</script>
为了展示 HTTP 拦截,我们将从 JSONPlaceholder 获取评论列表,并将它们存储在评论响应实例变量下。我们可以使用 fetch (我们导入 unfetch 时使用的名称)在 mounted() 生命周期事件中执行此操作,如下所示:
<script>
// imports
export default {
    data() {
        return {
            // other data properties
            comments: []
        }
    },
    mounted() {
        fetch('https://jsonplaceholder.typicode.com/comments')
        .then(res => res.json())
        .then(comments => {
            this.comments = comments
        })
    }
    // other component properties
}
</script>
示例评论包括 ID、正文和电子邮件以及其它属性。
这意味着我们可以通过创建 ul 容器来渲染评论,该容器仅显示是否有评论(comments.length > 0)。 在 ul 容器内,我们可以使用 v-for 渲染具有卡片布局的 li 元素列表。每张卡片都会在 mailto: 链接中渲染评论正文和作者的电子邮件。
请注意我们如何分别为列表容器和列表项设置 comments-list 和 comment-card data-test-ids:
<template>
<div id="app" class="p-10">
<div class="flex flex-col">
<!-- rest of template -->
<ul
v-if="comments.length > 0"
class="flex flex-col items-center my-4 mx-auto
md:w-2/3 lg:w-1/2"
data-test-id="comments-list"
>
<li
class="flex flex-col px-6 py-4 rounded overflow-hidden
shadow-lg mb-6"
v-for="(comment, index) in comments"
:key="comment.id + index"
data-test-id="comment-card"
>
<p class="flex text-gray-700 text-lg mb-4">{{ comment.body }}</p>
<p class="flex text-gray-600 font-semibold text-sm">
<a :href="'mailto:' + comment.email">
{{ comment.email }}</a>
</p>
</li>
</ul>
</div>
</div>
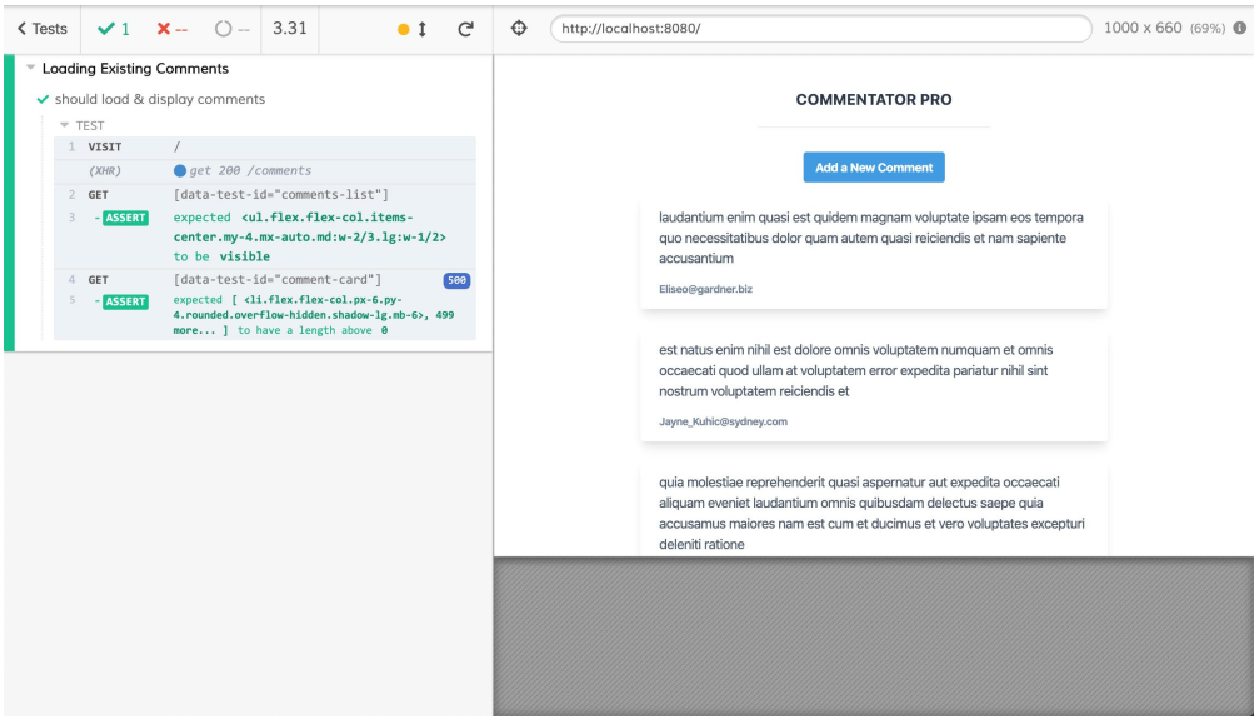
</template>如果我们要在没有 HTTP 拦截的情况下进行测试,我们就必须保持断言非常通用。 例如,我们可以检查 comments-list 是否可见,并且在新的 E2E 测试文件中是否存在一定数量(大于 0)的 comment-card 实例:
describe('Loading Existing Comments', () => {
    it('should load & display comments', () => {
        cy.visit('/')
        cy.get('[data-test-id="comments-list"]').should('be.visible')
        cy.get('[data-test-id="comment-card"]').should('have.length.gt', 0)
    })
})
使用 Cypress GUI 运行的以下测试通过了,但测试非常通用。我们无法对评论的具体数量或其内容做出任何断言:
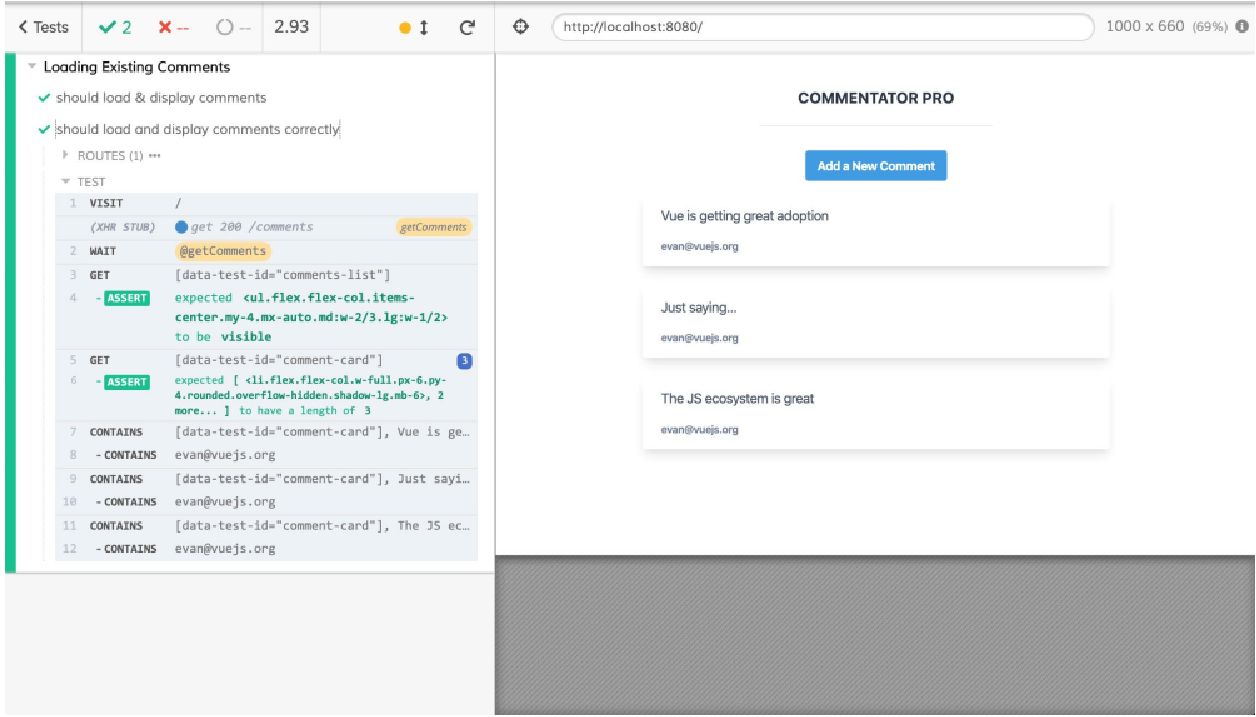
为了拦截请求,我们必须使用 cy.server() 初始化 Cypress 模拟服务器。 然后我们可以使用 cy.route() 拦截特定请求,这会产生以下新测试。 cy.route 当与两个参数一起使用时,采用 URL 后跟存根响应,在我们的例子中是注释数组。我们将在存根中使用虚构的电子邮件地址:
describe('Loading Existing Comments', () => {
    // other tests
    it('should load and display comments correctly', () => {
        cy.server()
        cy.route('**/comments', [
            {
                body: 'Vue is getting great adoption',
                email: 'evan@vuejs.org',
                id: 100,
            },
            {
                body: 'Just saying...',
                email: 'evan@vuejs.org',
                id: 10
            },
            {
                body: 'The JS ecosystem is great',
                email: 'evan@vuejs.org',
                id: 1
            }
        ]).as('getComments')
    })
})
一旦我们设置了存根路由,我们就可以访问该页面并使用 cy.wait('@getComments') 等待评论获取完成,因为我们之前已将评论获取路由的别名设置为 getComments 与 .as('getComments'):
describe('Loading Existing Comments', () => {
    // other tests
    it('should load and display comments correctly', () => {
        // test setup
        cy.visit('/')
        cy.wait('@getComments')
    })
})然后我们可以开始断言,首先,评论列表(comments-list)是可见的,然后断言评论卡(comment-card)的数量:
describe('Loading Existing Comments', () => {
    // other tests
    it('should load and display comments correctly', () => {
    // test setup
    cy.get('[data-test-id="comments-list"]').should('be.visible')
    cy.get('[data-test-id="comment-card"]').should('have.length', 3)
    })
})
我们还可以使用 .contains() 函数断言卡片的具体内容:
describe('Loading Existing Comments', () => {
    // other tests
    it('should load and display comments correctly', () => {
        // test setup
        cy.contains('[data-test-id="comment-card"]', 'Vue is getting great adoption').contains('evan@vuejs.org')
        cy.contains('[data-test-id="comment-card"]', 'Just saying...').contains('evan@vuejs.org')
        cy.contains('[data-test-id="comment-card"]', 'The JS ecosystem is great').contains('evan@vuejs.org')
    })
})
然后我们可以使用 Cypress GUI 运行该套件并查看它是否通过:
我们现在已经了解了如何以及为何使用 Cypress 来存根 HTTP 请求。
练习 13.04:提交时向 API 发表评论
新的评论提交按钮目前仅设置加载状态几秒钟,然后重置 - 评论实际上并未发送到任何地方。
让我们使用 JSONPlaceholder API 作为发送新评论的位置。
当对 API 的 POST 请求成功时,我们会将评论添加到评论列表的顶部。
要访问本练习的代码文件,请参阅 https://packt.live/2IIWY3g 。
为了完成练习,我们将执行以下步骤:
-
首先让
submitNewComment方法实际上使用fetch(实际上是unfetch)将数据发送到c:<script> // imports export default { // other component properties methods: { submitNewComment() { this.isSubmitting = true fetch('https://jsonplaceholder.typicode.com/comments', { method: 'POST', headers: { 'Content-Type': 'application/json' }, body: JSON.stringify({ email: this.email, body: this.newComment }) }) } } } </script>遗憾的是,
fetch()调用本身并不能更新数据或脱离加载状态。为此,我们需要链式调用一些.then()函数来处理响应,并调用.catch函数以防出错。成功后(.then),我们应获取请求的 JSON 输出,并将其添加到注释数组副本的前面。我们还应该重置isSubmitting、newComment和showEditor。在出错时(.catch),我们只需将加载状态isSubmitting重置为false;我们不会清除编辑器或关闭它,因为用户可能想再次尝试提交:<script> // imports export default { // other component properties methods: { submitNewComment() { this.isSubmitting = true fetch( // fetch params ).then(res => res.json()) .then(data => { this.comments = [ data, ...this.comments, ] this.isSubmitting = false this.newComment = '' this.showEditor = false }).catch(() => { this.isSubmitting = false }) } } } </script>我们现在应该将新测试添加到
tests/e2e/specs/add-new-comment.js测试套件中。 -
首先,为了成为
JSONPlaceholder的良好用户,我们将为add-new-comment套件存根所有指向/comments的GET请求。为此,我们将使用beforeEach钩子启动 Cypress 存根服务器(cy.server()),并用[]响应(cy.route('GET', '**/comments', []))存根删除对任何匹配**/commentsglob 的 URL 的 GET 请求:describe('Adding a New Comment', () => { beforeEach(() => { cy.server() // GET comments is not the concern of this test suite cy.route('GET', '**/comments', []) }) // tests -
然后我们可以继续更新新的评论编辑器应该在提交测试时显示一个旋转器(spinner),因为我们不再使用
setTimeout而是使用 HTTP 请求。首先,我们需要删除/commentsPOST 请求,为此我们将使用cy.route的配置对象语法,以便在 HTTP 请求中引入一些延迟,使其不会立即响应。我们将此请求别名为.as('newComment'):describe('Adding a New Comment', () => { // setup & tests it('the new comment editor should show a spinner on submit', () => { cy.route({ method: 'POST', url: '**/comments', delay: 1500, response: {} }).as('newComment') // rest of the test }) }) -
我们现在可以使用
cy.wait()来等待newCommentHTTP 请求完成,然后再检查微调器是否消失,而不是// eventually, the spinner should stop showing:describe('Adding a New Comment', () => { // setup & tests it('the new comment editor should show a spinner on submit',() => { // test setup // click the "submit" button // check the spinner appears cy.wait('@newComment') // check that the spinner is gone }) }) -
我们添加了新功能,可以在提交操作成功完成后关闭编辑器,因此我们应该添加相关测试。我们将使用与更新加载状态测试类似的骨架,设置 POST 注释路由,将
cy.route('POST', '**/comments', {}), 别名为.as('newComment')。然后,我们就可以显示新的评论编辑器,添加一些文本,并提交表单。然后,我们将继续等待POST请求完成,然后检查编辑器和提交按钮是否不再可见:describe('Adding a New Comment', () => { // other tests it('adding a new comment should close the editor', () => { cy.route( 'POST', '**/comments', { body: 'Just saying...', email: 'hi@vuejs.org' } ).as('newComment') cy.visit('/') // Get the editor to show cy.get('[data-test-id="new-comment-button"]').click() cy.get('[data-test-id="new-comment-submit"]').should('be.visible') cy.get('[data-test-id="new-comment-editor"]').type('Just saying...') cy.get('[data-test-id="new-comment-submit"]') .should('not.be.disabled') .click() cy.wait('@newComment') cy.get('[data-test-id="new-comment-editor"]').should('not.be.visible') cy.get('[data-test-id="new-comment-submit"]').should('not.be.visible') }) })现在可以使用 Cypress GUI 运行此测试并将通过:
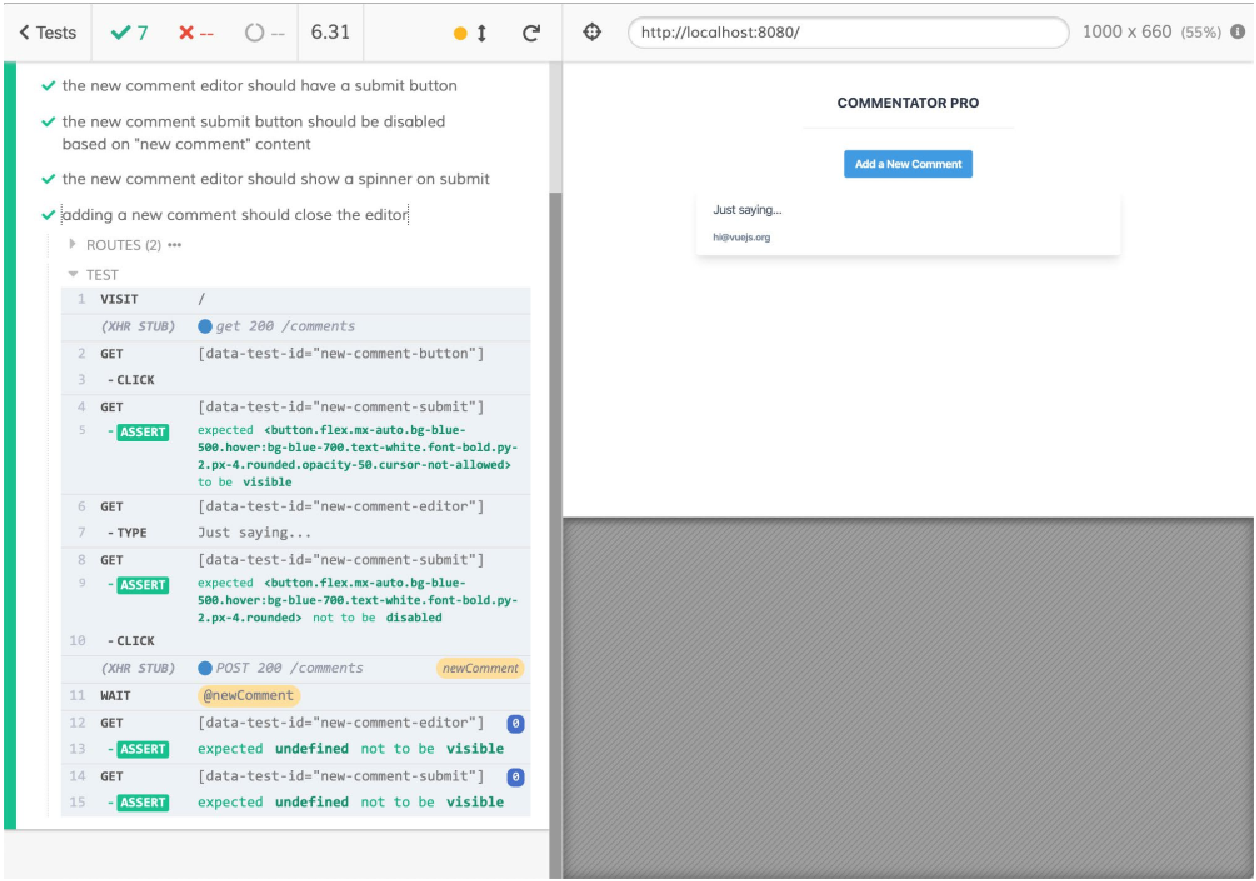 Figure 15. Figure 13.16: Cypress running "add-new-comment" tests, including the editor closing on submission test
 -
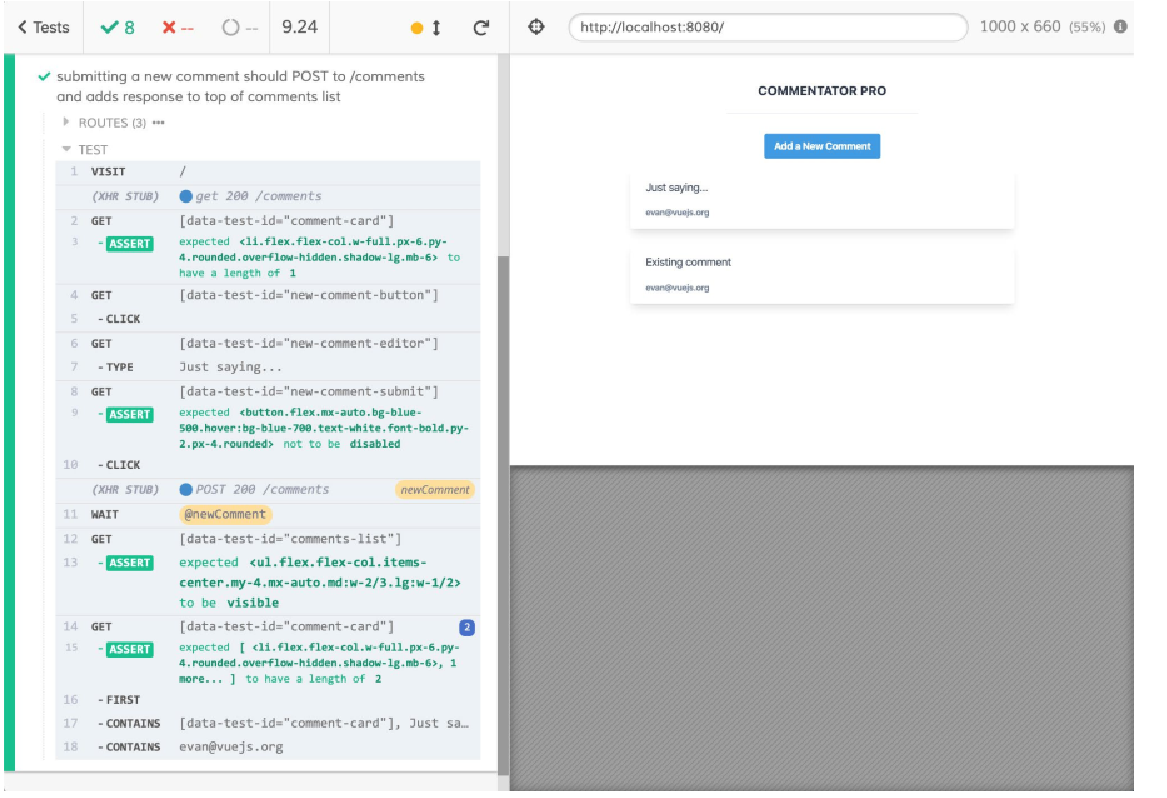
我们添加的第二个功能是,HTTP 请求完成后,新案例将添加到评论列表的前面。 为了测试这一点,最好将评论的
GET请求的响应更改为至少包含一个元素(以便我们可以检查新评论是否已添加到列表顶部):describe('Adding a New Comment', () => { // setup & other tests it('submitting a new comment should POST to /comments and adds response to top of comments list', () => { cy.route('GET', '**/comments', [ { email: 'evan@vuejs.org', body: 'Existing comment' } ]) }) }) -
然后,我们可以使用一些模拟数据存根
POST请求,将文本添加到编辑器,然后提交表单:describe('Adding a New Comment', () => { // setup & other tests it('submitting a new comment should POST to /comments and adds response to top of comments list', () => { // GET request stubbing cy.route({ method: 'POST', url: '**/comments', response: { email: 'evan@vuejs.org', body: 'Just saying...', }, }).as('newComment') cy.visit('/') cy.get('[data-test-id="comment-card"]').should('have.length', 1) cy.get('[data-test-id="new-comment-button"]').click() cy.get('[data-test-id="new-comment-editor"]').type('Just saying...') cy.get('[data-test-id="new-comment-submit"]') .should('not.be.disabled') .click() cy.wait('@newComment') }) }) -
最后,我们可以使用
cy.get()、.first()和.contains()的组合来断言第一个注释是新添加的注释:describe('Adding a New Comment', () => { // setup & other tests it('submitting a new comment should POST to /comments and adds response to top of comments list', () => { // setup & wait for POST completion cy.get('[data-test-id="comments-list"]').should('be.visible') cy.get('[data-test-id="comment-card"]') .should('have.length', 2) .first() .contains('[data-test-id="comment-card"]', 'Just saying...') .contains('evan@vuejs.org') }) })
当使用 Cypress GUI 运行 add-new-comment 套件时,我们可以看到新的测试通过了:
我们现在已经了解了如何使用 Cypress 拦截 HTTP 请求,因此在下一节中,我们将了解 Cypress 提供的一些围绕视觉回归(快照)测试的报告工具。
使用 Cypress 快照进行视觉回归测试
到目前为止,我们使用 Cypress 编写的测试类型大部分都是功能测试。
功能测试检查应用程序的行为是否符合预期。视觉测试检查应用程序的外观是否符合预期。
有多种方法可以检查渲染的 CSS,但这种方法往往相当乏味,并且在重构标记或样式时容易损坏(即,相同的视觉输出但具有不同的规则或标记)。
幸运的是,Cypress 的 cypress-plugin-snapshots 插件允许我们拍摄并比较应用程序的快照。首先,需要使用以下命令安装它:
npm install --save-dev cypress-plugin-snapshots
# or
yarn add -D cypress-plugin-snapshots
该插件在 Cypress 选择上添加了 .toMatchImageSnapshot 方法。为了让它工作,我们需要在插件的初始化文件中注册它。
我们应该导入 cypress-plugin-snapshots/plugin 并使用插件初始化数据运行其导出 initPlugin :
const { initPlugin } = require('cypress-plugin-snapshots/plugin');

module.exports = (on, config) => {
    initPlugin(on, config);
    // rest of plugin config, including return
}
我们还需要从 cypress-plugin-snapshots/commands 注册相关命令,这可以在 commands.js 文件中完成:
import 'cypress-plugin-snapshots/commands'我们还需要将 cypress-plugin-snapshots 的一些配置添加到 cypress.json:
{
    "//": "other config",
    "env": {
        "cypress-plugin-snapshots": {
            "autoCleanUp": false,
            "autopassNewSnapshots": true,
            "diffLines": 3,
            "imageConfig": {
                "createDiffImage": true,
                "resizeDevicePixelRatio": true,
                "threshold": 0.01,
                "thresholdType": "percent"
            },
            "screenshotConfig": {
                "blackout": [],
                "capture": "fullPage",
                "clip": null,
                "disableTimersAndAnimations": true,
                "log": false,
                "scale": false,
                "timeout": 30000
            },
            "backgroundBlend": "difference"
        }
    }
}
最后,我们可以在 test.js 文件中添加快照测试。
首先,我们将清理文件并删除 /comments API 调用(这对于快照测试特别有用):
describe('Commentator Pro', () => {
    beforeEach(() => {
        cy.server()
        cy.route('GET', '**/comments', [
        {
            body: 'Just saying...',
            email: 'evant@vuejs.org'
        }
        ]).as('getComments')
    })
    // tests
})
接下来,我们可以添加视觉回归测试。我们将打开编辑器以最大化单个快照测试,使用 #app 获取整个应用程序,并快照:
describe('Commentator Pro', () => {
// setup & other tests
it('visual regression', () => {
cy.visit('/')
cy.get('[data-test-id="new-comment-button"]').click()
cy.wait('@getComments')
cy.get('[data-test-id="new-comment-editor"]').should('be.visible')
cy.get('#app').toMatchImageSnapshot({
threshold: 0.001,
})
})
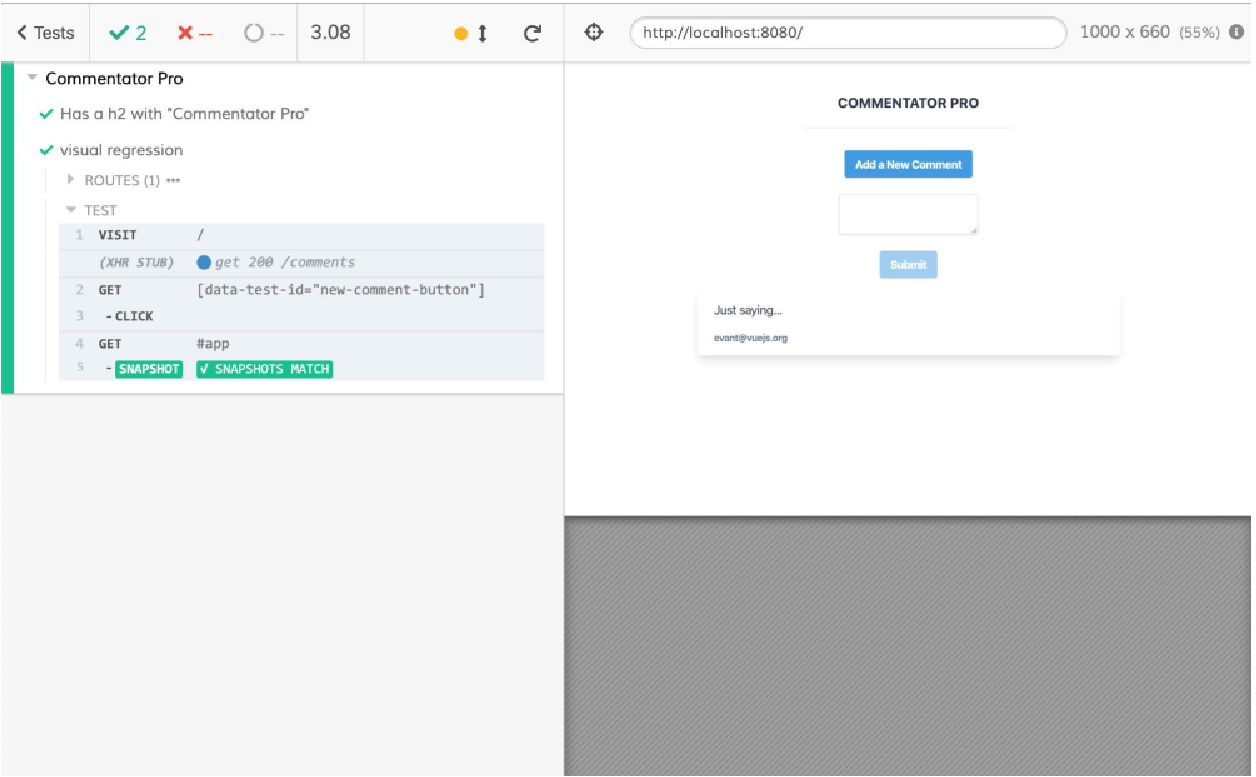
})当使用 Cypress UI 运行测试时,我们看到以下输出:
我们可以通过在 App.vue 文件中将按钮颜色更改为红色(从 bg-blue-500 更改为 bg-red-500)来显示失败的快照:
<template>
<div id="app" class="p-10">
<div class="flex flex-col">
<!-- rest of template -->
<button
@click="showEditor = !showEditor"
class="flex mx-auto bg-red-500 hover:bg-blue-700
text-white font-bold py-2 px-4 rounded"
data-test-id="new-comment-button"
>
Add a New Comment
</button>
<!-- rest of template -->
</div>
</div>
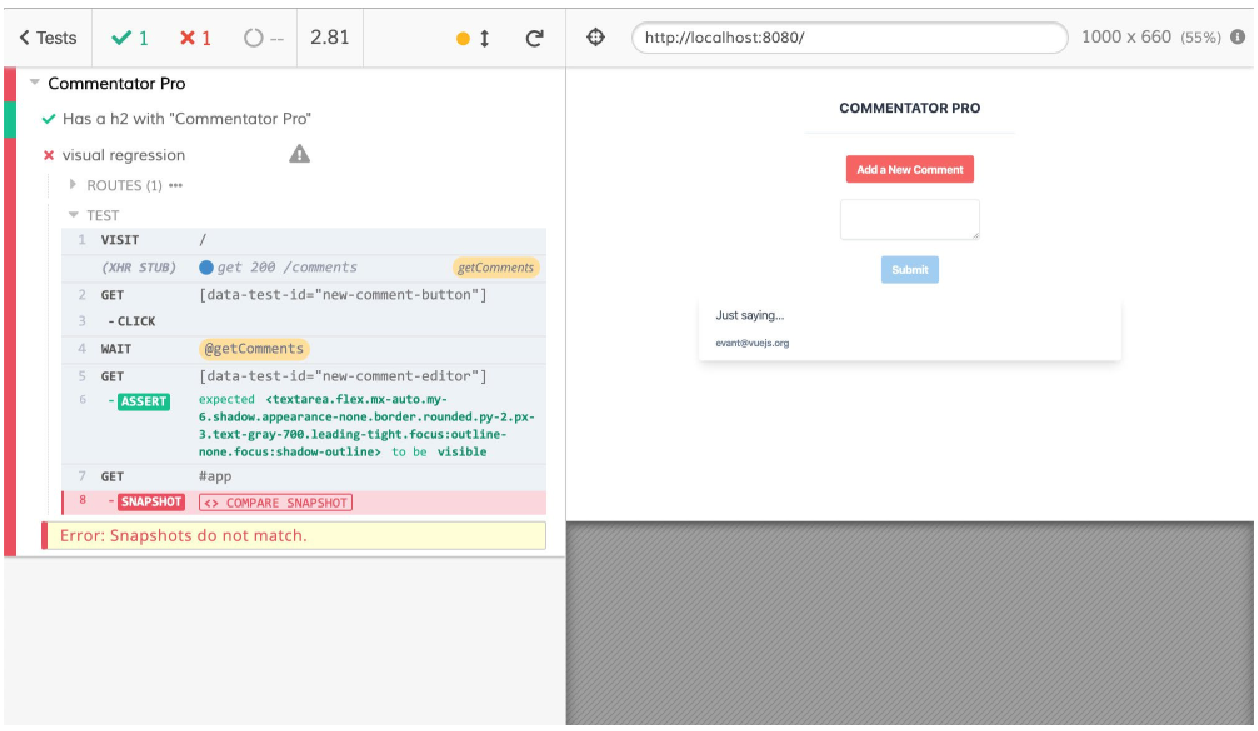
</template>当我们运行相关的测试集时,它们现在失败了(因为,正如我们所看到的,按钮是红色而不是蓝色):
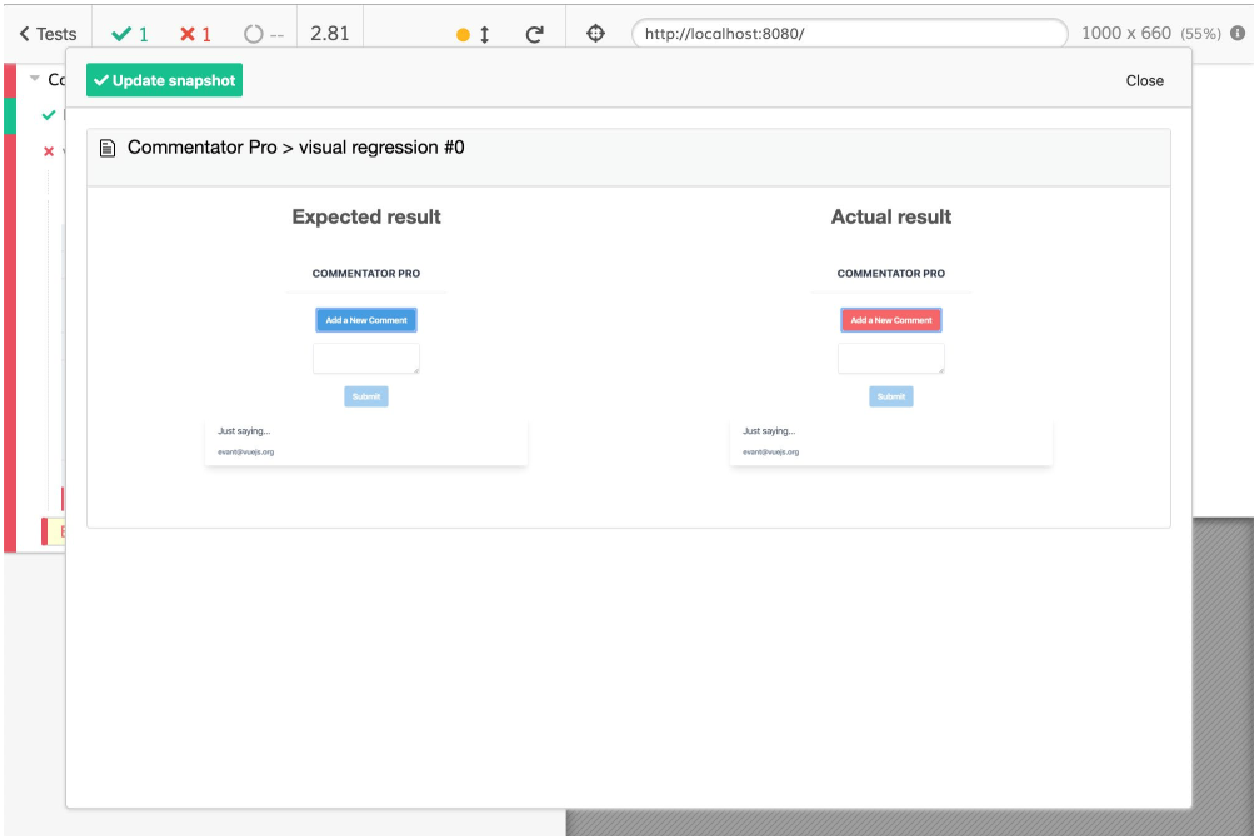
通过单击 “比较快照”,我们将获得一个视觉差异视图,这使我们能够更新快照:
我们现在已经了解了如何使用 Cypress 进行视觉回归测试。
我们现在将考虑添加新功能及其所有相关测试。
活动 13.01:添加设置用户电子邮件和测试的功能
您会记得我们已将 evan@vuejs.org 硬编码为任何评论的电子邮件地址。 我们在此活动中要做的是添加一个电子邮件输入,该输入将设置评论的电子邮件(email)属性。 我们将在新的 tests/e2e/specs/enter-email.js 套件中添加相关测试:
-
为了跟踪电子邮件,我们将其设置为
data()中的一个反应状态,并向页面添加电子邮件类型输入,该页面将使用v-model双向绑定到电子邮件。 我们还添加标签和相应的标记。请注意,我们将电子邮件输入上的data-test-id属性设置为email-input。 -
现在,我们将添加一个
beforeEach挂钩来设置 Cypress 模拟服务器并消除GET评论(列表)请求。 评论列表请求应别名为getComments。 -
我们将添加第一个测试,检查电子邮件输入的输入是否正常。 我们将转到应用程序,输入电子邮件,然后检查我们输入的内容现在是否为输入值。
当使用 Cypress UI 运行时,我们应该得到以下通过测试:
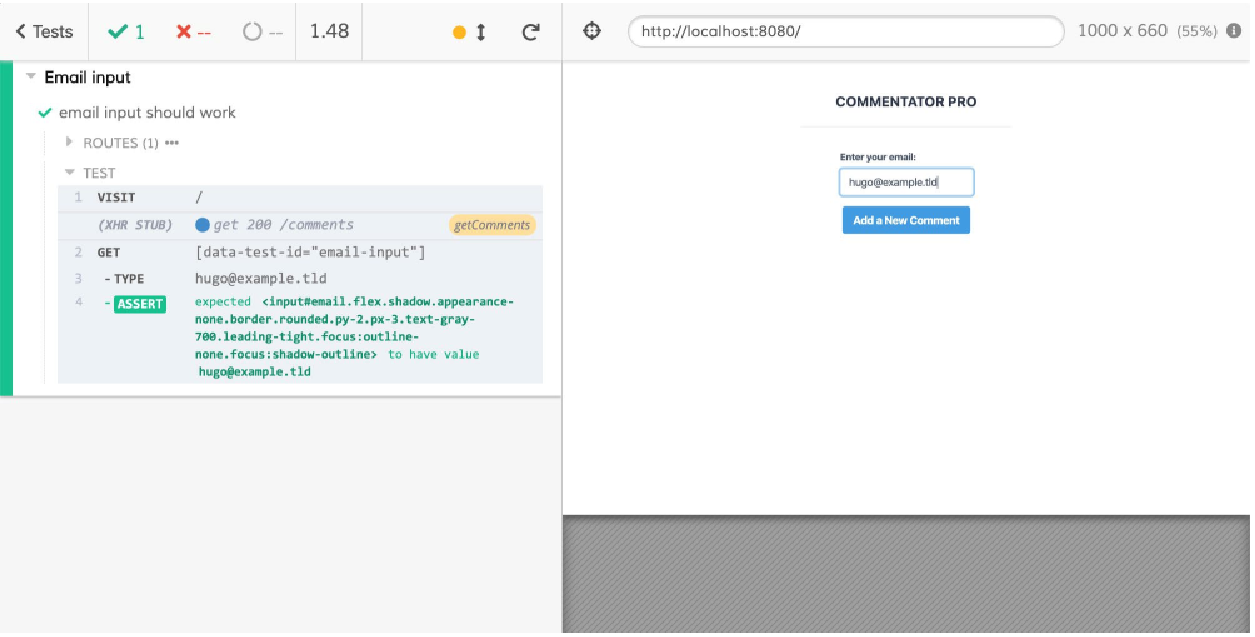 Figure 20. Figure 13.21: Cypress running "enter-email" tests, with the email input test
 -
拥有
email属性是添加评论的先决条件,因此当电子邮件为空 (!email) 时,我们将禁用 “添加新评论” 按钮。我们将绑定到禁用属性并根据电子邮件字段是否填充来切换一些类。 -
通过这个新的在电子邮件为空时禁用添加新评论按钮的功能,我们应该添加一个新的 E2E 测试。 我们将加载页面,并在初始加载时检查电子邮件输入是否为空并且 “添加新评论” 按钮是否已禁用。然后,我们将在电子邮件输入字段中输入一封电子邮件,并检查 “添加新评论” 按钮现在是否未禁用,这意味着它已启用。
当使用 Cypress UI 运行时,我们应该看到新测试通过,并显示以下输出:
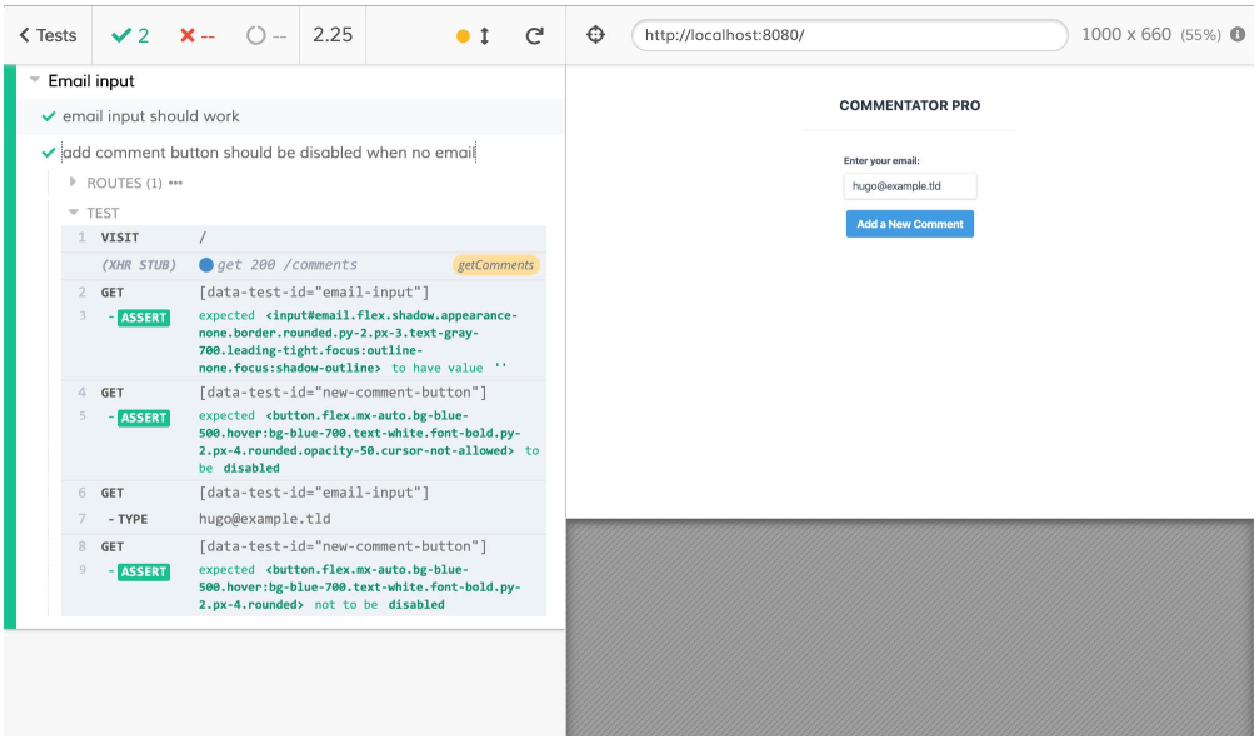 Figure 21. Figure 13.22: Cypress running "enter-email" tests, with the disabled add comment button test
 -
现在我们已经有了捕获电子邮件的方法,我们应该在调用 POST 评论时(即提交新评论时)将其传递给后端 API。为此,我们应修改
methods.submitNewComment中的 spot,其中电子邮件被硬编码为evan@vuejs.org。 -
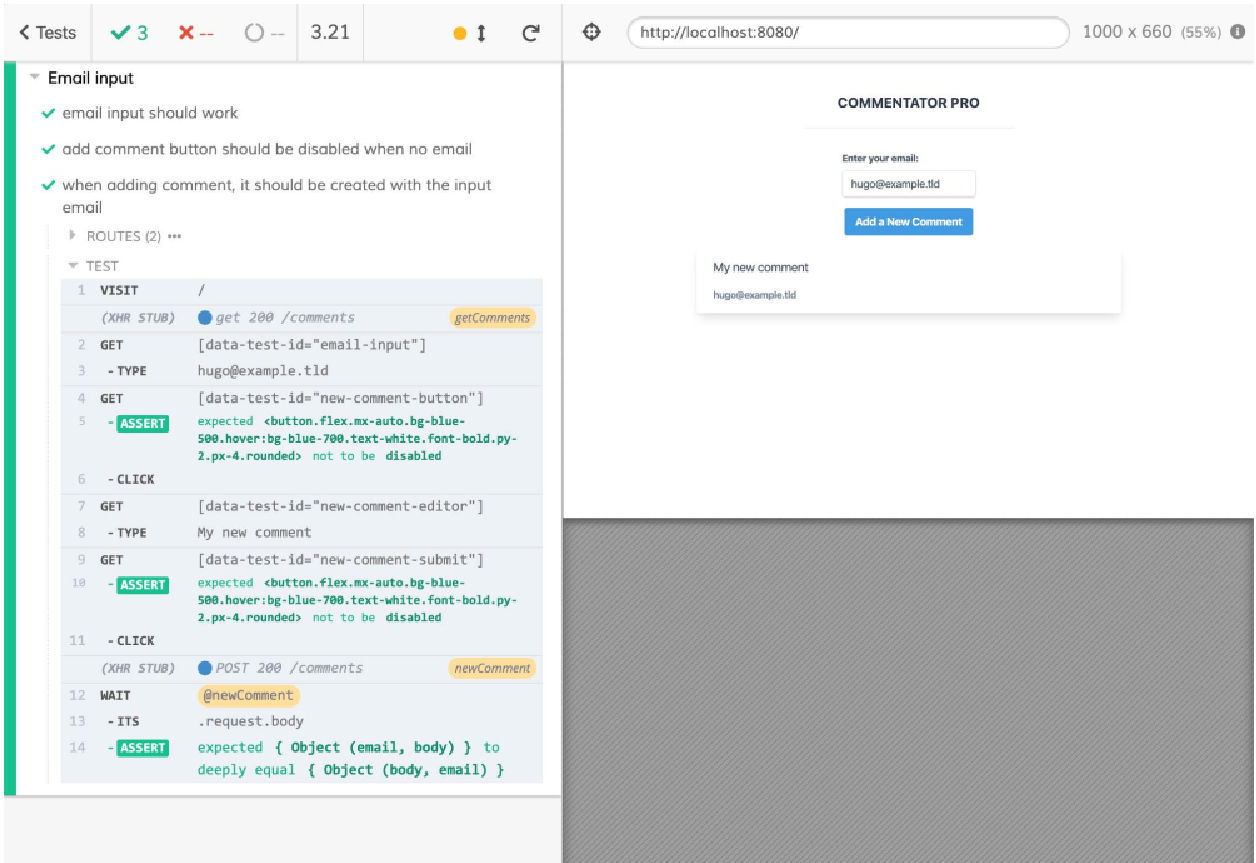
现在我们正在使用用户输入的电子邮件,我们应该编写一个 E2E 测试来检查它是否已发送。我们将删除 POST 请求,将其别名为
newComment,然后发回任意值。然后我们可以访问该页面,填写电子邮件输入,打开评论编辑器,填写并提交。然后,我们将等待newComment请求,并在请求正文上断言正文和电子邮件与我们完成时的状态相同。
|
我们还可以选择不删除 |
当使用 Cypress UI 运行时,我们得到以下测试运行输出:
总结
在本章中,我们研究了如何利用 Cypress 来端到端测试 Vue.js 应用程序。
一般来说,E2E 测试有助于让我们高度确信测试的流程将按预期工作,而不是单元测试或集成测试,后者以低得多的开销验证我们的代码是否按预期工作。
我们已经了解了如何使用 Cypress 来检查、交互和针对 UI 进行断言。 我们还展示了赛普拉斯的默认等待/重试功能在编写强大的测试时如何发挥巨大优势。
我们利用 Cypress 的 HTTP 拦截库来阻止 HTTP 请求,并使测试更加可预测和更快。
最后,我们研究了如何使用 Cypress 设置视觉回归测试。
在下一章中,我们将了解如何将 Vue.js 应用程序部署到网络。