使用 Vuex 模式与其它模式(例如 Redux)对比
我们将看到的最后一个场景是使用 Vuex 模式。在这种情况下,所有状态都保存在单个存储中。对状态的任何更新都会发送到此存储。 组件从存储中读取共享或全局状态。
Vuex 既是一种状态管理模式,也是 Vue.js 核心团队的库实现。该模式旨在缓解应用程序的不同部分共享全局状态时发现的问题。无法直接操作存储的状态。突变(Mutations)用于更新存储状态,并且由于存储状态是响应性的,Vuex 存储的任何消费者都会自动更新。
Vuex 从 JavaScript 状态管理领域的先前工作中汲取灵感,例如普及了单向数据流概念的 Flux 架构,以及 Flux 的单存储实现 Redux。
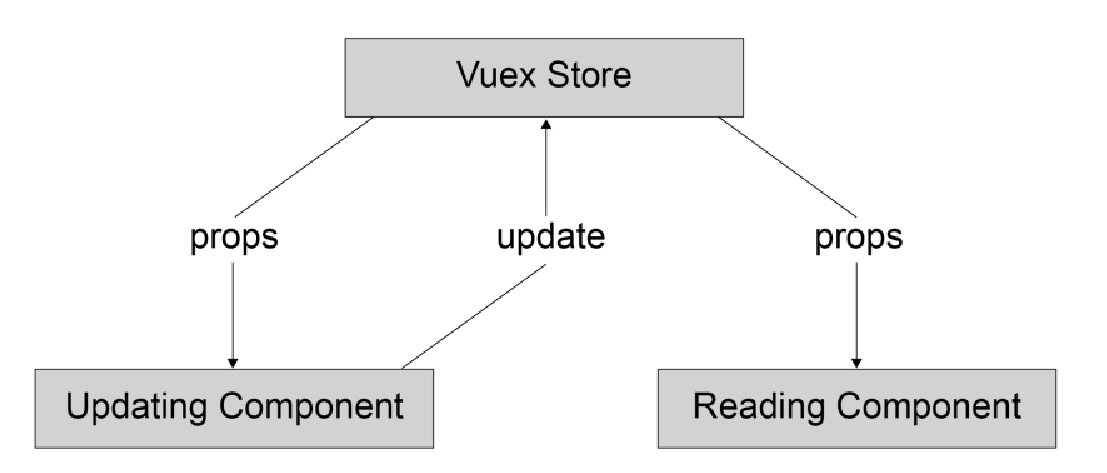
Vuex 不仅仅是另一个 Flux 实现。它是一个特定于 Vue.js 的状态管理库。因此,它可以利用 Vue.js 特定的东西(例如响应性)来提高更新的性能。下图显示了 props 和状态更新的层次结构:
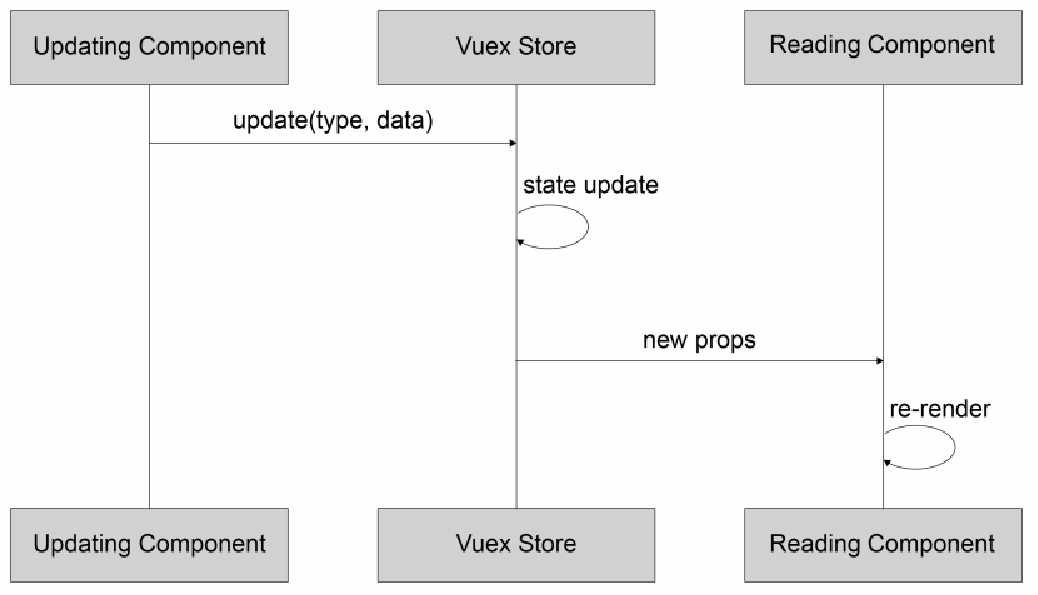
为了更新全局状态,组件会触发存储中称为突变(mutation)的更新。store 知道如何处理此更新。它更新状态并通过 Vue.js 响应性相应地向下传播 props:
我们可以使用 Vuex 扩展现有的应用程序。
首先,我们需要使用 yarn add vuex 或 npm install --save vuex 添加 vuex 模块。
接下来,我们需要使用 store.js 文件中的 Vue.use() 向 Vue 注册 Vuex:
import Vue from 'vue'
import Vuex from 'vuex'

Vue.use(Vuex)
最后,我们创建一个具有默认状态的 Vuex 存储。此状态包括我们在 store.js 文件中使用的相同 formData 对象。然后我们使用导出默认值(export default)导出它:
export default new Vuex.Store({
    state: {
        formData: {
            name: '',
            occupation: ''
        }
    },
})
最后,我们需要在 main.js 文件中向 Vue.js 的主应用程序实例注册我们的 store:
// other imports
import store from './store'
// other imports and code
new Vue({
    render: h => h(App),
    store
}).$mount('#app')
最棒的是每个组件都有对 this.$store 下的 store 的引用。例如,要访问 formData,我们可以使用 this.$store.state.formData。使用此功能,我们可以使用单个计算属性替换 AppProfileDisplay.vue 文件的脚本部分中的事件总线订阅和本地状态更新:
<script>
export default {
    computed: {
        formData() {
            return this.$store.state.formData
        }
    }
}
</script>
为了触发状态更新,我们需要定义一些突变(mutations)。在这种情况下,我们需要 store.js 文件中的 profileUpdate。 突变(mutations)接收状态(state)(当前状态)和有效负载(payload)(存储 commit 有效负载)作为属性。
export default new Vuex.Store({
    // other store properties
    mutations: {
        profileUpdate(state, payload) {
            state.formData = {
                name: payload.name || '',
                occupation: payload.occupation || ''
            }
        }
    }
})
现在我们已经有了 profileUpdate 突变,我们可以更新 AppHeader.vue 文件中的 Reset 按钮以使用 Vuex $store.commit() 函数:
<script>
export default {
    methods: {
        clear() {
            this.$store.commit('profileUpdate', {})
        }
    }
}
</script>
我们还应该更新 AppProfileForm.vue 文件以提交到 $store 而不是发送到事件总线:
<script>
export default {
// rest of component
methods: {
submitForm() {
this.$store.commit('profileUpdate', {
name: this.name,
occupation: this.occupation
})
},
// other methods
}
}
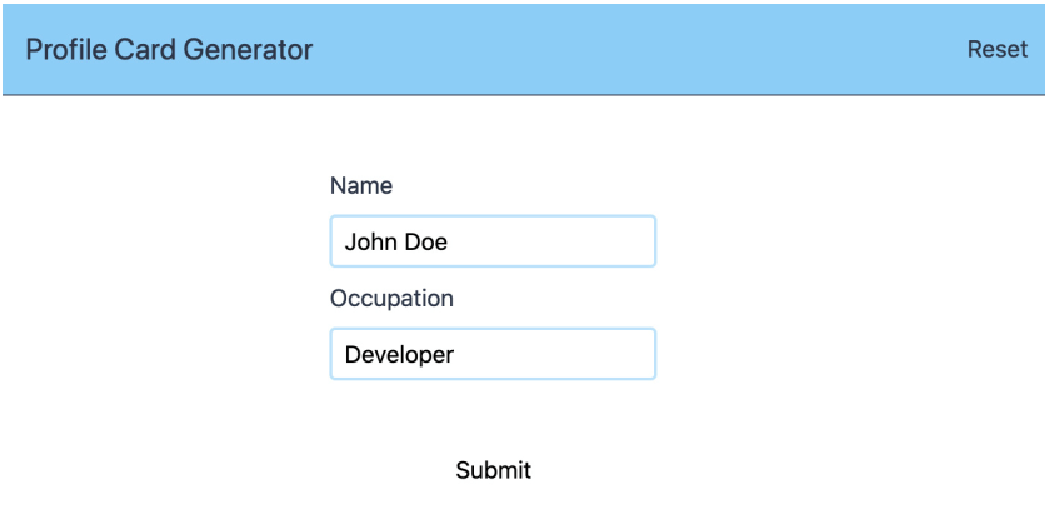
</script>该应用程序现在将支持更新姓名和职业(occupation):
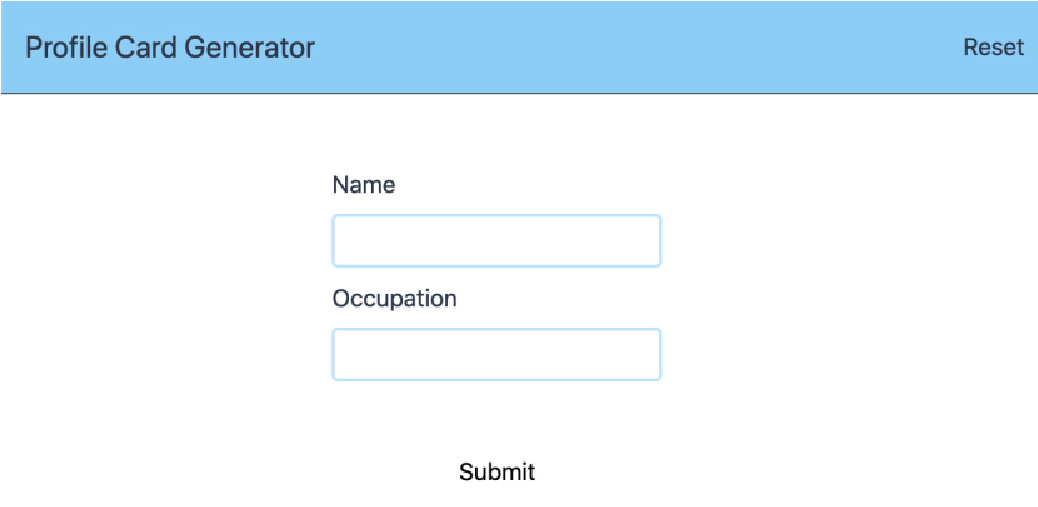
不幸的是,重置(Reset)按钮不会清除表单:
为了更有效地重置,我们将在 store.js 文件中添加 profileClear 突变:
export default new Vuex.Store({
    // other store properties
    mutations: {
        // other mutations
        profileClear(state) {
            state.formData = {
                name: '',
                occupation: ''
            }
        }
    }
})
我们将在 AppHeader.vue 文件中提交此操作而不是 profileUpdate。使用 profileClear 而不是带有空数据的 profileUpdate 可以清除我们的代码:
<script>
export default {
    methods: {
        clear() {
            this.$store.commit('profileClear')
        }
    }
}
</script>
最后,当 profileClear 提交到 AppProfileForm 文件中的存储时,我们需要订阅存储更改并重置本地状态:
<script>
export default {
    created() {
        this.$store.subscribe((mutation) => {
            if (mutation.type === 'profileClear') {
                this.resetProfileForm()
            }
        })
    },
    // other component properties
    methods: {
        // other methods
        resetProfileForm() {
            this.name = ''
            this.occupation = ''
        }
    }
}
</script>
现在应用程序的重置按钮可以与 Vuex 一起正常工作。我们的屏幕应显示如下:
我们现在已经了解了如何使用 Vuex store 在我们的应用程序中存储全局状态。
练习 8.04:向配置文件生成器添加组织字段
在个人资料卡生成器中,除了个人的姓名和职业之外,了解他们的工作地点(换句话说,他们的组织)也很有用。
为此,我们将在 AppProfileForm 和 AppProfileDisplay 中添加一个组织(organization)字段。要访问本练习的代码文件,请参阅 https://packt.live/3lIHJGe 。
-
我们可以首先向 AppProfileForm 添加新的文本输入和标签:
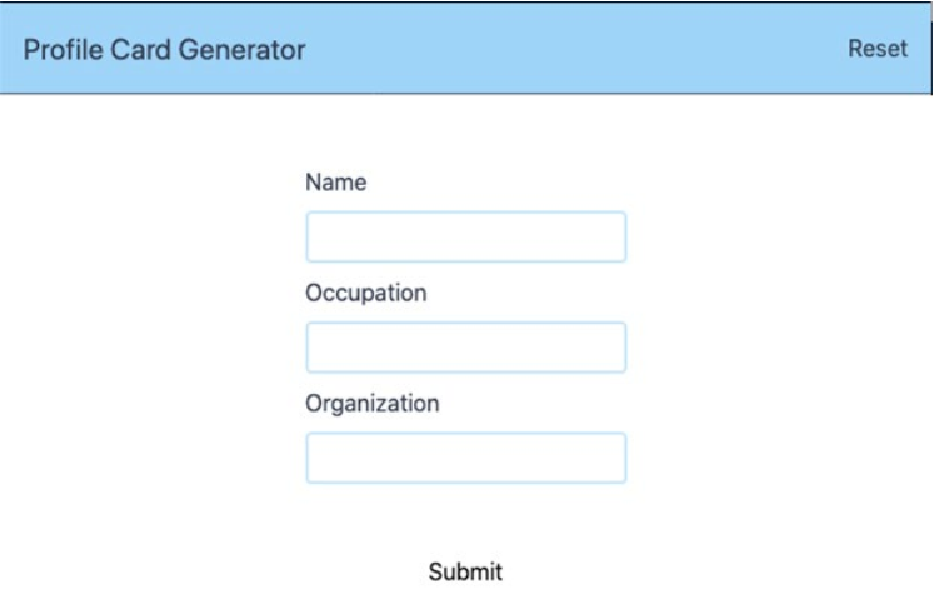
<template>
    <!-- rest of template -->
    <div class="flex flex-col mt-2">
        <label class="flex text-gray-800 mb-2"
        for="organization">Organization</label>
        <input
            id="occupation"
            type="text"
            name="organization"
            class="border-2 border-solid border-blue-200
            rounded px-2 py-1"
        />
    </div>
    <!-- rest of template -->
</template>
新字段如下所示:
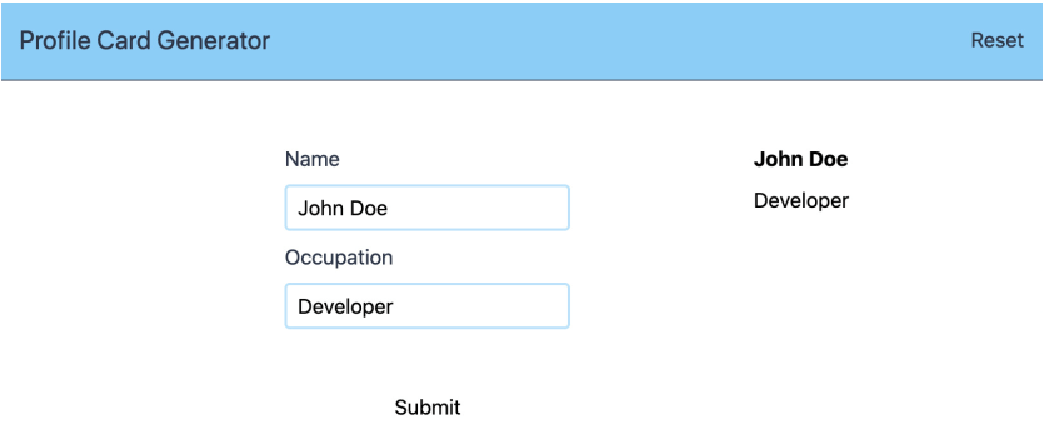
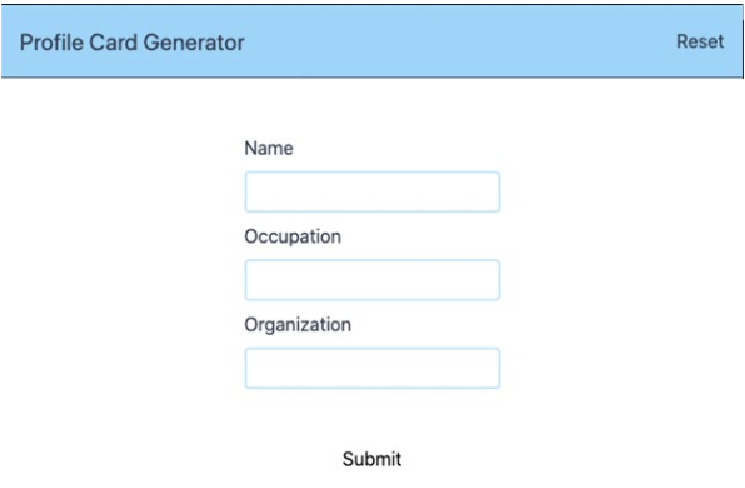 Figure 6. Figure 8.30: Application with a new Organization field
 -
然后,我们可以将组织字段添加到 src/store.js 中的初始状态和突变,以便组织在 profileUpdate 期间初始化、设置,并在 profileClear 期间重置:
// imports & Vuex setup export default new Vuex.Store({ state: { formData: { // rest of formData fields organization: '' } }, mutations: { profileUpdate(state, payload) { state.formData = { // rest of formData fields organization: payload.organization || '', } }, profileClear(state) { state.formData = { // rest of formData fields organization: '' } } } }) -
我们需要使用
v-model跟踪src/components/AppProfileForm.vue组件本地状态的组织(organization)并在data()函数中初始化它:<template> <!-- rest of template --> <div class="flex flex-col mt-2"> <label class="flex text-gray-800 mb-2" for="organization">Organization</label> <input id="occupation" type="text" name="organization" v-model="organization" class="border-2 border-solid border-blue-200 rounded px-2 py-1" /> </div> <!-- rest of template --> </template> <script> export default { // rest of component data() { return { // other data properties organization: '' } } } </script> -
为了使突变的有效负载包含组织,我们需要将其添加到
$store.commit('profileUpdate')有效负载中,并在组件触发 profileClear 突变(mutation)时在表单中重置它:<script> export default { // rest of component methods: { submitForm() { this.$store.commit('profileUpdate', { // rest of payload organization: this.organization }) }, resetProfileForm() { // other resets this.organization = '' } } } </script> -
为了显示组织(organization),我们需要使用条件 span 在
src/components/AppProfileDisplay.vue中渲染它(在没有设置 organization 时隐藏 at):
<template>
<!-- rest of template -->
<p class="mt-2">
{{ formData.occupation }}
<span v-if="formData.organization">
at {{ formData.organization }}
</span>
</p>
<!-- rest of template -->
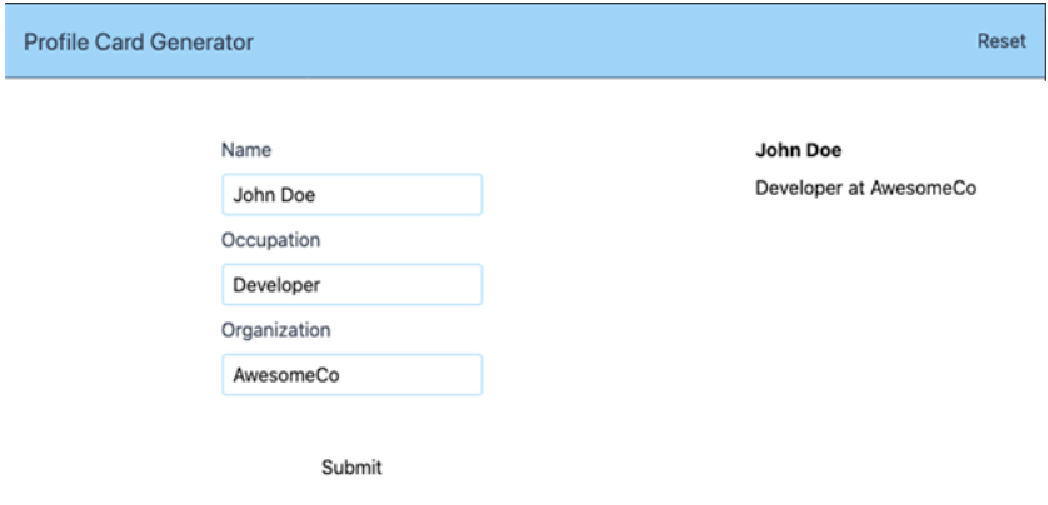
</template>该应用程序现在允许我们捕获组织(organization)字段并显示它。
它也将使我们能够毫无问题地清除配置文件:
我们现在已经了解了如何向使用 Vuex 的应用程序添加字段。相对于事件总线或在祖先组件中存储状态,Vuex 的最大好处之一是它可以随着您添加更多数据和操作而扩展。接下来的活动将展示这种力量。
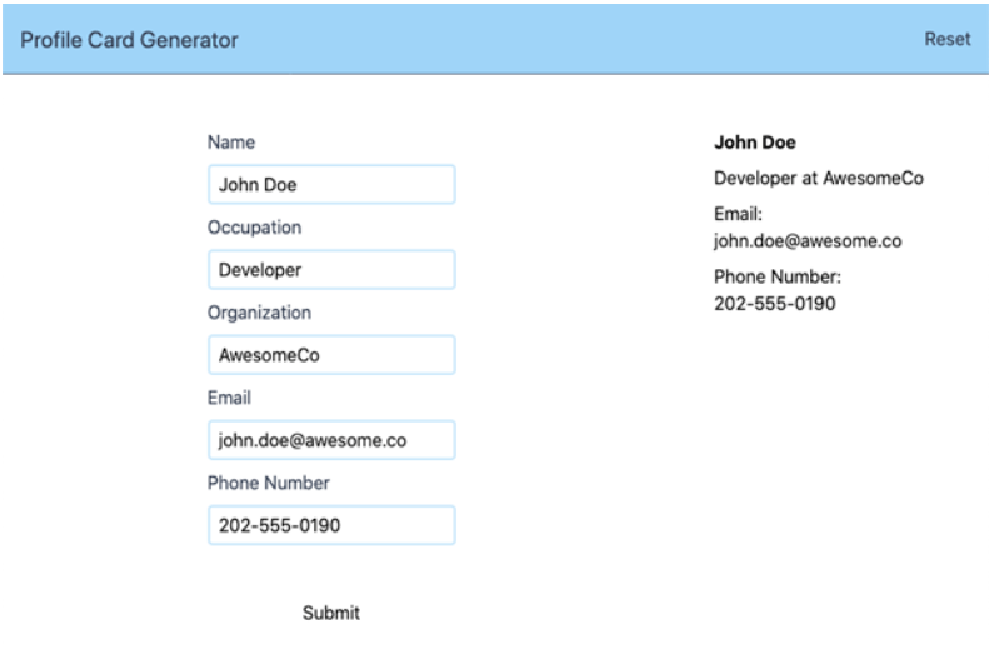
活动 8.01:将电子邮件和电话号码添加到个人资料卡生成器
在个人资料生成器中,您可以查看个人资料以查找有关个人的一些信息。电子邮件和电话号码通常是在个人资料卡上查找的最重要的信息。此活动是将这些详细信息添加到个人资料卡生成器中。
为此,我们将在 AppProfileForm 和 AppProfileDisplay 中添加电子邮件和电话号码字段:
-
我们可以首先向 AppProfileForm 的 email 字段添加一个新的电子邮件输入字段和标签。
-
然后,我们可以向 AppProfileForm 添加一个新的 phone 输入字段(类型为 tel)和一个标签作为 Phone Number 字段:
新字段如下所示:
 Figure 9. Figure 8.33: Application with new Email and Phone Number fields
 -
然后,我们可以将 email 和 phone 字段添加到 src/store.js 中的初始状态和突变(mutations),以便组织在 profileUpdate 期间初始化、设置,并在 profileClear 期间重置。
-
我们需要使用 v-model 跟踪
src/components/AppProfileForm.vue组件的本地状态中的 email,并在 data() 函数中对其进行初始化。 -
我们需要使用 v-model 跟踪
src/components/AppProfileForm.vue组件的本地状态中的 phone,并在 data() 函数中对其进行初始化。 -
为了使突变(mutation)的有效负载包含电子邮件(email)和电话(phone),我们需要将其添加到
$store.commit('profileUpdate')有效负载中。当组件触发 profileClear 突变(mutation)时,我们还希望在表单中重置它。 -
为了显示电子邮件(email),我们需要使用条件段落在
src/components/ AppProfileDisplay.vue中渲染它(在没有设置电子邮件时隐藏 Email 标签)。 -
为了显示电话(phone),我们需要使用条件范围在
src/components/ AppProfileDisplay.vue中渲染它(在没有电话设置时隐藏 Phone Number 标签)。
填写并提交表格后,申请表应如下所示: