部署到 Netlify
Netlify 是一家专门从事静态托管和相关支持服务的托管提供商,以便拥有一个使用静态托管的完全交互式网站。这包括 Netlify Functions(无服务器功能)、Netlify Forms(无后端表单提交系统)和 Netlify Identity(身份/身份验证提供商)等产品。
以下部分要求您拥有 Netlify 帐户,该帐户是免费的。
将站点部署到 Netlify 的最简单方法是使用拖放界面。您可以在登录视图的主页底部找到它: https://app.netlify.com 。它看起来如下:
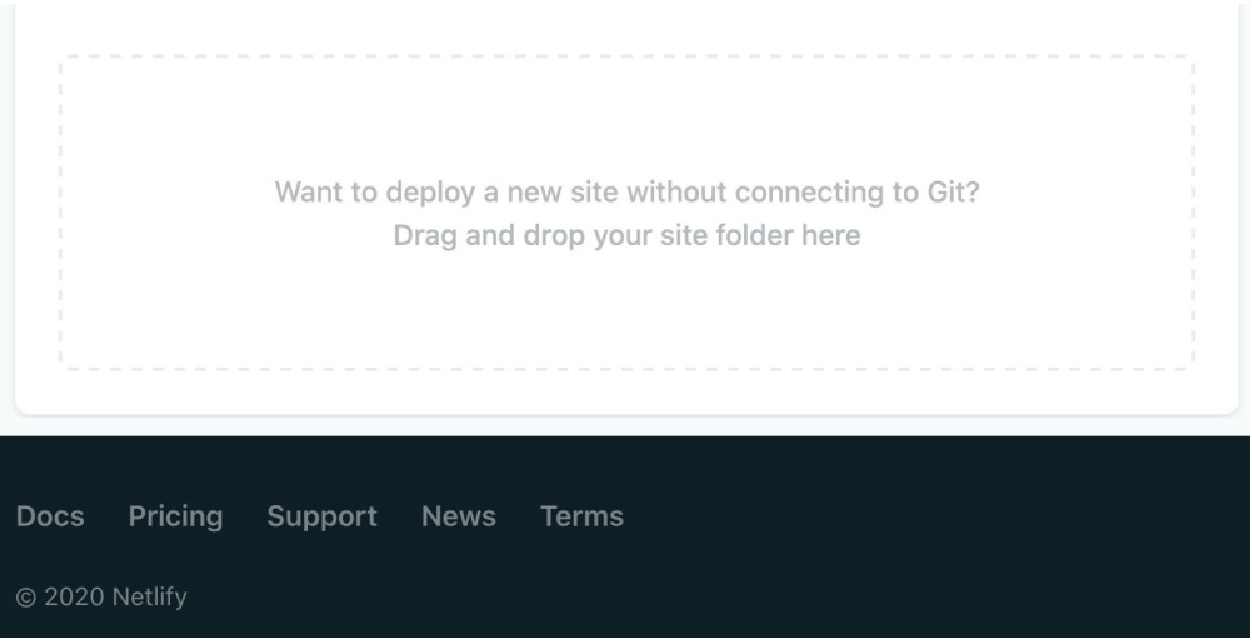
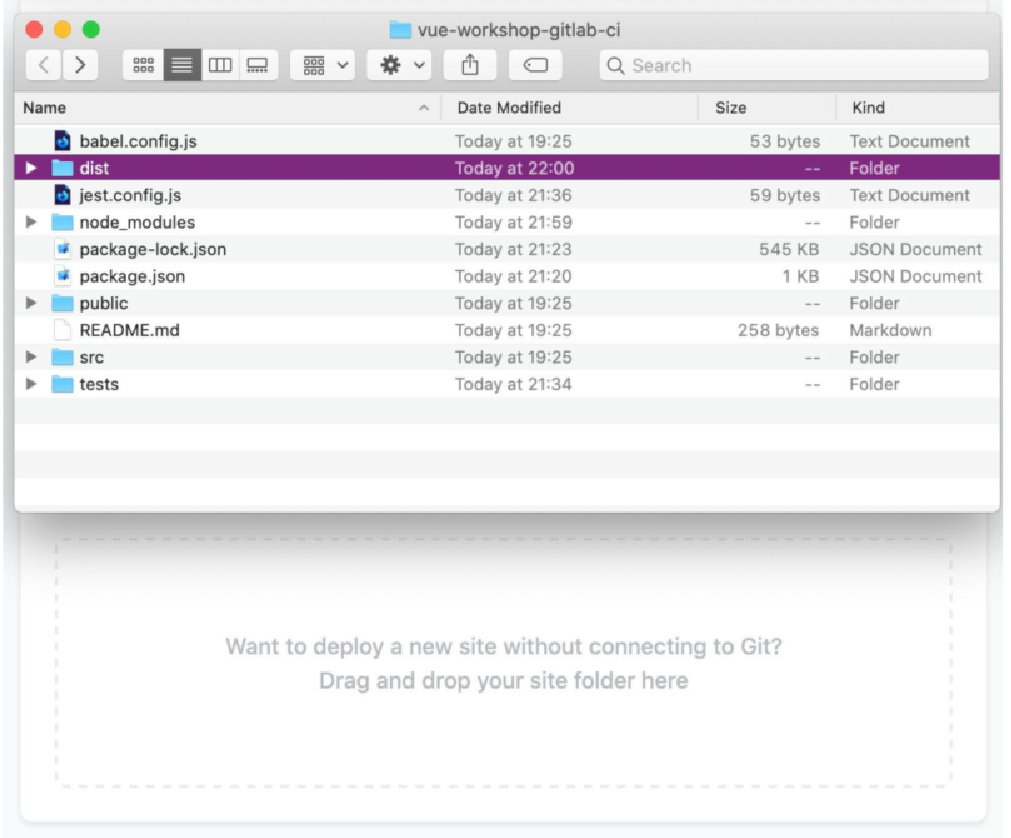
因此,我们可以选择一个运行 npm run build 命令的项目,然后只需将其拖到拖放部署部分即可部署 dist 文件夹,如以下屏幕截图所示:
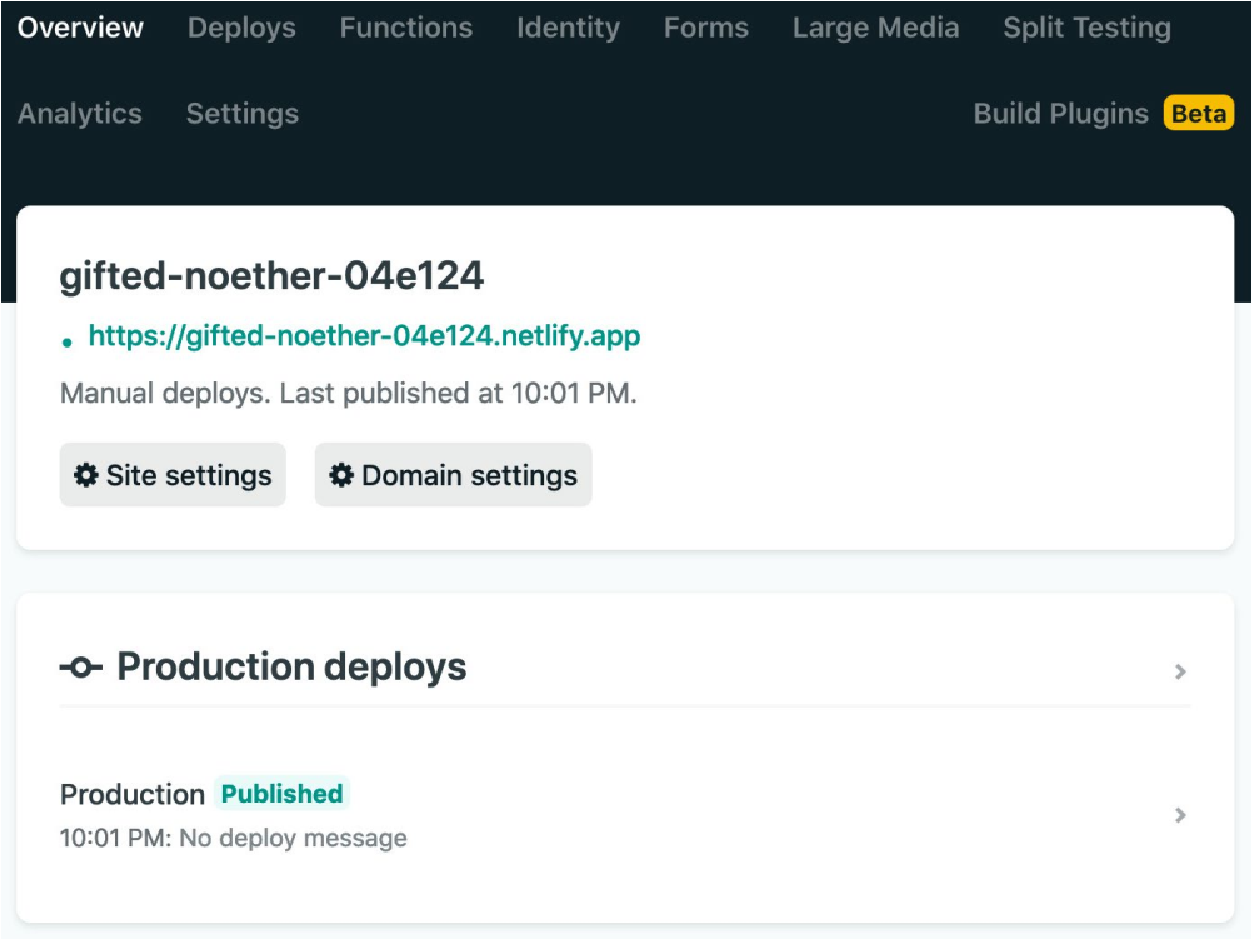
上传成功后,Netlify 会将您重定向到新网站的管理页面。 这将如下所示:
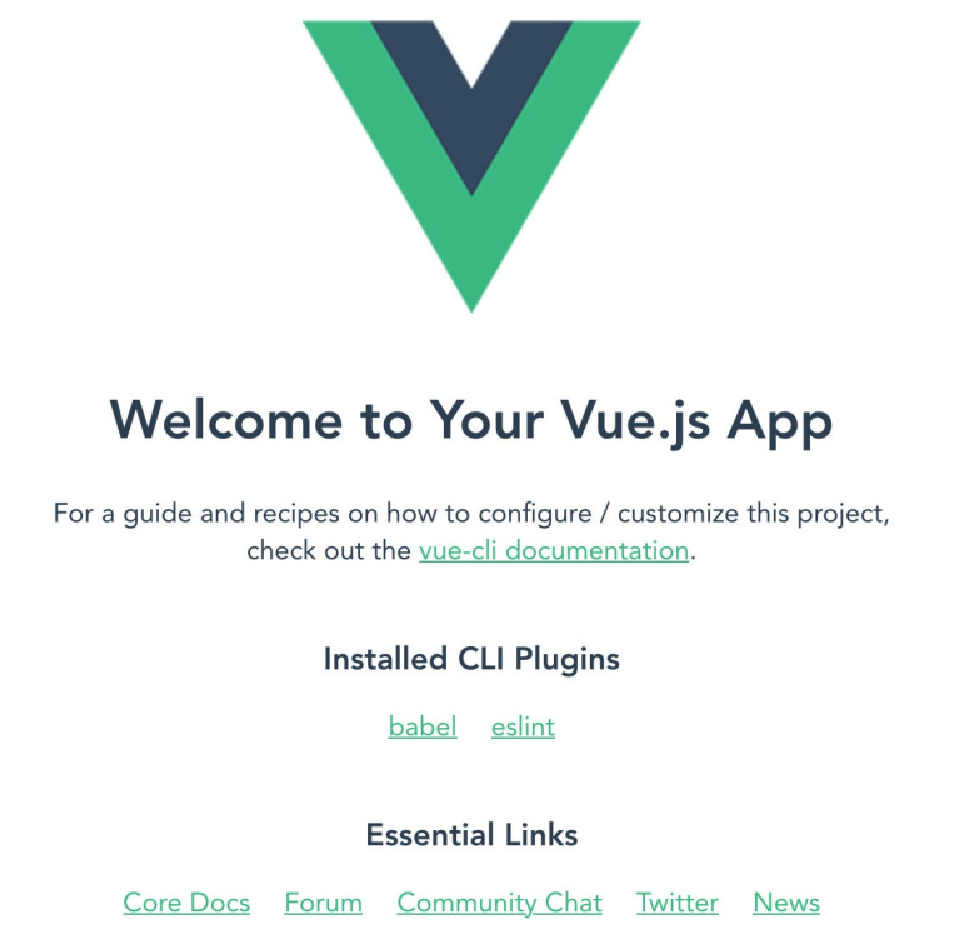
我们可以点击该站点的链接,我们将看到默认的 Vue CLI 主页模板,如下所示:
我们现在已经了解了如何使用拖放界面手动将站点部署到 Netlify。
接下来,我们将了解如何将我们的站点从 GitLab 部署到 Netlify。
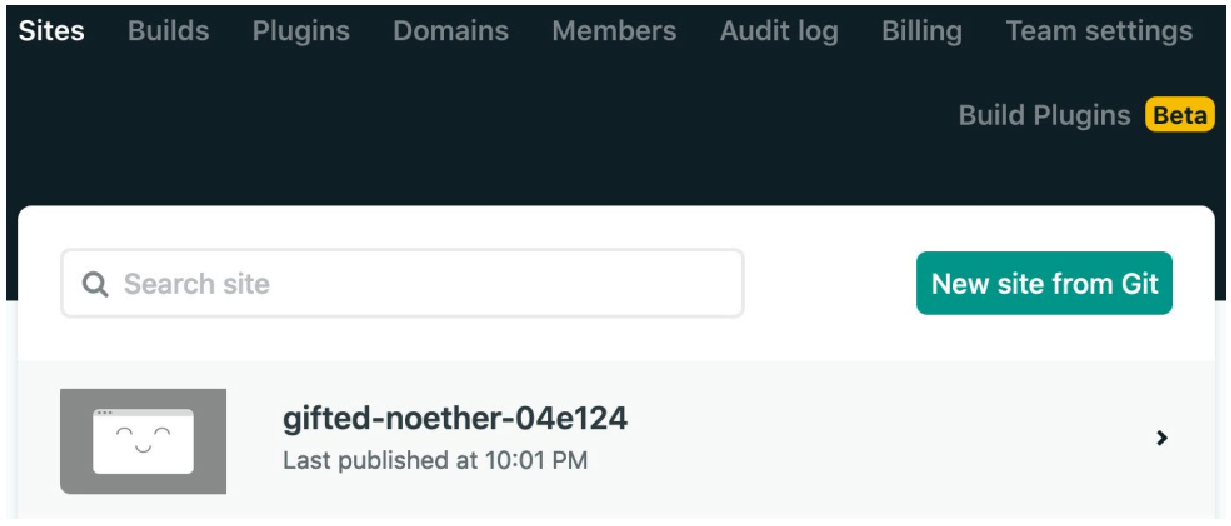
在 Netlify 应用程序主页上,我们需要单击 “New site from Git” 按钮,如以下屏幕截图所示:
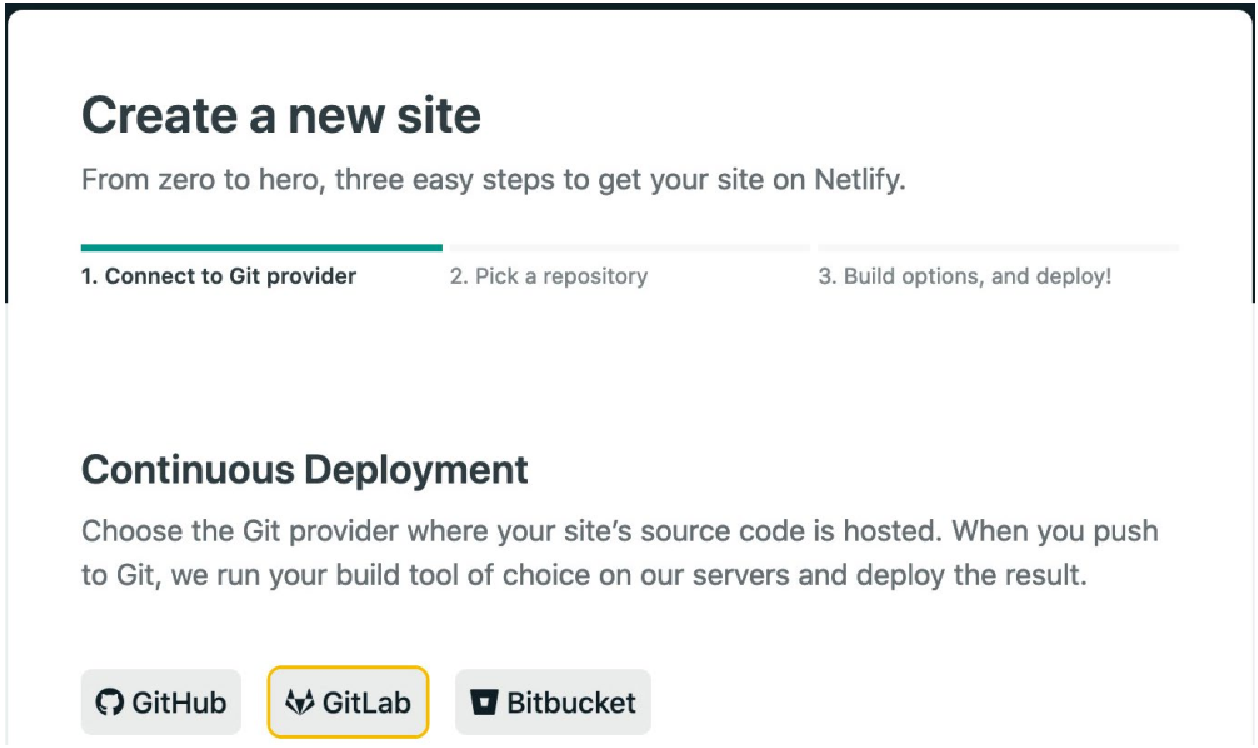
我们将看到一个页面,要求我们选择要连接的 Git 提供商。对于本示例,我们将使用 GitLab。 以下屏幕截图代表了屏幕的外观:
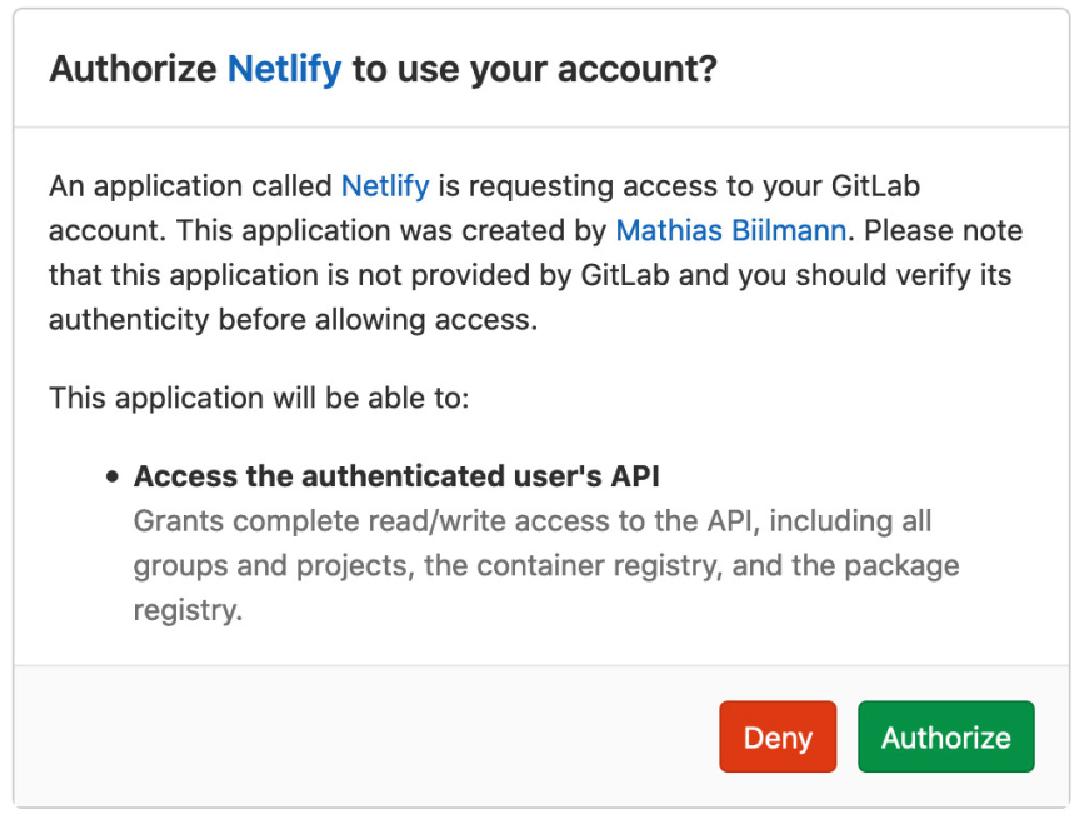
单击 GitLab 后,我们将从 GitLab 收到 OAuth 授权质询,我们需要通过单击 “授权” 按钮接受该质询,如以下屏幕截图所示:
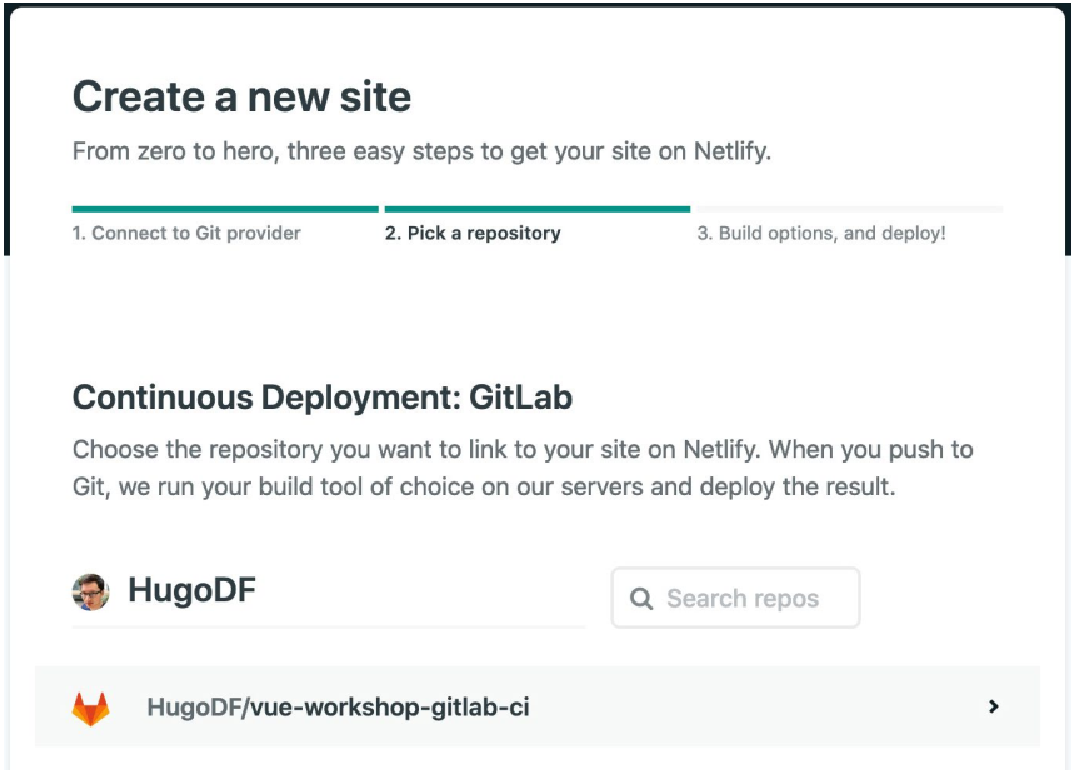
然后我们将被重定向到 Netlify 并要求选择要部署的存储库,如下所示:
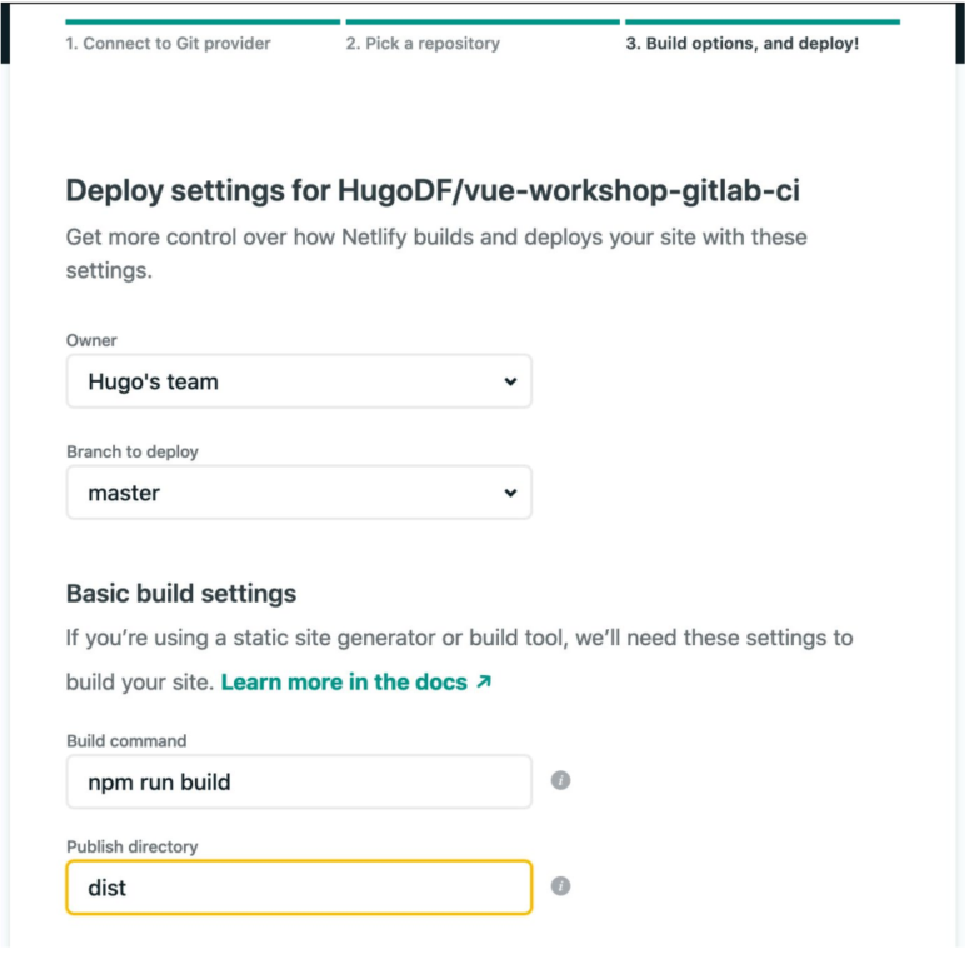
我们选择要部署的存储库,然后看到一个配置页面。 由于我们现在在 Netlify 的构建服务器上进行构建,因此我们需要配置 Netlify 来构建应用程序并部署正确的文件夹。
我们将 build 命令填写为 npm run build,因为这是我们的构建脚本。发布目录是dist。
然后我们可以单击 “部署站点” 按钮,这将启动部署过程,如下所示:
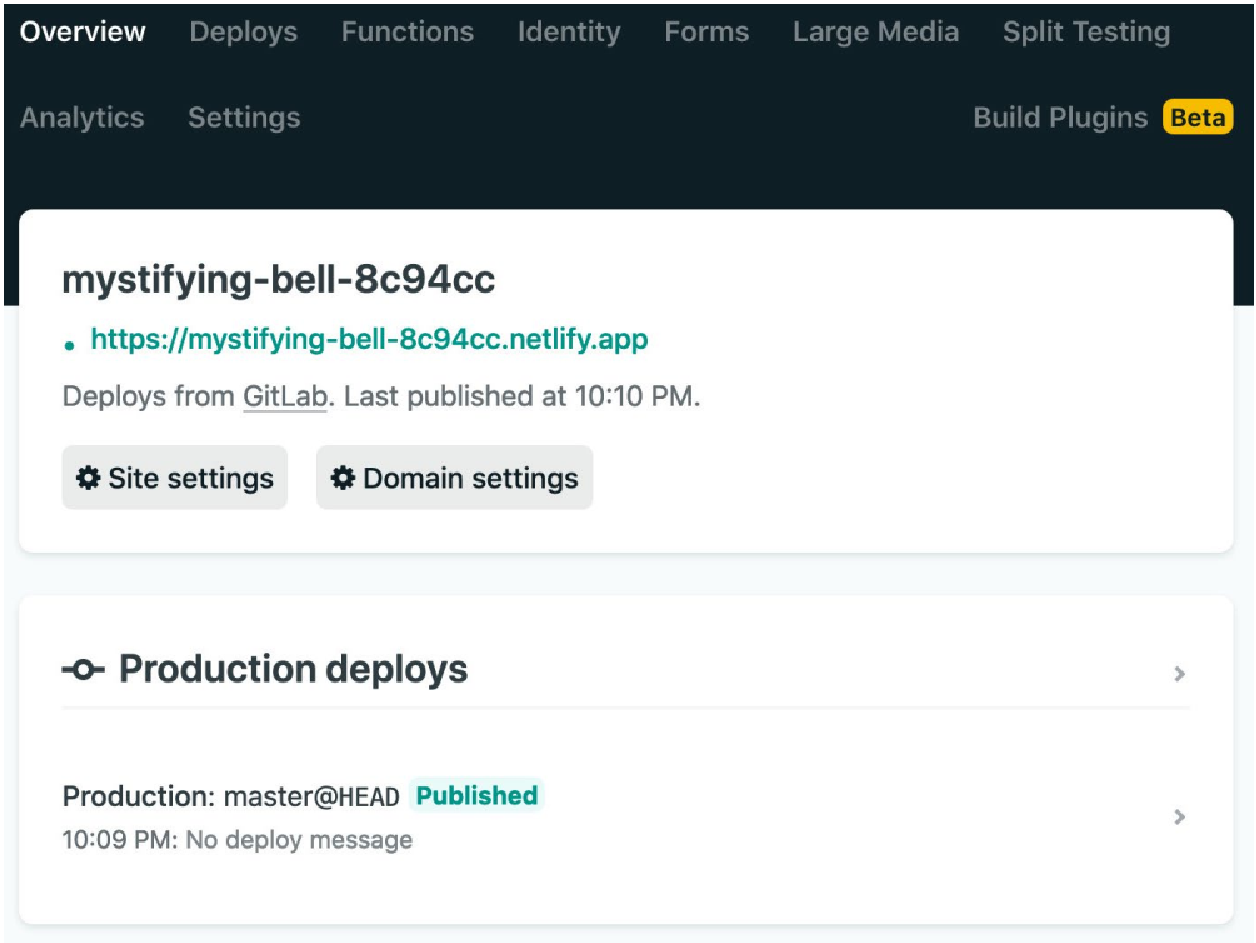
然后我们将被重定向到新创建的应用程序的页面,如下所示:
我们现在已经了解了如何使用手动上传方法并使用 GitLab 作为 Git 托管提供商将应用程序部署到 Netlify。
练习 14.02:从 GitHub 将站点部署到 Netlify
我们已经了解了如何从 GitLab 将站点部署到 Netlify,但这与从 GitHub 部署站点有何不同? 答案是它们非常相似;唯一显着的区别是 “连接到 Git 提供程序” 选项卡中的第一步:
-
我们首先单击主页上的 New site from Git 按钮,如下所示:
 Figure 11. Figure 14.28: New site from Git on the Netlify dashboard
 -
然后我们选择 GitHub 作为 Git 托管提供商,如下图所示:
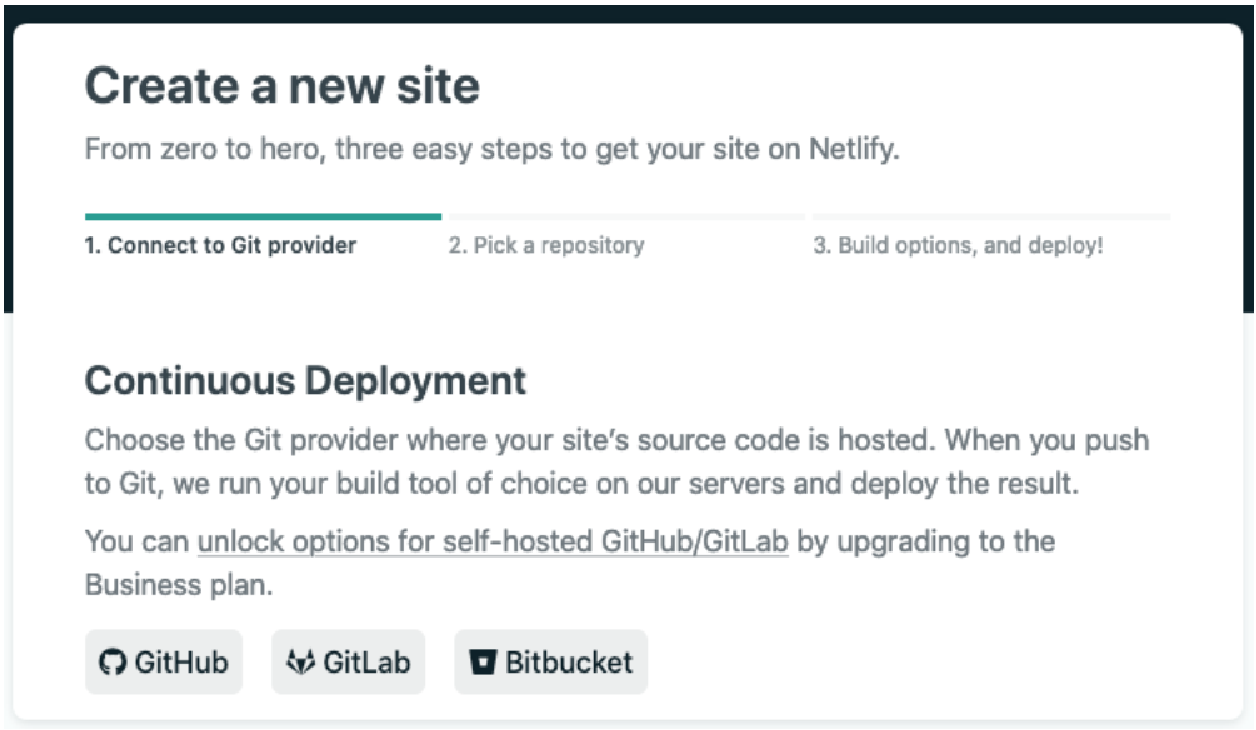 Figure 12. Figure 14.29: Continuous Deployment
 -
当我们收到 GitHub OAuth 授权质询时,如下图所示,我们对 Netlify 进行授权:
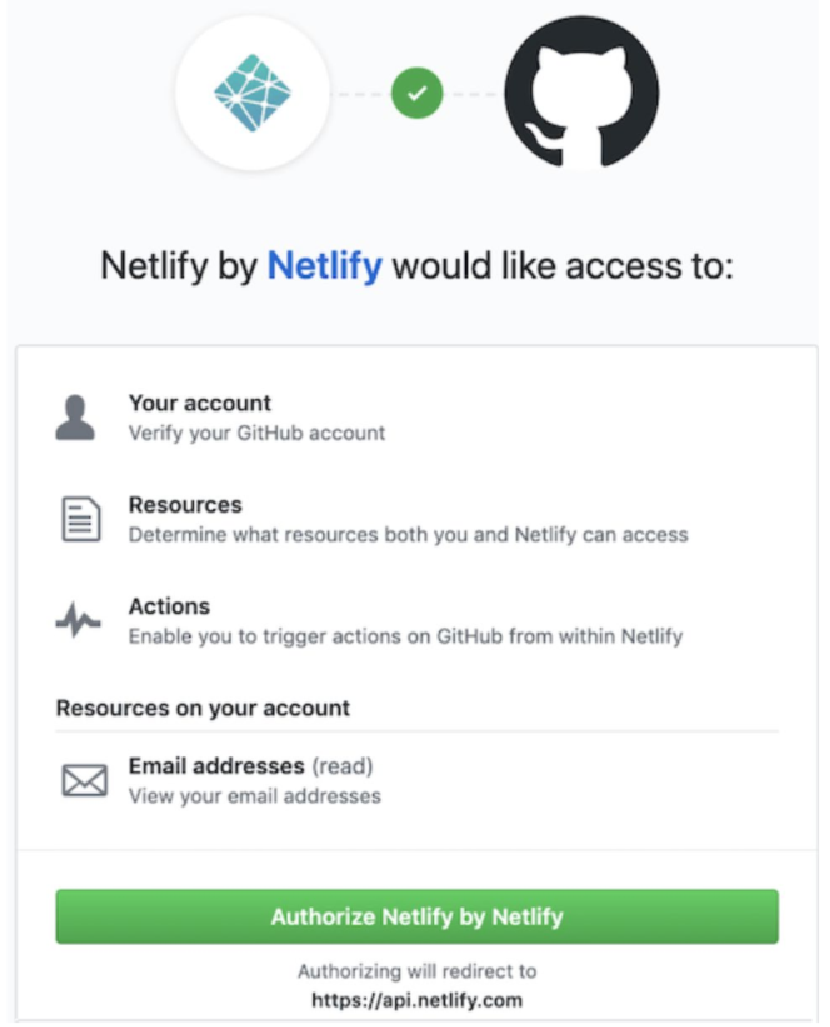 Figure 13. Figure 14.30: GitHub authorization challenge
 -
我们从存储库列表中选择我们要部署的 Vue CLI 项目,如下:
-
选择仓库
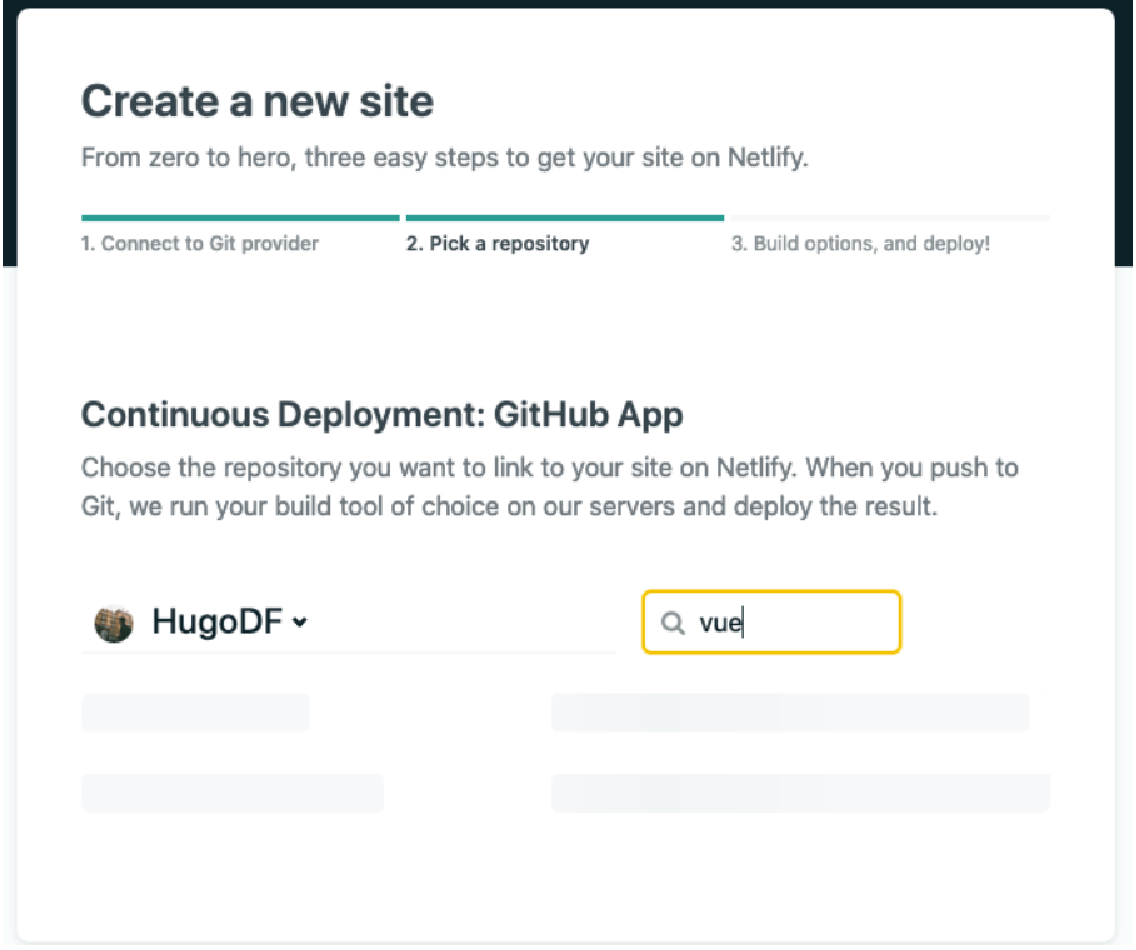 Figure 14. Figure 14.31: Selecting the correct repository
 -
在部署选项选项卡上,我们选择 master 作为要部署的分支。
-
我们将构建命令设置为 npm run build。
-
我们将发布目录设置为 dist。
-
完成的部署选项如下所示:
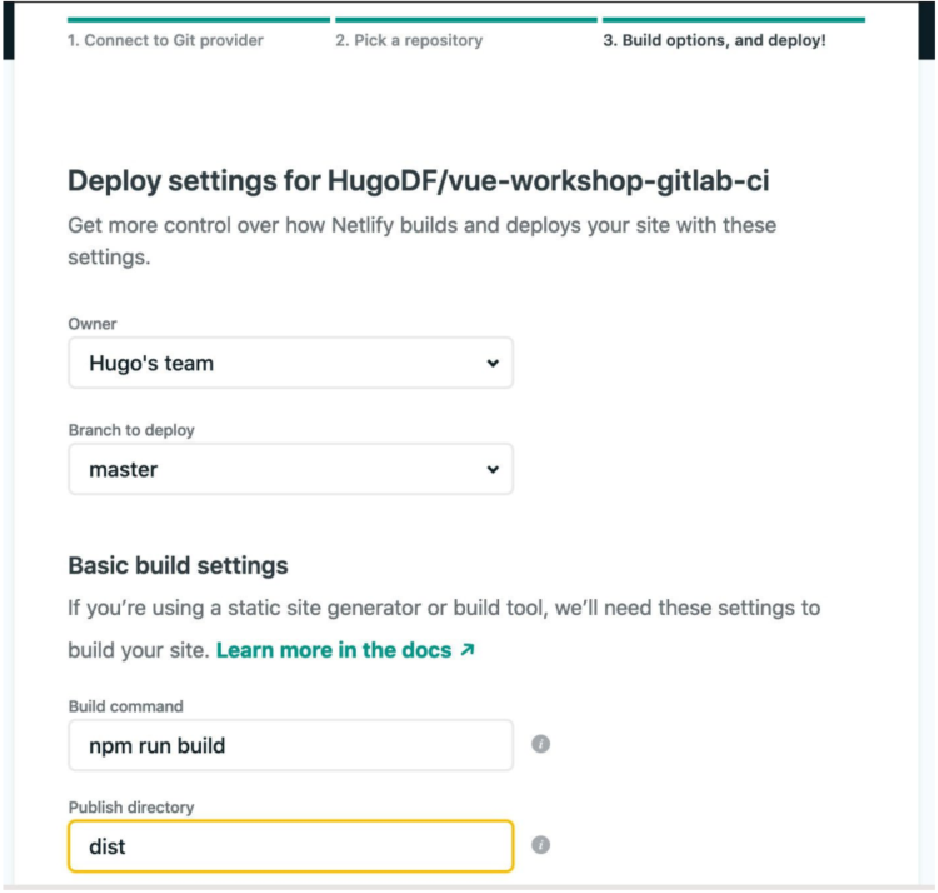 Figure 15. Figure 14.32: The Netlify build configuration tab filled in with npm run build and dist for the build command and publish directory, respectively
 -
我们单击 “部署站点” 以开始部署过程。
现在,我们已经了解了如何使用手动上传方法并使用 GitLab 或 GitHub 作为 Git 托管提供商将应用程序部署到 Netlify。
接下来,我们将了解如何使用 Amazon Web Services Simple Storage Service (AWS S3) 和 AWS CloudFront 部署 Vue.js 应用程序。