测试方法、过滤器和混合
由于 filters 和 mixins 仅根据函数参数生成输出,因此它们很容易进行单元测试。除非绝对必要,否则不建议测试方法,因为用户不会直接调用组件上的方法。用户看到渲染的 UI,并且他们与应用程序的交互表现为事件(例如,click、input change、focus change 和 scroll)。
例如,将输入内容截断为 8 个字符的过滤器执行方式如下:
<script>
export default {
    filters: {
        truncate(value) {
            return value && value.slice(0, 8)
        }
    }
}
</script>
有两个选项可以对其进行测试。我们可以通过导入组件并在某些输入上调用 truncate 来直接测试它,按照 truncate.test.js 文件:
import PostListItem from '../src/components/PostListItem.vue'

test('truncate should take only the first 8 characters', () => {
    expect(
        PostListItem.filters.truncate('longer than 8 characters')
    ).toEqual('longer t')
})
另一种方法是检查它在 PostListItem 组件中的使用位置:
<template>
    <!-- rest of template -->
    <h3 class="flex text-md font-semibold text-gray-700">
        {{ title | truncate }}
    </h3>
    <!-- rest of template -->
</template>
现在,我们可以通过检查将长标题传递到 PostListItem.test.js 文件中的 PostListItem 组件时发生的情况来测试截断,我们在以下测试中执行此操作:
// imports
test('PostListItem renders title and description correctly', () => {
    const wrapper = shallowMount(PostListItem, {
        propsData: {
            title: 'Blog post title',
            description: 'Blog post description'
        }
    })
    expect(wrapper.text()).toMatch("Blog post title")
    expect(wrapper.text()).toMatch("Blog post description")
})
// other tests
前面的代码将生成如下屏幕截图所示的输出:
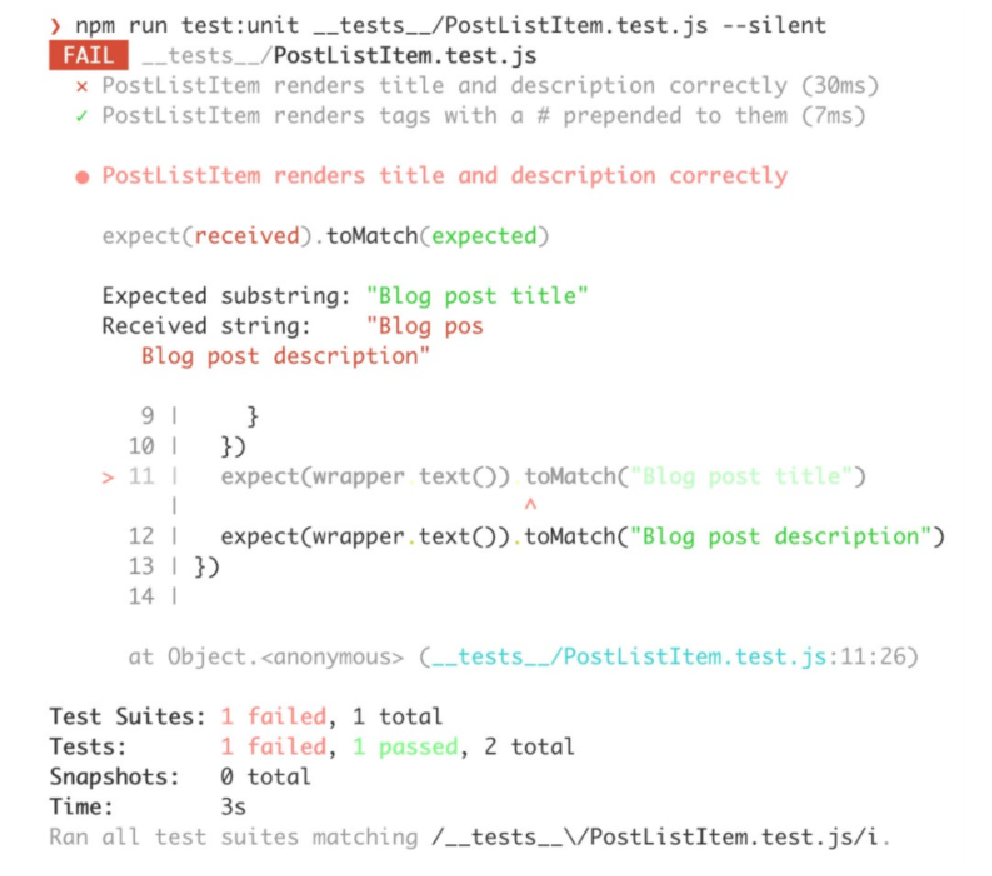
为了解决这个问题,我们可以更新失败的测试以期望博客帖子(Blog pos)而不是博客帖子标题(Blog post title)。
这两种方法非常适合测试过滤器。正如我们之前在安装与浅渲染中所看到的,区别在于单元测试的紧密程度。更严格的单元测试是直接的 filters.truncate() 测试,因为它直接访问截断过滤器。更宽松的单元测试是使用传递的 props 并验证组件输出的测试。更紧密的单元通常意味着测试更简单,但其代价是有时测试功能的方式与最终用户的感知方式非常不同。例如,用户永远不会调用 filters.truncate()。
我们已经了解了如何测试任意 truncate 过滤器。我们现在将实现一个省略过滤器并测试它。
省略号(ellipsis)过滤器将应用于帖子描述,并将其长度限制为 40 个字符加上 …… 。
练习 12.02:构建和测试省略过滤器
我们已经了解了如何测试任意 truncate 过滤器;我们现在将实现一个 ellipsis 过滤器并测试它。
要访问本练习的代码文件,请参阅 https://packt.live/2UK9Mcs 。
现在让我们看看构建和测试 ellipsis 过滤器的步骤:
-
我们可以首先为
ellipsis过滤器编写一组测试(它将位于src/components/PostListItem.vue中)。一项测试应检查如果传递的值少于 50 个字符,过滤器是否不执行任何操作;另一个应该检查是否传递的值超过 50 个字符,它会截断为 50 并附加...。 我们将在__tests__/ellipsis.test.js文件中执行此操作:import PostListItem from '../src/components/PostListItem.vue' test('ellipsis should do nothing if value is less than 50 characters', () => { expect( PostListItem.filters.ellipsis('Less than 50 characters') ).toEqual('Less than 50 characters') }) test('ellipsis should truncate to 50 and append "..." when longer than 50 characters', () => { expect( PostListItem.filters.ellipsis( 'Should be more than the 50 allowed characters by a small amount' ) ).toEqual('Should be more than the 50 allowed characters by a...') }) -
我们现在可以在
src/components/PostListItem.vue中实现ellipsis的逻辑。我们将添加一个带有省略号的过滤器对象,如果传递的值超过 50 个字符,它将使用String#slice,否则不执行任何操作:<script> export default { // rest of component properties filters: { ellipsis(value) { return value && value.length > 50 ? `${value.slice(0, 50)}...` : value } } } </script>在这种情况下,测试现在通过了
npm run test:unit __tests__/ellipsis.test.js,如图 12.14 所示: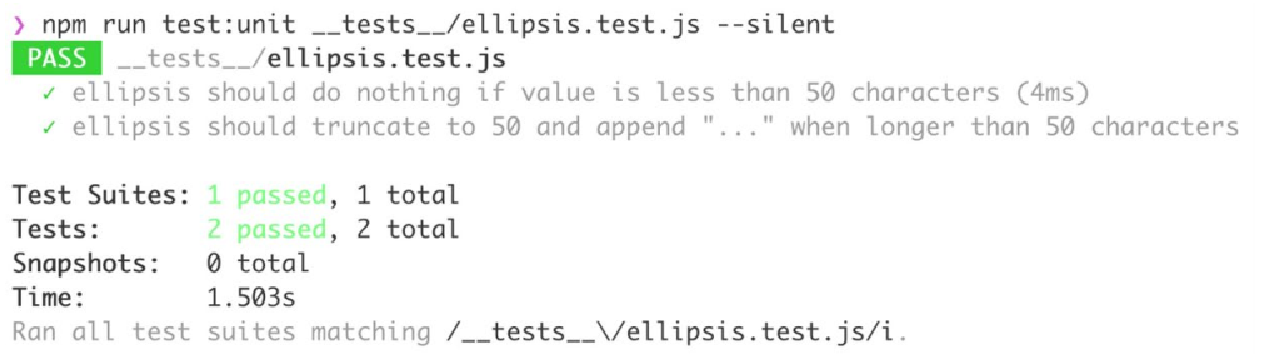 Figure 2. Figure 12.14: The ellipsis filter unit test passing
 -
我们现在需要将省略过滤器集成到组件中。为了检查这是否有效,我们可以首先在
__tests__/PostListItem.test.js中编写测试:// other tests and imports test('PostListItem truncates long descriptions', () => { const wrapper = shallowMount(PostListItem, { propsData: { description: 'Very long blog post description that goes over 50 characters' } }) expect(wrapper.text()).toMatch("Very long blog post description that goes over 50 ...") })由于我们没有在组件模板中使用过滤器,因此该测试失败。输出如下:
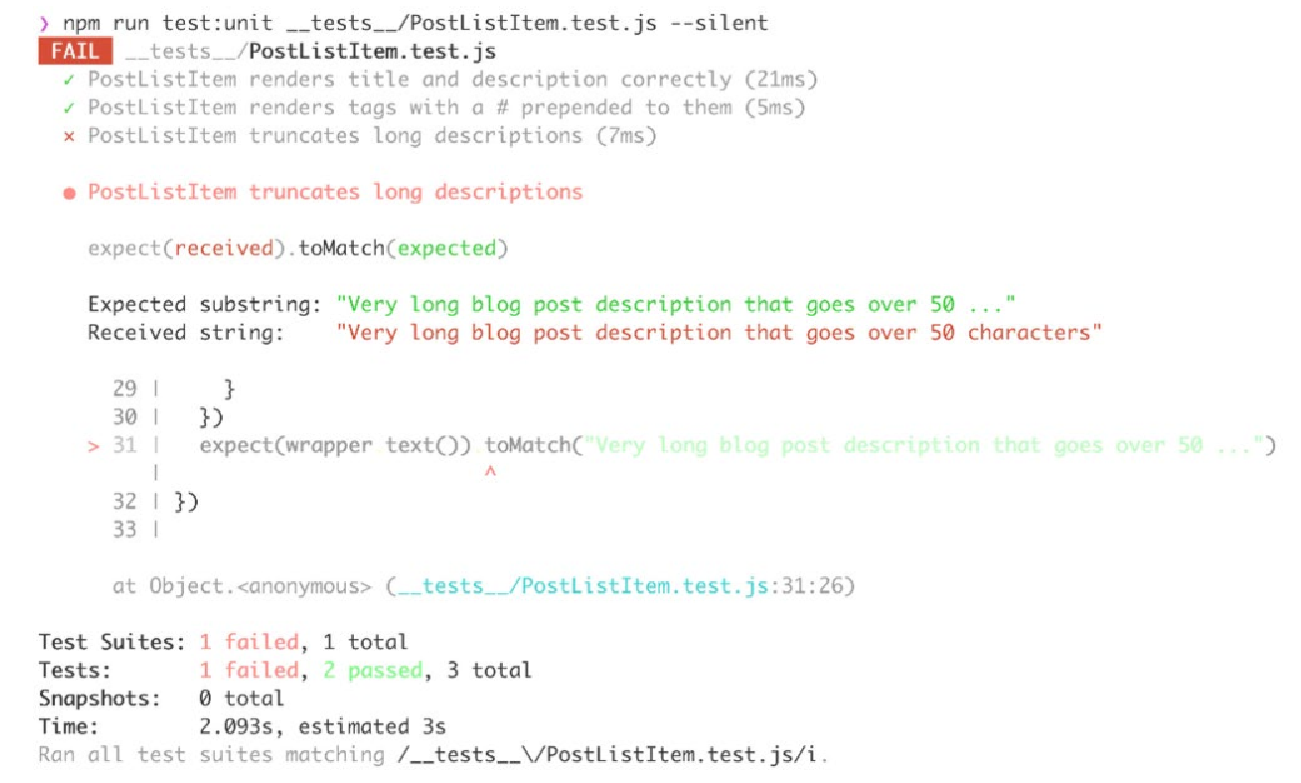 Figure 3. Figure 12.15: PostListItem ellipsis test failing
 -
为了让测试通过,我们需要将描述(description)属性通过管道传输到
src/components/PostListItem.vue中的省略号过滤器中:
<template>
    <!-- rest of template -->
    <p class="flex leading-relaxed">{{ description | ellipsis }}</p>
    <!-- rest of template -->
</template>
现在,测试将通过,如下图所示:
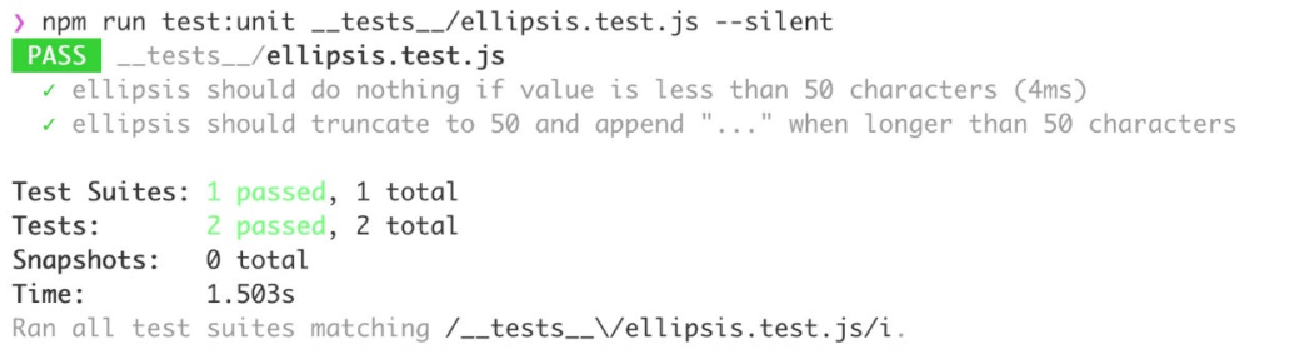
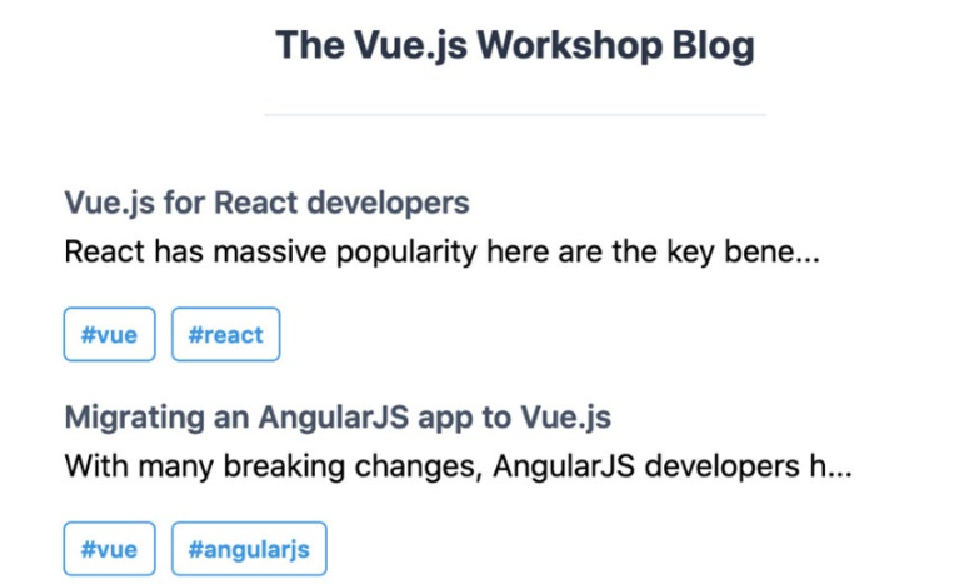
我们可以在浏览器的应用界面中看到描述被截断,如下:
我们现在已经了解了如何测试 Vue.js 组件的过滤器和其它属性,不仅通过直接测试对象,还通过测试在组件级测试中使用它的功能。
接下来,我们将了解如何处理使用 Vue.js 路由的应用程序。